Print Friendly and PDF
Showing posts with label BAKES. Show all posts

Wednesday, August 06, 2025

Condensed milk buns

Bakes have taken a side seat since long, as I don't get enough time these days. But I love baking and so whenever there is something new to try, I would definitely make a point to try. This is one such bake recipe that I loved for the soft, fluffy nature. They are so soft, pillowy that you just totally enjoy the bite. The ingredients are easy to combine, and they are ready very soon. Check it out !!


Preparation time ~ 10 minutes
Baking time ~ 20–25 minutes
Serves ~ 8 buns
Author ~ Julie
Ingredients
All-purpose flour (maida) 2 cups 
Instant dry yeast 2 tsp
Unsalted Butter, softened 1/3 cup
Condensed milk 1/4 cup
Granulated Sugar 1.5 tbsp
Egg 1
Salt 1/2 tsp
Milk 1/2 cup

for brushing
Condensed milk 1/4 cup
Unsalted Butter, softened 3 tbsps
 
Watch on YouTube -


Method
  • In a bowl, add the milk, condensed milk, egg and granulated sugar, yeast and mix. To this add the all-purpose flour(maida) and salt. Give a mix.
  • The dough may be sticky, transfer to a baking mat or clean counter top and knead. Add the softened butter and knead for 8–10 minutes until the gluten sets. Check using the windowpane test. Pinch out a small portion and stretch the dough until thin. The light must pass through this layer but shouldn't tear is an indication that gluten has set in. At this point, transfer the dough to an oiled bowl.Cover and leave to rise for 1–2 hours.
  • Once the dough is risen, punch out the air from the dough and make 8 equal sized balls. Shape and place on an oiled tray. Cover and leave for 45 minutes for the second rise.
  • In the meantime, mash the butter for brushing Add condensed milk and mix without lumps. Keep aside.
  • Pre heat oven to 350 degrees F or 180 degrees C for 10 minutes. 
  • Brush the prepared buns liberally with the condensed milk mix and reserve the rest for final brush after bake. 
  • Place and bake in the oven for 20–25 minutes. Mine was done at 20 minutes. Finally, brush the condensed milk mix. Cool on a wire rack in the tray for 10 minutes and then remove the buns out of the tray.
  • Enjoy just like that or drizzle an extra dash of condensed milk and give a try.

NOTES
* You can make a single loaf of bread too in the bread tray if you don't want to shape it like buns.
* This is a mildly sweet soft fluffy buns, you can drizzle extra condensed  milk if you like it sweet.


Thursday, May 15, 2025

Iyengar Bakery Honey Cake | Honey Cake

Iyengar bakery honey cake is quite popular in the south and everyone loves this cake. The cake base is quite simple, and it has a mixed fruit jam and desiccated coconut topping. I wanted to try this cake since long but didn't get a chance. Better late than never, so finally tried this out and all loved it. The cake is very simple to make but tastes delicious.

I have used the eggless vanilla cake recipe using condensed milk, but you can use any other eggless vanilla cake recipe. You can use a vanilla cake recipe with eggs too, but I prefer an eggless one for this recipe. Check it out !!


Preparation time ~ 10 minutes
Baking time ~ 25–30 minutes
Serves ~ 8' cake (16 square honey cake pieces)
Author ~ Julie
Ingredients
for making cake
wheat flour 3/4 cup
all-purpose flour 3/4 cup
baking powder 1.5 tsp
baking soda 1/2 tsp
salt a good pinch or 1/4 tsp

vanilla extract 1.5 tsp
whole milk 1/2 -3/4 cup
condensed milk 1 cup
oil (any neutral) 1/2 cup

for topping
granulated sugar 1/4 cup
water 1/2 cup
honey 1/4 cup

mixed fruit jam 1/3 cup
honey 1 tsp

desiccated coconut 1/4 cup


Method
  • Sift the dry ingredients twice and keep aside.
  • Add the condensed milk to a bowl and add the oil, vanilla extract and mix. Add the dry ingredients in batches. Pour milk little by little and make a lump free smooth batter.
  • Line a tray (8') with parchment paper on the bottom and sides. Pre-heat oven to 180 degrees C /350 degrees F for 10 minutes.
  • Transfer the batter to the prepared tray and bake in pre-heated oven for 25–30 minutes.
  • Cool on a wire rack and remove the cake from the tray.
  • Heat the sugar and water in a pan until sugar is dissolved. Switch off and cool. Once cooled, add the honey and mix. Poke the cake on all sides using a skewer to pour the honey syrup. Add the sugar syrup to soak the cake.
  • Then mix the jam with honey to a spreadable consistency. Spread this mix on top of the cake thickly, covering all edges. Finally, add desiccated coconut as topping.
  • Refrigerate for 2 hours, cut and serve. Enjoy !!


NOTES
* If you use a vanilla cake recipe with butter, then upon refrigeration, the cake may turn hard. So using an eggless cake was good.
* You can use any jams of your choice, but mixed fruit jam is good.
* The eggless condensed cake is quite popular in my blog and so used that but you can use any other eggless vanilla cake too.


Friday, February 07, 2025

Strawberry Upside Down Cake ~ Easy Cake

When strawberries are in season, I can't resist trying out a few recipes, though am not a big fan of munching fresh strawberries. Last year I had made a batch of homemade strawberry crush and before that I have tried these recipes, do check out if you are interested in any-  strawberry pudding, strawberry rasam, strawberry apple milk shake, strawberry faloodastrawberry beet juice

Cakes are one of my first learnt bake lessons, and so I keep trying different types of cake with confidence. This is one such trial and error cake, which I initially tried as upside down muffins and then recreated this cake. The vibrant colour of the strawberries makes this cake stand out and so you don't need any additional frostings. You can always make this cake for small kitty parties or even serve as a dessert with a dollop of vanilla ice cream. So check it out !!


Preparation time ~ 10 minutes
Baking time ~ 35–40 minutes
Author ~ Julie
Serves ~ a 6' cake
Ingredients 
strawberry 1 pack (200g)
corn starch 1 tbsp
granulated sugar 1/4 cup

all-purpose flour(maida) 3/4 cup
baking powder 1/2 tsp
baking soda 1/4 tsp
salt 1/8 tsp

unsalted butter 55 g (1/2 stick)
granulated sugar 1/2 cup
egg 1
vanilla extract 1 tsp
milk 1/4-1/3 cup


Watch on YouTube -


Method
  • Wash the strawberries by adding 1/2 tsp baking soda and 1 tsp vinegar. Add enough water and soak the strawberries for 15–20 minutes. Discard the dirty water and rinse the strawberries well. Drain water and hull the strawberries. Slice each strawberry in 3–4 slices and keep aside.
  • Add 1. tbsp corn starch and sugar to the sliced strawberries. Mix and keep aside. The strawberries will ooze out liquid and sugar will dissolve. Keep aside.
  • Pre heat oven to 350 degrees F or 180 degrees C for 10 minutes. Line a 6' tray with parchment paper at the bottom and apply oil on the sides and dust with flour. Keep aside.
  • In a bowl, add the all-purpose flour(maida), baking soda, salt and baking powder. Give a thorough mix and keep aside.
  • In another bowl, add the softened butter with granulated sugar and beat for a minute. Add the egg and vanilla extract. Beat until light and fluffy.
  • To this, add the dry ingredients in batches and mix. Add milk as needed to loosen the batter. Get a ribbon consistency batter. I have used 1/4 cup + 1 tbsp milk.
  • Spread the strawberries with the liquid in the base of the tray and then pour the prepared batter over it. Level it up with a spatula.
  • Place the tray into the pre-heated oven and bake for 35–40 minutes. Remove from oven and cool in the tray for 15 minutes. Then invert the cake and leave to cool completely.
  • Drizzle powdered sugar on top (optional step). Cool completely and then slice, enjoy !!
                                         

NOTES
* You can omit adding the powdered sugar at the end as topping. The toping is thick and juicy, so you can skip the powdered sugar.
* You can use oil instead of butter. Use 1/4 cup oil for this measure.


Tuesday, February 13, 2024

Orange Fruit Cake

Oranges are in season and mostly during this time, I try baking a cake with the fresh oranges. This time kinnow were in good sale and so grabbed a few of them. I personally don't tolerate these citrus fruits, but kids love them. Kinnow are good for baking as they impart a beautiful colour and are juicier compared to the regular oranges. What do you say about the colour of this cake? I am in love with this colour, looks and tastes exactly like the Britannia fruit cake.


The ingredients are all natural and no added colours and preservatives. Isn't it good to bake this soft, moist cake ? The amount of sugar can be adjusted as per the sweetness of the oranges. I have used kinnow oranges which are more on the sour side so added 1 & 1/4 cup sugar which was correct. Though this cake can be made with regular oranges, I prefer to use the sour kind or kinnow variety as it helps to soften the cake than the regular orange cake. I have already posted an Orange Cake (Eggless) long back, check that out if interested. Do give this a try and enjoy the slice with a cup of black coffee !!


Preparation time ~ 15 minutes
Baking time ~ 1 hour
Author ~ Julie
Serves ~ a big loaf (9*5*3)
Ingredients
all-purpose flour (maida) 1 & 3/4 cup
baking powder 2 tsp
salt 1/2 tsp
eggs 3
granulated sugar 1 & 1/4 cup
orange juice 1/2 cup
veg oil 1/4 cup
unsalted butter, melted 1/4 cup
vanilla extract 1 tsp
orange zest 1 tbsp
tutti frutti 1/4 cup
milk 1/4- 1/2 cup


Watch on YouTube -


Method
  • Wash and cut the oranges, squeeze out the juices. Strain the juice and keep aside.
  • Sift the flour, baking powder and salt twice. Keep aside.
  • Add the eggs one by one in a bowl. Add the granulated sugar and beat the egg with sugar. Beat the mix for 3–4 minutes, or until the eggs turn pale and fluffy.
  • Pour the orange juice followed by veg oil and melted butter along with vanilla extract.
  • To this, add the dry ingredients mix in batches. Mix and fold without deflating the air much.
  • Finally, add the orange zest. Mix a tsp of flour to the tutti frutti (prevents sinking of tutti frutti) and add to the batter.
  • Pre heat oven to 350 degrees F or 180 degrees C for 10 minutes. Line a tray 9*5*3 with parchment paper at the bottom and brush oil on the sides. Dust with flour and shake off excess.
  • Add milk to the batter to adjust the consistency (I added 1/4 cup milk, add more or less to get the ribbon consistency). 
  • Pour in the prepared tray and pop the air bubbles using a skewer. Place in pre-heated oven and bake for 50–60 minutes (Mine was baked in 60 minutes). I gave the top rod heat in the oven for the last 3 minutes to get the golden shade which can be reduced to 1.5 minutes as this cake, the top changed colour and so removed immediately. Keep a close watch when you give the top rod.
  • Cool on a wire rack for 10 minutes and then remove from the tray. Cool completely and then cut in slices. Store in sir tight containers at room temperature for 4–5 days, refrigerate thereafter. 

NOTES
* The amount of sugar can be adjusted as per the sweetness of the oranges. I have used kinnow oranges which are more on the sour side so added 1 & 1/4 cup sugar which was correct.
* Though this cake can be made with regular oranges, it's better to use sour kind as it helps to soften the cake.
* I used 2 kinnow oranges to extract 1/2 cup orange juice. Adjust the number of oranges to get 1/2 cup juice.
* The poured batter reaches almost to the full of the tray but don't worry. The batter doesn't flow out when baking.
* The slices taste best the next day. Check that and let me know too.
* You can add chopped nuts or dry fruits intead of tutti frutti. Or you can bake the cake plain too.
* This cake can be baked in a square tray 8' size too.

RELATED POSTS


Monday, September 18, 2023

Hot Milk Cake (No Beater Cake, Simple & Quick)

Vanilla cake can be made in a number of ways, and I have tried many versions so far. Have you tried my eggless condensed milk cake (a popular hit in my space)? This is another quick, simple cake that tastes so good and delicious. Another delicious cake that can be made in a jiffy is this atta cake.

The cake is soft melt in mouth, moist and tender with crumbs. Tastes just like the store bought Britannia vanilla cake. The best part of this cake is that this cake doesn't need expertize or any fancy tools, not even hand beater. I used my mixer to beat the eggs and sugar, which also can be done with a hand whisk. This cake can be baked on stove top too by placing the pan in another covered pan, the bake time almost same like oven. Check this out and try !!


Preparation time ~ 10 minutes
Cooking time ~ 35 minutes
Author ~  Julie
Serves ~ a loaf
Ingredients
all-purpose flour 1 cup (120 g)
baking powder 1 tsp (4.8g)
salt a pinch
granulated sugar 3/4 cup(150gm)
eggs 2
vanilla essence 1 tsp
veg oil 1/4 cup
unsalted butter, 3 tbsp (approx 45g)
milk 1/2 cup (approx 120 ml)


Watch on YouTube -


Method
  • Beat the eggs with granulated sugar until sugar is completely dissolved.
  • Sift the all-purpose flour, baking powder and salt in a bowl.
  • In a bowl, add the egg-sugar mixture. Add vanilla essence and give a quick mix. Add the dry ingredients in batches, add oil. 
  • Pre-heat oven to 350 degrees F or 180 degrees C. Line a bread tray with parchment paper at the bottom. Brush oil on the sides of the pan and dust flour.
  • Heat a pan and add the butter. When melted, add the milk to warm it up. Switch off the flame and pour this in the batter. Give a quick mix, the batter will be looser than ribbon consistency.
  • Pour the batter in the prepared tin and bake in pre-heated oven for 35–40 minutes. Check with a toothpick for done ness.
  • Cover with an aluminium foil paper and leave for 10–15 minutes. De mould then and cool on wire rack completely. Cut in slices and enjoy.
  • Store in airtight containers and enjoy at room temperature for 4–5 days.


 NOTES
* You can store this cake at room temperature for 4–5 days. Tastes best the next day after baking.
* If the granulated sugar is more of a crystal, then powder the sugar first and then add eggs so that eggs don't get heated up.
* If using salted butter, omit adding salt in the dry ingredients.
* This cake can be baked on stove top too by placing the pan in a pan, the bake time almost same like oven.


Monday, June 19, 2023

Marbled Banana Bread | Choco Banana Bread

 Leftover bananas? Don't worry. 

This is a great recipe to finish off all your leftover bananas and tastes so good. I loved the blend of chocolate and vanilla in this simple bread recipe. Though I have been baking all my leftover bananas and trying out many bakes in the past of which I have showcased a few in my blog too.

To be frank, the banana breads that I tried using eggs didn't fascinate me much as this eggless bake did. If you are an egg fan, then go ahead and add two eggs instead of the yogurt in this bake. The sweetness is perfect for a banana bread in this recipe, you can lower the sugar as per your sweet tooth. I generally don't bake my banana bakes as soon as I get overripe bananas, most of the time they land in the freezer and I bake only when am in a mood to bake. This way, these bananas are soft and easily mashed using a fork when thawed and used. 


This is one of the best banana bakes so far. I have been trying out multiple banana breads in the past - the low fat banana breadthe eggless chocolate banana bread, the butterscotch banana bread. My kids don't love the ripe bananas once they get the black spots on them, and so I get a plenty of leftovers. This is one way in which I end up baking them, and they make a great after-school snack for them-filling and delicious. Give this a try and enjoy !!


Preparation time ~ 20 minutes
Baking time ~ 50 mins- 1 hour
Author ~ Julie
Serves ~ a loaf (9*5*3)
Ingredients
wheat flour 3/4 cup
all-purpose flour (maida) 3/4 cup
baking powder 1.5 tsp
baking soda 1/2 tsp
salt 1/4 tsp
cocoa powder 2 tbsp
banana 4-5 small
yogurt (curd) 1/2 cup
oil 1/2 cup
granulated sugar 3/4 cup
vanilla essence 1 tsp
milk 6 tbsp (approx.)


Watch on YouTube-


Method
  • Sift the dry ingredients twice and keep aside.
  • Mash the bananas using a fork, I used frozen bananas (thaw and use). Add the granulated sugar in batches and mix. Add the yogurt and combine well.
  • Add the wet ingredients to the dry mix and combine well. To this add the veg oil and give a quick stir. Add the vanilla essence and finally add in milk (3tbsp) to adjust consistency.
  • Take the cocoa powder in another bowl and mix 4-5 tbsp of the prepare batter. Give a quick mix, add 2 tbsp milk to adjust consistency.
  • Pre-heat oven to 350 degree F or 180 degree C. Line a bread tray (9*5*3) with parchment paper at the bottom. Dust the sides with flour.
  • Finally, pour in the batter, alternating both batters till you finish off the batter. The batter should be 3/4th of the tray. Tap the tray to release trapped air bubbles. Run a skewer in the batter to get the marbled effect.
  • Place in preheated oven and bake for 50–60 minutes (mine took 60 minutes). Remove from oven and cool the bread in a tray for 10 minutes. De mould from tray and remove the parchment paper. Cool completely before slicing. Enjoy with a cup of hot coffee.


NOTES
* The bread is soft and moist, so just slice after completely cooling, else will stick.
* If you would like to add eggs to this bake instead of curd, then go ahead and add two eggs, the rest of the measure remains the same.
* You can make this bread with maida alone for a lighter texture.
* I generally don't bake my banana bakes as soon as I get overripe bananas, most of the time they land in the freezer and I bake only when am in a mood to bake. This way, these bananas are soft and easily mashed using a fork when thawed and used. If you are using fresh overripe bananas, just mash and use. The streaks of not properly mashed bananas is perfect in the banana bread recipe.

* Rava Bread (Suji Bread)


Friday, November 25, 2022

Chocolate Crinkle Cookies

What are your bake plans for this holiday season?  I, have a never ending list of bakes to try each holiday season and I ended up trying one or two from that, rest is all bookmarked forever :D

Chocolate crinkle cookies is one such bake from the list that I tried recently. These cookies are so good to watch them bake as they press down to flatten and take the shape of a crinkle cookie from a ball. The white icing sugar on top adds beauty to the cookie. Kids totally loved these and have already demanded for another batch soon. Do give this a try and enjoy with a cup of warm milk this season.


Preparation time ~ 10 minutes
Baking time ~ 10-12 minutes
Serves ~ 12 large cookies
Author ~ Julie
Ingredients
all-purpose flour (maida) 1 cup (125 g)
cocoa powder 1/2 cup (50 g)
granulated sugar 1 cup
baking powder 1 tsp
salt 1/8 tsp
eggs 2
vanilla extract 1.5 tsp
oil 1/4 cup
icing sugar 1/2 cup (refer notes)

to make icing sugar (1/2 cup)
granulated sugar 1/4 cup
corn flour 1.5 tsp


Watch on YouTube -


 Method
  • Powder the granulated sugar in a blender jar and grind smooth.
  • Add cocoa powder to a bowl, add the powdered sugar. Mix this well. 
  • ICING SUGAR DIY- If you have store brought icing sugar, then forget this step. Otherwise, go ahead and prepare this up to roll the cookies. Add 1/4 cup granulated sugar to the same blender jar and add 1.5 tsp corn flour. Blend until sugar is smoothly powdered. Keep aside till you roll the cookies.
  • In the same blender jar, add the eggs. Blend until smooth. To this, add the vegetable oil and blend again. Add the liquid to the cocoa sugar mix and combine. Add the vanilla extract too. Mix smoothly without lumps.
  • Finally, sift the flour, baking powder and salt over the mix, and you will get a sticky dough. Cover with a cling wrap and refrigerate for 2-3 hours or overnight.
  • Remove, after chilling, roll out small portions of the dough in balls. I got 12 large balls or make 24 small balls. Roll the made balls in the prepared icing sugar and keep on a tray lined with parchment paper.
  • Preheat oven to 350 degrees F/ 180 degrees C for 10 minutes. Place the tray and bake in preheated oven for 10-12 minutes. The cookies are soft just after bake, so cool in the pan for 10 minutes and then transfer to a wire rack to cool completely. 
  • Enjoy with a cup of warm milk, or store in airtight containers till use.
                                                     

NOTES
* Depending on the oven temperatures, keep a close watch on the oven temperatures to prevent burning.
* I added 3/4 granulated sugar to make these cookies, but you can go up to 1 cup of granulated sugar.


Tuesday, November 15, 2022

Nutty Bubble Cake

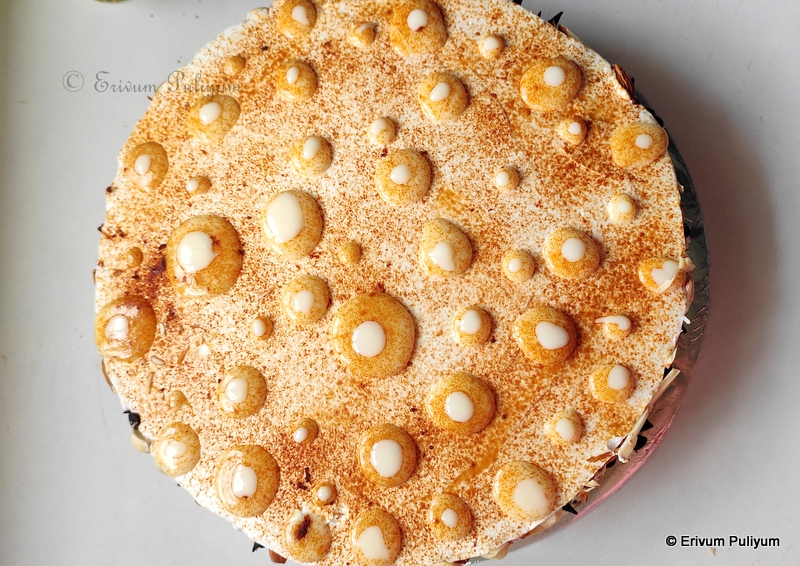
Nutty Bubble Cake is a simple-to-make icing cake using sponge cake, whipping cream, nuts, white chocolate ganache and boost powder. The white chocolate ganache is dropped like bubbles on top and dusted with boost powder that gives the cake the bubble look. 

I prepared the cake from scratch by making a basic vanilla sponge cake. I soaked the cake in boost mixed condensed milk syrup. To this I added whipped cream in the layers and covered the sides of the cake with cashews, almonds and dark chocolate chips. Finally, topped the cake with bubbles made from white chocolate ganache ad dusted with boost powder. The cake is very soft, delicious and melt in mouth. Do give this a try and enjoy !!


Preparation time ~ 30 minutes
Baking time ~ 35 minutes
Author ~ Julie
Serves ~ >1 kg (1200g) cake
Ingredients 
to make sponge
all-purpose flour 1 cup (250 ml)
baking powder 1 tsp
baking soda 1/4 tsp
salt a pinch
powdered sugar 3/4 cup 
vanilla essence 1 tsp
oil 1/4 cup 
eggs 4
milk 1 tbsp

for whipped cream
whipping cream 1.5 cup

to soak
water 1 cup
condensed milk 3tbsp
boost powder 2 tsp

to chocolate ganache
white compound 50 gms
half cream 3 tbsp

for garnish 
cashews 3tbsp
almonds 3 tbsp
dark chocolate chips 3 tbsp


Watch on YouTube -


Method
To make sponge cake
  • Powder the granulated sugar (1/2 cup) to get 3/4th cup. Prepare an 8' tray with parchment paper at the bottom and brush oil on the sides, dust the sides with flour. 
  • In a bowl, sift the maida, baking powder, baking soda and salt twice. Keep aside.
  • In another bowl, beat the eggs until frothy. Add powdered sugar in batches and beat well until pale and creamy.
  • To this add the vanilla extract and oil, give a quick mix. Add the dry ingredients in batches and mix well (don't over mix the batter).
  • Pre-heat oven to 350 degrees F or 180 degrees C for 10 minutes.
  • Pour the batter in prepared tray and place in pre-heated oven. Bake in oven for 30-35 minutes, mine was done in 35 minutes.
  • Remove from oven and cool on a wire rack for 10 minutes and then remove from tray. Cool completely.

To make whipping cream
  • Chill the bowl and blades. Then add the whipping cream to the bowl and beat for 4-5 minutes with a beater. The cream should get stiff peaks and when the bowl is tilted upside down, the cream shouldn't slide down. Cover and refrigerate until use.
To make soaking syrup
  • Boil a cup of water in a pan and add the boost powder. Mix well. To this add the condensed milk. Mix well and keep aside.
To prepare white chocolate ganache
  • Add the chopped white chocolate in a bowl and double boil the chocolate to melt.
  • To this, add the whipping cream and mix well until smooth. Keep aside.


Assembling
  • Cut the cooled sponge cake using a serrated knife in three equal parts.
  • Add a dollop of cream on the board and place the first layer. 
  • Brush the soaking syrup all over the layer. Then pipe the whipping cream using a piping bag or just like that.
  • Add the second layer of cake and brush soaking syrup, add the cream. 
  • Place the final layer and then brush soaking syrup. Add the whipped cream on top and sides to complete the crumb coat. Refrigerate this cake for minimum 30 minutes to 2 hours to set.
  • Finally, add the remaining layer of whipped cream to coat the cake nice and good.
  • Add the cashews, almonds and dark chocolate chips on sides. 
  • In a piping bag, add the white chocolate ganache and cut a small hole. Pipe in small rounds on the top of the cake in different sizes. Finally, dust the cake with boost powder.
  • Pipe in a few smaller bubbles on top of the existing ones to highlight the bubbles a bit.
  • Chill the cake in refrigerator for 1 or 2 hours and enjoy !!!!
NOTES
* I have used a mix of boost powder and condensed milk to make soaking syrup, but you can add whole milk and boost with sugar. I have not added any extra sugar, as condensed milk had sugar.    
* You can use any basic vanilla sponge cake to make this cake if you don't want to try this cake from scratch.


Saturday, April 02, 2022

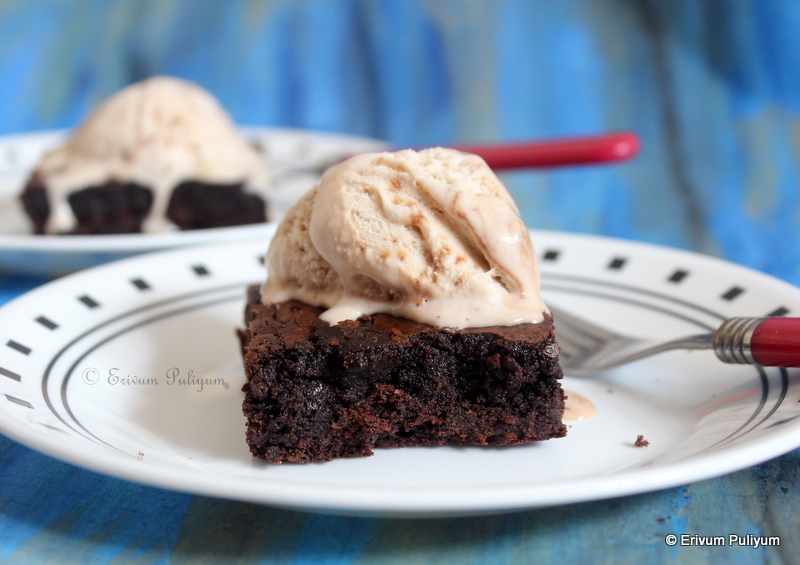
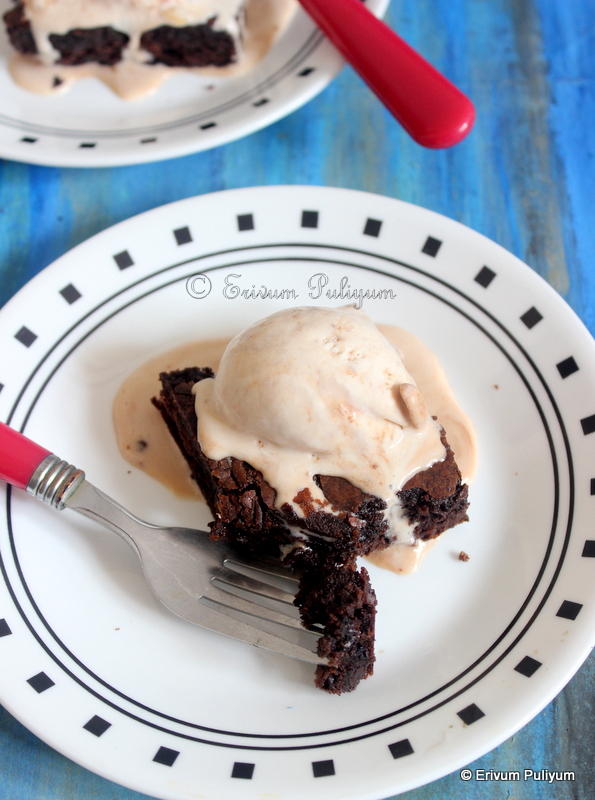
Wheat Flour Brownies ( Brown Butter Brownies) | Atta Brownies (VIDEO)

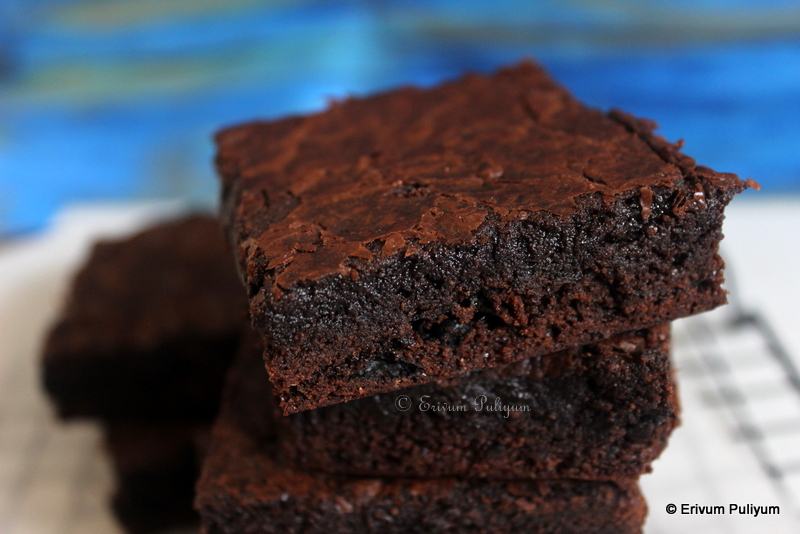
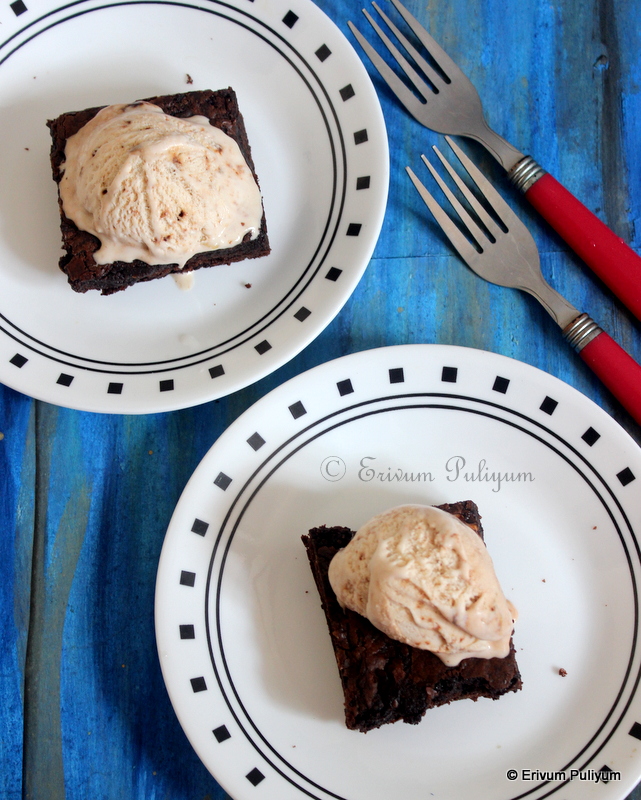
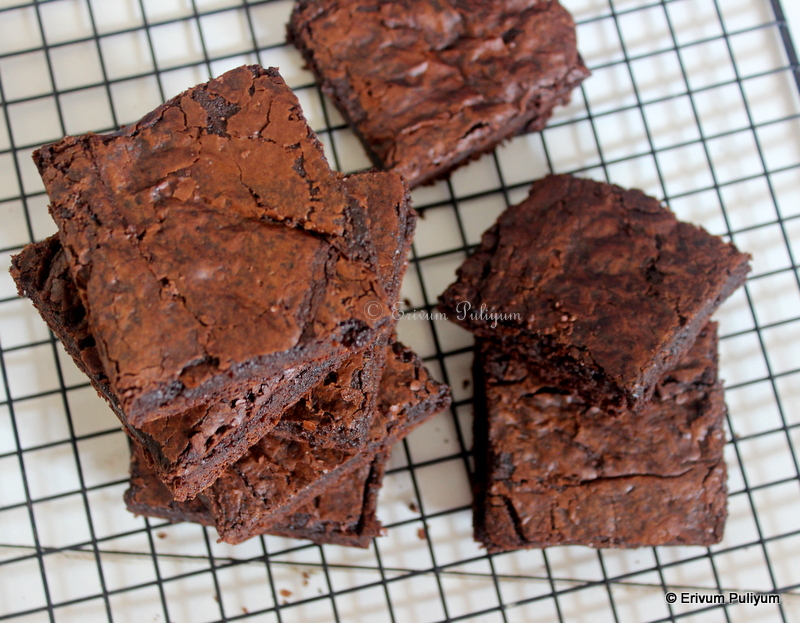
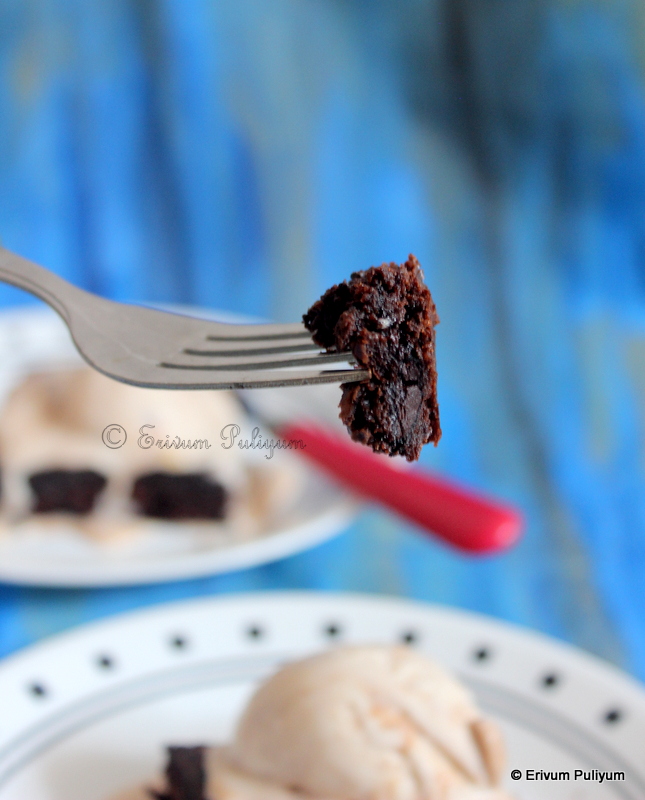
The classic brownies are rich, dark, chewy and fudgy, intensely rich with chocolate and a flaky top. That is what makes the brownies different from a cake or a fudge. This is what I was hunting down since long, and so I tried a lot of recipes, but those never matched my concept of a perfect brownie. This is one keeper recipe that I tried 3-4 times and each time, this has been so good that am in love with these flaky (crackly) top perfect brownies. The bake time is exact all the time and am so happy that these are made with atta (wheat flour). Also, wheat flour gets hidden in the amount of chocolate and you hardly make out the wheat flour in it.


These brownies are very rich with butter and chocolate but can't help it, if you would love to have a classic brownie at home. Any shortcut recipe to the original brownie never yields the same results and  kids aren't happy either as they don't get the same taste of shops. However, the store brought ones are not as healthy and I love these homemade wheat flour brownies. This recipe is very simple to put together, and you can try this anytime, referring to the video link below. Give this a try, am sure your kids will be more than happy !!


Preparation time ~ 20 minutes
Baking time ~ 20-25 minutes
Serves ~ 9 square pieces
Author ~ Julie
Ingredients
wheat flour 2/3 cups
baking powder 1/4 tsp  
cocoa powder dark 3/4 cup 
instant coffee powder 1/2 tsp
vanilla essence 1.5 tsp
coarsely powdered sugar, 1 1/4 cup
unsalted butter, 10 tbsp
eggs 2
salt 1/2 tsp
chopped dark chocolate 56 gms Or 2 ounce


VIDEO LINK- 


Method
  • Sift the flour with baking powder twice and keep aside.
  • In a pan, heat the butter until melted and lightly golden brown. Switch off flame and add salt, add coffee powder, add coarsely powdered sugar and cocoa powder. Mix well until the sugar looks dissolved and incorporated. Cool this mixture for 5 minutes.
  • Pre-heat oven to 350 degrees F and then line an 8' square tray with parchment paper criss-cross ways.
  • Then, crack one egg at a time in the butter mix. Whisk vigorously with a wooden spoon or spatula. Add vanilla extract,  mix. To this, add the flour in batches and combine well till you see no white streaks of flour in it. By now, the mixture should be only slightly warm. If not, cool slightly and fold in the chopped chocolate and mix well. 
  • Transfer the batter to the prepared tray and level with a spatula. 
  • Reduce oven temperature to 325 degrees F. Place the tray in oven and bake for 25 minutes. Check if done by inserting a toothpick and if come out mostly clean is done. A light crumb sticking is an indicator that brownies are perfectly baked, and the melted chocolate may also stick to the tooth pick. Don't wait for a clean toothpick when you bake brownies, it may be overbaked and anything that coats more than mostly clean on the tooth pick is under baked. Please refer to the video for the correct co relation of bake time.
  • Remove from oven and leave the pan to cool on a wire rack. Once completely cooled, lift the edges of the parchment paper, and you see the perfect crackly top then. Cut the brownies using a sharp knife in 9 or 16 square pieces. Enjoy !!


NOTES
* You can add 1 cup of chopped nuts instead of chopped chocolate. Pecan or walnuts can be used.
* You can omit the chopped chocolate for a less calorie version.
* You can use all purpose flour too instead of wheat flour. But let me tell you wheat flour gets hidden in the amount of chocolate and you hardly make out the wheat flour in it.
* For a cake like fluffy brownies, add another egg too and for a dense, fudge like brownies, cook the brownies less a minute or two.
* I have used dark cocoa powder, others may not yield the same colour.
* You can cut the ingredients in half and make 8 piece small brownies. In that case, use a bread pan.


Loving these ?? Go ahead and give a try!!


Monday, March 14, 2022

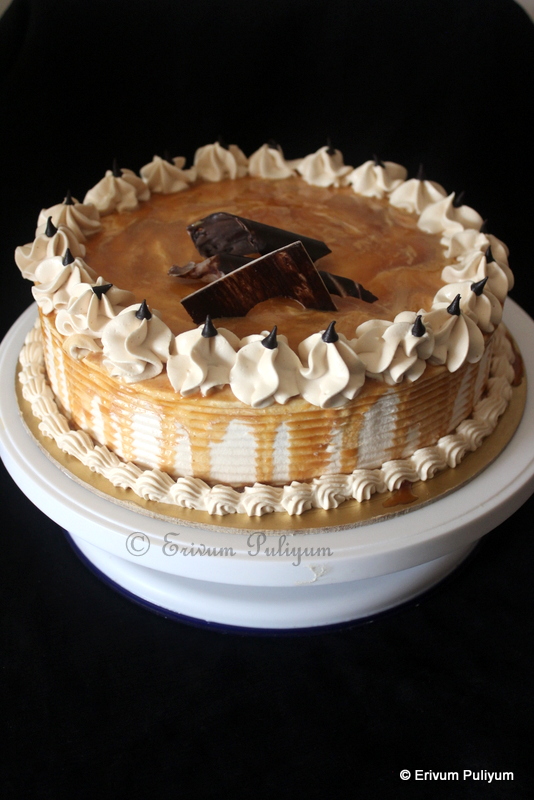
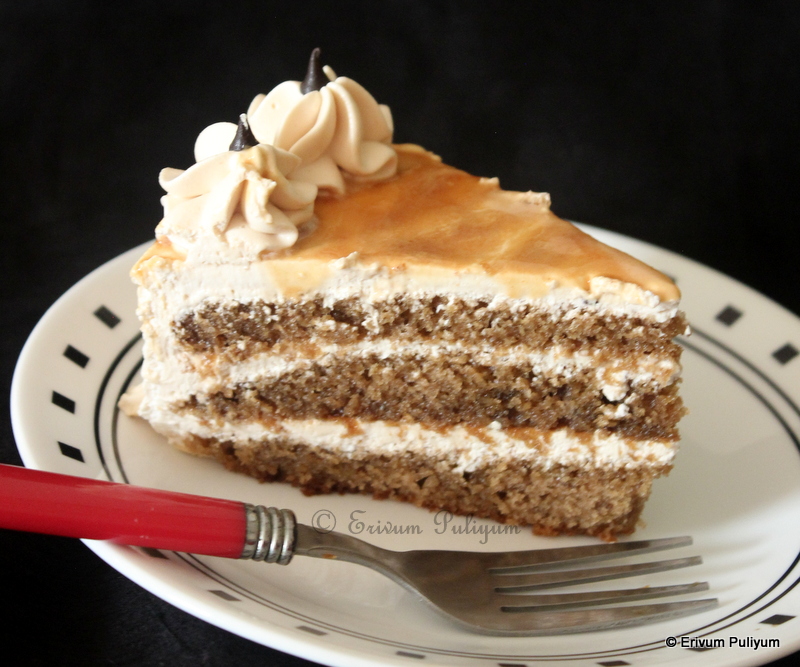
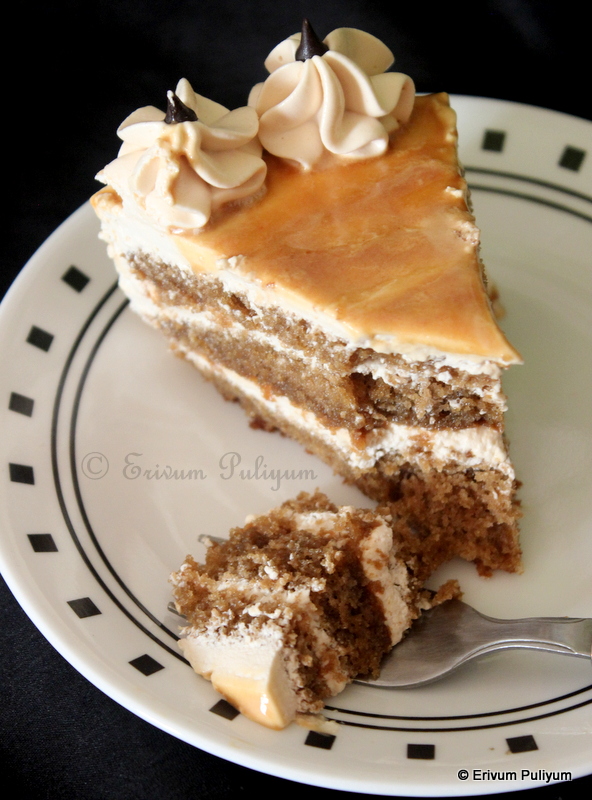
Coffee Cake with Homemade Coffee Sauce & Coffee Whipped Cream Frosting (VIDEO)

How often do you make frosting cakes at home?? Am not talking about home bakers and professional bakers, but who otherwise are passionate of frosting cakes and pastries. I do a lot of baking at home, but I hardly do frosting unless it's a family member's birthday or on any special occasions. Last month it was my elder son's 15th birthday, and he wanted a simple frosted cake as always. The flavour was his choice and I decided to give the coffee cake a try. 


I had to make everything from scratch, right from the cake bake to homemade coffee caramel sauce(the recipe of which is posted here). But I totally enjoyed the process of making this cake as there was enough time for me to bake the cake, prepare coffee sugar syrup, coffee sauce and coffee whipped cream. I was a little apprehensive about the coffee flavours as everything had coffee in it, but to my surprise all was perfect and right. We totally loved the cake on the second day than first as the cake was super moist and full of flavours. If you are looking for any good coffee frosting cakes, then bookmark this up and give it a try. The video link is shared below too. 


Preparation time ~ 20 minutes
Baking time ~ 25-30 minutes
Serves ~ 1 kg cake 
Author ~ Julie
Ingredients
for cake
all-purpose flour (maida) 1 cup
baking powder 1 tsp
baking soda 1/4 tsp
cocoa powder  1 tbsp
salt 1/8 tsp
powdered sugar 3/4 cup 
eggs 3
any neutral oil 1/2 cup + 2tbsp
vanilla essence 1 tsp
instant coffee powder 1/2 tsp
milk 2-3 tbsp 
vinegar 1/2 tsp

for coffee syrup
water 1.5 cups
instant coffee powder 2 tsp
sugar 6 tbsp 

for coffee whipping cream
whipping cream, 2 cups
coffee sauce 3 tbsp

assembling
prepared coffee sauce 6 -7  tbsp
prepared cake cut in three layers
prepared coffee whipped cream
prepared coffee sugar syrup


Method

VIDEO 


BAKING THE CAKE
  • To warm milk(2 tbsp), add coffee powder and mix till coffee powder is completely dissolved.
  • Sift the flour, baking powder, baking soda, cocoa powder and salt twice. Keep aside.
  • Beat three egg in a glass bowl using a beater and add powdered sugar in batches till the mixture looks creamy and pale.
  • Then, add in the oil and mix well. Add vanilla essence and the coffee milk mix, give a quick stir. Add the dry ingredients in three batches.
  • Pre-heat oven to 180 degrees F and line a 7' or 8' tray with parchment paper and dusted with flour on the sides. 
  • The batter should be of ribbon consistency , to adjust that add 1 or 2 tbsp milk as needed.
  • Transfer to the prepared pan and bake in pre-heated oven for 25-30 minutes.
  • Remove from oven and cool on a wire rack. Remove the cake from cake pan and cool completely before wrapping in cling wrap till use.
PREPARING COFFEE SYRUP(for soaking cake)
  • Add the water in a pan and bring to a boil. To this add the sugar and coffee syrup. Mix well until the sugar and coffee powder is completely dissolved. Switch off flame and leave to cool. If preparing earlier, then refrigerate till use.
PREPARING COFFEE WHIPPED CREAM
  • Beat the whipping cream with a beater until soft peaks. To this add, the coffee sauce(3 tbsp) and beat again until stiff peaks(takes about 4-5  minutes). Tilt the bowl upside down and check if cream is flowing down, if it stays like that, then it's ready. Refrigerate covered until use.
ASSEMBLING
  • Cut the cake in three thin layers or two as per your likes using a serrated knife.
  • Place the first layer of cake after placing a dollop of cream. 
  • Then soak the cake nicely using the prepared coffee syrup. Then add the coffee whipped cream using a piping bag and level this up with a spatula. Finally, add the coffee sauce on top (about 1.5 tbsp). Spread using a spatula.
  • Then, place the second layer and soak the cake followed by coffee whipped cream and coffee sauce (1.5 tbsp).
  • Then finally place the top layer, soak the cake nicely. Add the coffee whipped cream on the top and sides to give a nice crumb coat. Refrigerate at least half an hour before you apply the final coat.
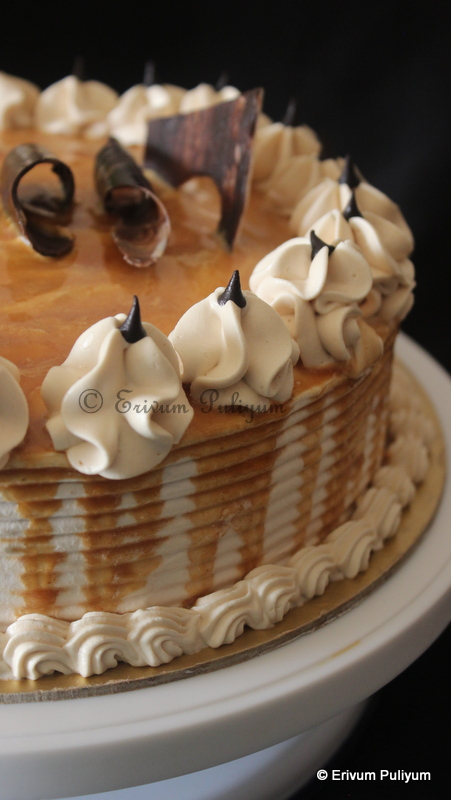
  • Apply the final coat of whipped cream and using a scraper draw a pattern on the sides. Pour the coffee sauce on the sides, using a small piping bag to dribble down through the sides.
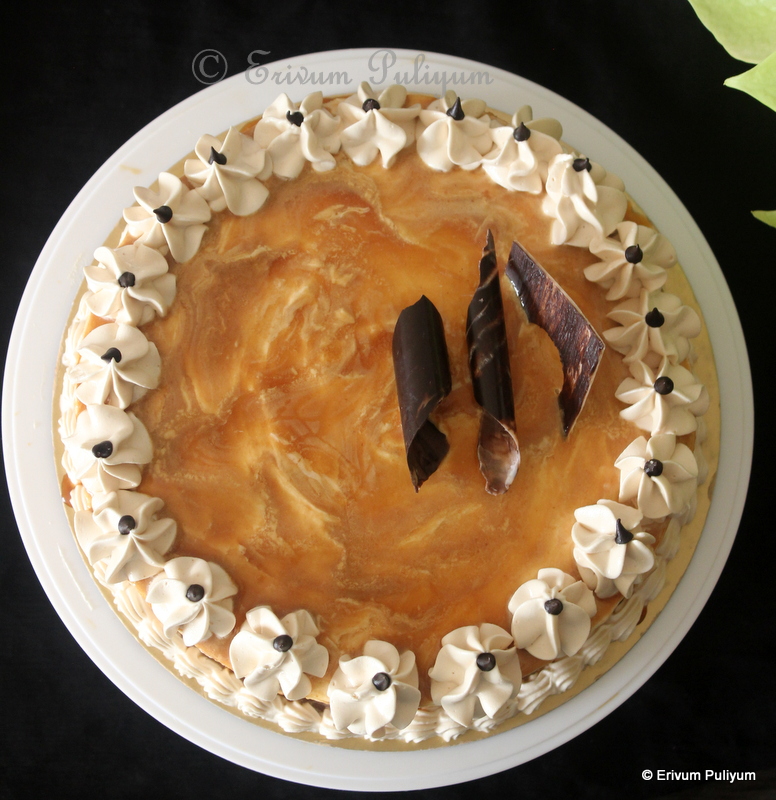
  • Also, pour the coffee sauce on top and spread evenly using an offset spatula. Then add the coffee whipped cream in a piping bag with star nozzle, draw designs on the upper border and lower borders. Finally, I placed a few chocolate chips on the sides and chocolate designs on top to finish the cake. Refrigerate until the cake is set (about 2 hours) and enjoy !!


NOTES
* You can use espresso coffee powder too when making this cake. I have used instant coffee powder.
* I have added only 6 tbsp sugar for making coffee sugar syrup, which was good enough with the caramel coffee sauce and whipped cream. But you can add 2 more tbsp if you need more sweet. Also, I have added 3/4 cup powdered sugar in the cake, which you can increase upto 1 cup. This cake is moderately sweet.


Monday, March 07, 2022

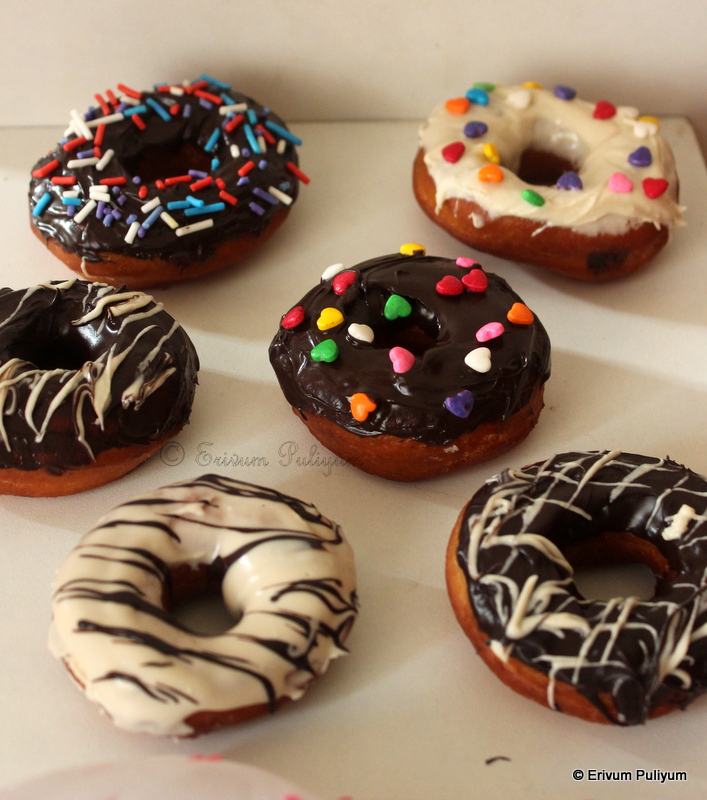
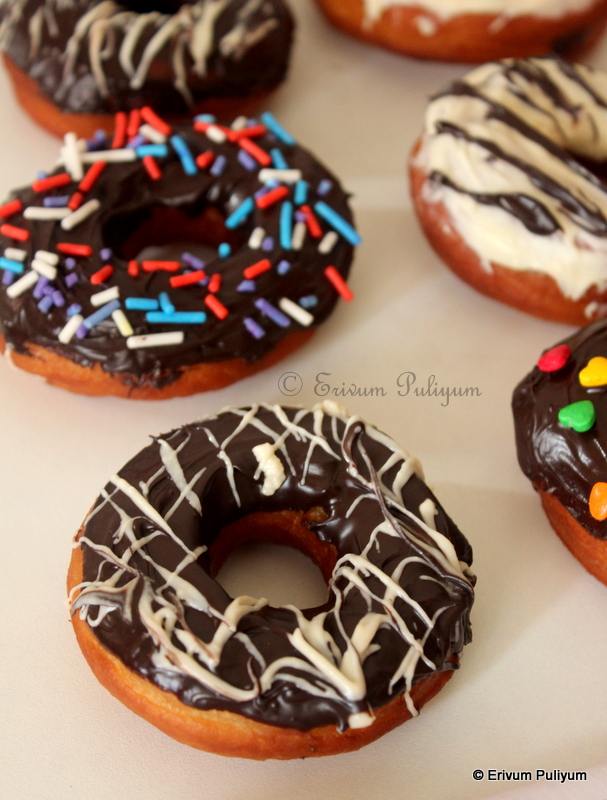
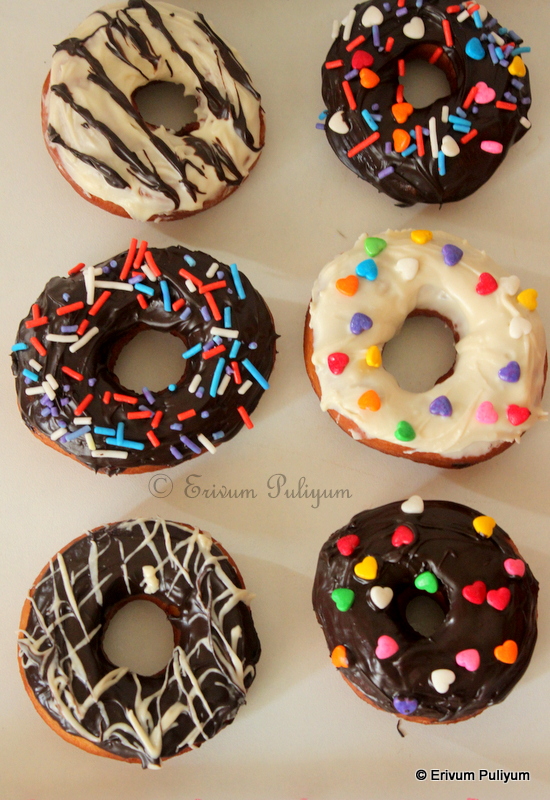
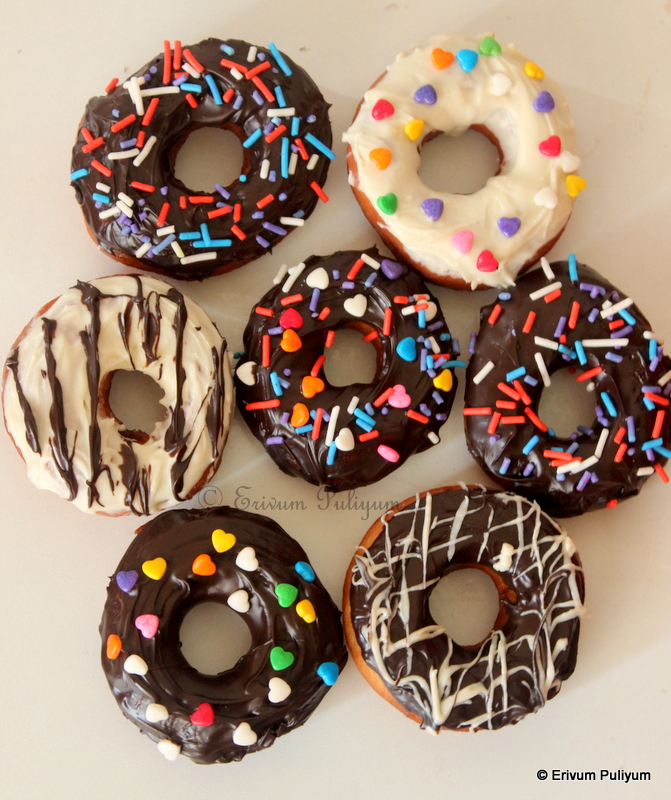
Classic Donuts | Doughnuts (VIDEO)

Did you know donuts were once called 'olykoeks' meaning 'oily cakes' as these were fried in oil when donuts were first brought to America? Strange but true is the fact that today the largest bakery of donuts is in Pensylvannia because Americans are donut crazy.😀


Donuts or Doughnuts? Quite a debatable topic! As the story goes, a New England woman fried some dough with nuts and sent with her son for his voyage at sea and called them 'donuts'. But her son was the one who created the hole in doughnuts, giving us the classic donuts shape. Baked Round Donuts  are the ones that I posted sometime back, and it's a healthier option to frying. But kids at times wish to have the classic donuts that we get from bakeries and to satisfy them, I do make these once in a while. These are simple to make, and the dough is quite easy to prepare. The only time taken is for the dough to rise. Rest of the steps are quite simple and dipping in chocolate is optional. You can just dip them in sugar glaze too. Give these a try and enjoy !!


Preparation time ~ 10 minutes
Rising time ~ 1.5-2 hours
Cooking time ~ 10 minutes
Author ~ Julie
Ingredients
all-purpose flour 2 cups +1/4 cup
milk 1/2 cup + 3 tbsp
instant dry yeast 2tsp
granulated sugar 3tbsp
salt 1/2 tsp
unsalted butter, 3 tbsp
egg 1
oil to fry 


Method
  • Mix the yeast with 3 tbsp lukewarm milk. Add sugar to fasten the process. Keep aside to proof or 10 minutes.
  • To the yeast mixture, add the egg. Beat well with a wire whisk or spatula.
  • Mix the flour(2 cups) and salt. To this, add the yeast and egg mixture.
  • Add the remaining milk (1/2 cup) and knead well. The dough may be sticky at this point, add a little more flour if needed. Knead for about 6-7 minutes and then add softened butter. Combine and knead for another 2-3 minutes.
  • Oil a bowl and place the dough, The dough may not hold a neat shape, but that's fine. Cover and leave to rise for one hour.
  • After one hour, the dough doubles. Punch down the air and place on a lightly dusted surface. Roll the dough in 1/4' thickness. 
  • Now using a doughnut cutter or using two lids or cookie cutter, cut out a 2' round and the smaller round with 1 cm lid. Place the cut donuts on a parchment paper and leave for second rise 20-25 minutes. 
  • Heat oil in a pan and check if oil is hot enough. Slide the prepared donuts and wait for a minute ill the donuts puff up nice and then using a skewer, flip the other side. Brown the doughnuts golden and remove on a parchment paper.
  • Re roll the scraps and make more doughnuts and finish the dough. Continue to fry the remaining doughnuts. 
  • If using a glaze, you can do that, or you can dust with confectioner's sugar.
  • I preferred dipping in melted chocolate, as kids love that way. Double boil the chocolate and dip each of the doughnuts in them and add sprinkles. 
   
Enjoy !!