Print Friendly and PDF
Showing posts with label CHRISTMAS RECIPES. Show all posts

Monday, December 23, 2024

Cranberry Pistachio Shortbread Cookies


How are your Christmas preps going on? Mine is going hectic, in one way or the other. 
Kids are busy with their model exams one after the other. It's stressful for them, but as I always tell them, this time shall also pass. And as they are busy in their exam schedule, my kitchen is busy as they need energy all the time to keep their brain working ;) So kind of cooking more than usual, but I hardly find time to capture videos, plus the editing becomes a never ending task for me as I hardly get free time.

In any case, today's recipe is for a delectable bake. Christmas season is the best time to make cookies. And these shortbread cookies are perfect buttery, tender and addictive. What else makes this a perfect cookie? I love the fact that these cookies are loaded with natural dry fruits and nuts.Cranberry & pistachio colours compliment each other and this is so calm to see the beautiful specks on the cookies. Do you love these ? They taste superb and none can eat just one. Enjoy these with a cup of warm milk. Double up the ingredient list, and you are ready to make a bigger batch too, if you would like to gift pack for friends and family. 


Preparation time ~ 10 minutes
Baking time ~ 15–20 minutes
Author ~ Julie
Serves ~ 12–15 cookies
Ingredients
all-purpose flour (maida) 1 cup
salt 1/4 tsp
unsalted butter (room temperature) 100 gms
powdered sugar 1/2-2/3 cup
vanilla extract 1/2 tsp
pistachios 1/2 cup
cranberries 1/2 cup


Watch on YouTube -


Method
  • Sift or combine the all-purpose flour and salt. Keep aside.
  • Chop the pistachios roughly and the cranberries in small pieces, keep aside till use.
  • In a bowl, add the room temperature butter. Beat for about 2 minutes. Then add the powdered sugar and give a mix using the spatula to avoid flying.
  • Then, beat using the beat for a minute until combined. Pour the vanilla extract and add the chopped cranberries & pistachios. Give a good mix.
  • Add the flour mix in batches and combine until incorporated. Transfer the dough to a cling wrap and shape in a rectangular log of size 20 cm *2.5 cm wide. Cover completely with the cling wrap and refrigerate for 2–3 hours to chill.
  • Line a tray with parchment paper and remove the log from the fridge. Open the cling wrap and cut the cookies about 1/4'' thickness. I used a serrated knife, but you can use any sharp knife.
  • Pre heat oven to 165 degrees C or 325 degrees F for 10 minutes. Arrange the cookies on the prepared tray, leaving space. Then place in the oven and bake for 15–20 minutes. Mine was done in 15 minutes. I gave the top rod bake in the last 2 minutes and so the top of the cookies is also lightly browned. If you don't wish that, then omit giving the top rod.
  • Remove from oven and cool in the tray for 10 minutes as the cookie are soft immediately after bake. Transfer the cookies to a wire rack and cool completely. Store in airtight containers. Enjoy with a cup of warm milk.


NOTES
* You can easily double this recipe and make larger batches.In that case, double up all ingredients.
* You can freeze the shaped log for 2–3 months. Thaw in the refrigerator the previous night and then cut the cookies & bake.

Happy holidays !!! 


Monday, January 01, 2024

Chocolate Mirror Glaze Cake ~ Happy New Year wishes !!

Wishing all my readers and friends a very Happy & Prosperous New Year !!
Hope everyone had a great start. May the day start with new hopes, new beginnings and newer opportunities knocking at your door. May all your wishes come true and 2024 be a great milestone in your lives.

Frosting cakes are rarely made at home except for kids birthdays, and I go for very simple when frosting cakes as am naive in frosting skills and I lack patience to learn that too. However, this mirror glaze cake looked stunning when I saw many posting this up, so was the wish to try this cake sooner.  This cake is a similar easy to go one for people like me to quick fix a frosting cake. 

Baking has always improved for me over a period of time, from pre packed cake mixes to trying out new trial and error cakes. But frosting has always taken the back seat. As the number of frosting cakes made in a year are less, and so I don't try improving the learning too. 


This was made for my son's birthday, who is an avid chocolate lover, and so he totally loved the cake and frosting. The chocolate mirror glaze, when poured over the cake, gives an elegant smooth finish. Don't you feel so ? I was quite happy with the outcome. This can be prepared with all basic cake ingredients and frosting also needs fewer ingredients compared to other frosting cakes. Give this a try this holiday season and enjoy.


Preparation time ~ 20 minutes
Baking time ~ 40 minutes
Author ~ Julie
Serves ~ 6' cake
Ingredients 
for chocolate sponge 
all-purpose flour (maida) 3/4 cup
baking powder 1/2 tsp
baking soda 1/4 tsp
salt 1/8 tsp
cocoa powder 6 tbsp
sugar 3/4 cup (6 tbsp)
veg oil 6 tbsp or 1/3 cup + 2 tsp
yogurt or curd 1/2 cup
milk 1/4 cup
vinegar 1/2 tsp
vanilla essence 1/4 tsp

for chocolate ganache 
fresh cream 3/4 cup
dark chocolate compound 300 g

for sugar syrup 
granulated sugar 1/3 cup
water 3/4 cup

for mirror glaze 
water 3/4 cup
granulated sugar 3/4 cup
cocoa powder 1/3 cup
dark chocolate compound 60g (1/3 cup chopped)
unsalted butter 1 tbsp 

Watch on YouTube -


Method
FOR CHOCOLATE SPONGE CAKE
  • Sift the dry ingredients twice, keep aside.
  • Mix the milk with vinegar and keep aside for 10 minutes until curdled.
  • Add the granulated sugar and oil in a bowl and mix. Add the curd and whisk until sugar is dissolved.
  • To this add the milk-vinegar mixture. Also, add the dry ingredients in batches & mix. Add in vanilla extract.
  • Prepare a 6' pan with parchment paper and pre-heat oven to 350 degrees F or 180 degrees C for 10 minutes.
  • Pour the batter in the tray and bake in the oven for 35–40 minutes. Remove from oven and check with a tooth pick if done. Cool on a wire rack for 10–15 minutes by covering with a towel and remove the cake from the tray, cool completely and store by wrapping in a cling wrap till use.
FOR CHOCOLATE GANACHE
  • Heat the cream and chopped chocolate using a double boil method until the chocolate melts and is smooth.
  • Cool and refrigerate by covering with a cling wrap till use.
FOR SUGAR SYRUP
  • Heat the sugar and water in a pan until the sugar dissolves. Switch off flame and leave to cool.
FOR CHOCOLATE MIRROR GLAZE
  • Mix the cocoa powder, water and sugar in a pan without lumps. Put this on flame and let the mix thicken till it coats the spoon. Then add grated chocolate and give a quick mix. Finally add in the butter, mix.


ASSEMBLING
  • Cut the dome and then level cut the cake in three rounds. Keep aside.
  • Thaw the chocolate ganache before use. Apply a small layer on the cake board. Place the first layer of cake.
  • Pour the sugar syrup to soak the layer. Apply the chocolate ganache and spread as a single layer.
  • Place the second layer cake and pour sugar syrup followed by chocolate ganache layer.
  • Finally, add the final layer of the cake and add sugar syrup & chocolate ganache.
  • Apply ganache over the top and sides of the cake. Level the cake and refrigerate for 30 minutes -2 hours.
  • Finally, pour the chocolate mirror glaze all over the cake. Add decorations and cover the border using chocolate sprinkles if using, or leave just like that. Refrigerate another 30 minutes, cut and serve.


NOTES
* You can make the base cake as chocolate cake with eggs too. I did an eggless base.
* Adding sugar syrup to soak the cake is to be used as needed. You can even omit that step if you don't want so much sugar in the cake.
* The chocolate ganache after applying needs refrigeration for the ganache to set. It becomes easy to level the cake after refrigeration.
* Adding chocolate sprinkles to the border is strictly optional in this cake, as the cake looks beautiful without borders.


Tuesday, January 24, 2023

Strawberry Pudding (No Gelatin, No Whipped Cream, No Agar Agar)

Strawberries are in season and this is the time to make the best of fresh strawberries. I tried making this simple pudding with the basic ingredients available at home. The pudding can be whipped up in no time and is a crowd pleaser for small kitty parties or birthday parties.The pudding tastes yummy with the tangy sweet topping with little bits of cooked strawberry and soft custard. This pudding is very light pink in colour, if you wish brighter colour add a drop of pink, which I haven't added (this is the natural colour of strawberry purée in pic). Do give this a try and enjoy !!

Please scroll down to the end of this page for more strawberry recipes.

Preparation time ~ 10 minutes
Cooking time ~ 15 minutes
Author ~ Julie
Serves ~6-8 small pudding cups
Ingredients
milk 2 cups
sugar 1/2 cup (2 tbsp+ 1/4 cup+ 2 tbsp)
corn starch/ flour 1/3 cup
strawberry 1 pack (250 gms)
lemon juice 2 tsp

Method
  • Wash and clean the strawberries. Remove the stem and cut the strawberries. Divide the strawberries in half. Add half of the strawberries to a blender jar, add 2 tbsp sugar. Blend until smooth. Keep aside the cut strawberries, blended purée.
  • Mix 1/4 cup milk to corn flour without lumps and keep aside.
  • Heat a pan and add remaining milk. Boil the milk, add sugar (1/4 cup). Mix well, add the corn flour mixed milk to the boiling mix and cook till this thickens considerably. Switch off flame and leave to cool.
  • When the mix is warm, add the puréed strawberry mix. Give a quick stir (no need to cook again).
  • Strain this mix to get a smooth pudding consistency. You may have to move with a spatula in the mix to strain.
  • Finally, add to pudding bowls and refrigerate until set or two hours.
  • In another pan, add the cut strawberries and 2 tbsp sugar. Add a tbsp of water and keep stirring continuously until the strawberries are cooked and sugar is dissolved. The sauce thickens, add a tbsp of lemon juice and switch off flame. Cool slightly and scoop on top of the pudding. Refrigerate again for half an hour. Enjoy !!

NOTES
* The main pudding is mildly sweet which we liked, but if you are a sweet tooth add another 2tbsp of sugar.
* Adding lemon adds a tangy flavoured topping and prevents sugar crystallization.
* This pudding is very light pink in colour, if you wish brighter colour add a drop of pink. I left in the natural colour.
* If you love to demold the pudding, then spray cooking oil or brush oil in the cup. Add the topping first and then add the custard, demold after refrigeration and enjoy !!

Friday, December 23, 2022

Dates Carrot Cake (Bakery Style)

Wishing all my readers a blessed & happy Christmas !!
Have you tried a dates cake? Am sure most of you must have baked one if you are a baker. But this cake is something that we loved a lot, carrot and dates. This cake is an eggless, butterless version but is a super moist, delicious cake.This cake tastes best the next day after baking. I have tried baking this cake quite a few times now, and each time I have fallen in love with the texture of the cake. The carrot speckles in the cake are so evident and the beautiful dark colour compliments well with the Christmas theme cakes like plum cake. I would say if you plan to bake something in the last minute, then this is a great choice as all the ingredients are readily available and there is no use of beater. Do share the pics and feedback too if you try this out this Christmas season. Enjoy !!


Preparation time ~ 15 minutes
Baking time ~ 35-40 minutes
Author ~ Julie
Serves ~ a 6' cake 
Ingredients
all-purpose flour (maida) 1 1/4 cups
baking powder1/2 tsp
baking soda 3/4 tsp
dates 13-15
milk 1/2 cup+ 1/4 cup
carrot 3/4 cup grated or two medium-sized
veg oil 1/2 cup
sugar 1/2 cup granulated 
cinnamon 1' piece
nutmeg 1/2 tsp
cloves 4
almond chopped 1/4 cup


Watch on YouTube -


Method
  • Add the deseeded dates in warm milk
  • Sift the flour, baking powder baking soda and salt twice.
  • Add the granulated sugar, cinnamon, cloves and nutmeg. Powder till smooth. Keep aside.
  • Peel and grated the carrots. Add 2 tbsp flour to the grated carrots, mix and keep aside.
  • Pre-heat oven to 350 degrees F or 180 degrees C and line a tray with parchment paper and apply oil, dust with flour. Keep aside.
  • Add the dates soaked in milk and grind smoothly to a fine paste.
  • Add the paste to a bowl, add oil. Mix well. To this, add the flour mix in batches.
  • Slide in the flour mixed grated carrots. Add the remaining 1/4 cup milk in batches.
  • Add the batter to the prepared cake tin. Garnish with chopped almonds.
  • Bake in preheated oven for 35-45 minutes (mine was done in 35 minutes). I gave the top rod in the last 3 minutes.
  • Remove to wire rack when done. Cool completely before cutting in slices. This cake tastes best the next day. Enjoy !!


NOTES
* You can add 1/2 tsp vanilla extract.
* You can add 1/4 cup chopped almonds or cashews too in the cake.


RELATED POSTS


Friday, November 25, 2022

Chocolate Crinkle Cookies

What are your bake plans for this holiday season?  I, have a never ending list of bakes to try each holiday season and I ended up trying one or two from that, rest is all bookmarked forever :D

Chocolate crinkle cookies is one such bake from the list that I tried recently. These cookies are so good to watch them bake as they press down to flatten and take the shape of a crinkle cookie from a ball. The white icing sugar on top adds beauty to the cookie. Kids totally loved these and have already demanded for another batch soon. Do give this a try and enjoy with a cup of warm milk this season.


Preparation time ~ 10 minutes
Baking time ~ 10-12 minutes
Serves ~ 12 large cookies
Author ~ Julie
Ingredients
all-purpose flour (maida) 1 cup (125 g)
cocoa powder 1/2 cup (50 g)
granulated sugar 1 cup
baking powder 1 tsp
salt 1/8 tsp
eggs 2
vanilla extract 1.5 tsp
oil 1/4 cup
icing sugar 1/2 cup (refer notes)

to make icing sugar (1/2 cup)
granulated sugar 1/4 cup
corn flour 1.5 tsp


Watch on YouTube -


 Method
  • Powder the granulated sugar in a blender jar and grind smooth.
  • Add cocoa powder to a bowl, add the powdered sugar. Mix this well. 
  • ICING SUGAR DIY- If you have store brought icing sugar, then forget this step. Otherwise, go ahead and prepare this up to roll the cookies. Add 1/4 cup granulated sugar to the same blender jar and add 1.5 tsp corn flour. Blend until sugar is smoothly powdered. Keep aside till you roll the cookies.
  • In the same blender jar, add the eggs. Blend until smooth. To this, add the vegetable oil and blend again. Add the liquid to the cocoa sugar mix and combine. Add the vanilla extract too. Mix smoothly without lumps.
  • Finally, sift the flour, baking powder and salt over the mix, and you will get a sticky dough. Cover with a cling wrap and refrigerate for 2-3 hours or overnight.
  • Remove, after chilling, roll out small portions of the dough in balls. I got 12 large balls or make 24 small balls. Roll the made balls in the prepared icing sugar and keep on a tray lined with parchment paper.
  • Preheat oven to 350 degrees F/ 180 degrees C for 10 minutes. Place the tray and bake in preheated oven for 10-12 minutes. The cookies are soft just after bake, so cool in the pan for 10 minutes and then transfer to a wire rack to cool completely. 
  • Enjoy with a cup of warm milk, or store in airtight containers till use.
                                                     

NOTES
* Depending on the oven temperatures, keep a close watch on the oven temperatures to prevent burning.
* I added 3/4 granulated sugar to make these cookies, but you can go up to 1 cup of granulated sugar.


Friday, December 24, 2021

Vancho Cake ~ Merry Christmas 2021!!

Wishing all a very Merry Christmas !!
Hope all are enjoying the holidays with your dear ones.

As a child, Christmas is the time when I waited to have my mom's freshly baked plum cake. And mom used to bake so many cakes that I actually had it for my birthday too, which falls in January. Just recollecting those fond memories and those days cakes were very special because we got to see plum cakes only once a year, especially if you stay in a place away from Kerala. These days, cakes are so easily baked at home, available in bakeries and served, that you get to devour plum cake every other day if you wish to. Did you bake your plum cakes this year? My elder one is not a big fan of plum cake, and so I always bake lighter fruit cakes for him. He does have a piece of plum cake just for the namesake. 

Do you wish to try something different this Christmas than plum cake? Then, this is the best choice to try out-Vancho cake. 'VAN' refers to vanilla and 'CHO' refers to chocolate. This is the new super hit at home as you get to taste both chocolate and vanilla flavours infused in one cake topped with both white chocolate and dark chocolate ganache. This is a simple cake to frost as it involves pouring of the chocolate ganache on top and doesn't require many expert hands to pipe out designs, especially to people like me 😛 (am a novice in piping out patterns). I just created few patterns using dark and white chocolate, broke in pieces and decorated the top design. Placed a few wafer sticks to add on to the deco. I have used the same vanilla sponge recipe that I used to make the white chocolate cake and chiffon cake recipe to bake the chocolate sponge, so I haven't shared the step by step pics here as it's already listed in the respective posts already. I have shared the making of ganache and assembling of the cake in step by step pics. Do give this simple cake a try and enjoy!!


Preparation time ~ 20 minutes
Baking time ~ 1 hour for 2 cakes
Author ~ Julie
Serves ~ 1200 gm cake
Ingredients
for sponge cake
all-purpose flour (maida) 3/4 cup
corn flour 1 tbsp
baking powder 3/4 tsp
baking soda 1/4 tsp
salt a pinch
powdered sugar 3/4 cup
eggs 3
vanilla essence 1 tsp
any neutral oil 2 tbsp

for chocolate cake
cake flour 3/4 cup
cocoa powder 1.5 tbsp
baking powder 3/4 tsp
baking soda, a pinch
salt 1/8 tsp
vanilla extract 3/4 tsp
eggs  3
brewed coffee  2 tbsp
oil 1tbsp

for sugar syrup
granulated sugar 1/2 cup
water 1 cup

for frosting
whipping cream, 2 cups

for ganache
white chocolate compound 150 gms
dark chocolate compound 100 gms
fresh cream 1 cup(used 2/3 for white and 1/3 for dark)


Method

How to make the sponge cake ? Refer the detailed pics here in this post on sponge cake.
  • Sift the flours with baking powder, baking soda, salt thrice and keep aside. In another bowl, add the eggs and powdered sugar, beat until creamy and pale (may take around 5 minutes). Add in the oil and vanilla essence, mix well.
  • Pre-heat oven to 325 degrees F and line a 6' tray with parchment paper and oil the sides, dust with flour and keep ready.
  • To this add the sifted flour mixture in three to four batches and combine well using a spatula without much deflating the air from beaten egg mixture. 


  • Transfer the batter to the prepared cake tin and tap the cake tin several times(20-25) to release the trapped air bubbles. Then place in oven and bake for 25-30 minutes. Insert a tooth pick in the centre of the pan and check if done (Mine was done in 25 minutes, I pre-heat the oven by using the both rods on. Initial bake time was changed to lower rod along for 5 minutes and then changed back to both rods on).
  • Cool the cake on a wire rack and transfer out from the pan. Cover with a parchment paper once cooled completely and then wrap with a cling wrap or aluminium foil. I left overnight before frosting.
How to make chocolate sponge cake ? Refer to detailed recipe here on step by step pics.

  • Separate the egg yolk and egg whites in two bowls when cold. Leave at room temperature for 30 minutes.
  • Preheat oven to 325 degrees F and line a round 9" cake pan(I used Wilton's  6' cake pan as I halved the original recipe) with parchment paper at the bottom and lightly butter the sides. Ideally a tube pan should be used for chiffon type cakes as the cake needs to be inverted soon after bake when hot as the cake tends to shrink and lose its volume when cooled, but a round pan also worked fine.
  • Sift the cake flour in a bowl and then measure 3/4 cup (If making cake flour by substituting, then add 2 tbsp of corn flour in a cup and then add the rest all-purpose flour to fill one cup).
  • Sift together cake flour, cocoa, baking powder, baking soda, granulated white sugar and salt twice in a bowl. Beat the egg yolk in a bowl using a hand whisk. Add in the oil, vanilla extract. Mix well. Pour the brewed coffee and stir well.
  • Add this mixture to the sifted flour mix and gently stir using a wire whisk to combine well. Add a tbsp more coffee according to the consistency of the batter so that it's well combined, don't get it watery as when we add the meringue the consistency will thin out and be correct.
  • In the meantime, beat the egg whites in a grease free oil free bowl using an electric hand whisker or stand mixer. Beat until soft peaks form or when you see streaks with your whisker. Gradually add in the granulated white sugar and beat until almost stiff peaks form. Fold in this meringue in the combined batter using a wire whisk or spatula until just blended(don't over mix to deflate the batter).
  • Pour the batter in the prepared pan and run a knife through the batter to get rid of air bubbles. I gently tapped the tray on the table 2-3 times to get rid of the air bubbles. Place in oven and bake for 30-32 minutes or until when the skewer inserted in the centre comes out clean.
  • Immediately after removing the cake from the oven, run a knife through the sides and invert the cake on a buttered wire rack. Remove the parchment paper and leave to cool completely before frosting the cake or serving.


How to make ganache?
  • Heat the cream in a pan and don't boil. Chop the dark compound in small bits and keep in a bowl. Similarly, add the white chocolate compound to another bowl. Divide the cream mixture in 2/3 and 1/3. Add 2/3rd mixture to white chocolate and 1/3rd to dark chocolate. Let it stand for 5 minutes and then mix to a smooth ganache. Cover and keep aside till use.


How to make whipped cream and chocolate cream? I have shared the detailed step by step pics of making whipping cream here in this recipe, pls refer.

  • I chilled the beater blades and bowl in the fridge overnight and thawed the cream in the fridge overnight(earlier it was in the freezer). Remove the blades, bowl and cream from the fridge. Pour the cream to the bowl. 
  • With the beater blades attached, beat the cream for 4-5 minutes until it turns stiff peaks (Remove 1/3rd of the cream when there are soft peaks to mix with 2tbsp of chocolate ganache. Incorporate the dark chocolate ganache in the whipping cream first and then beat. Beat this mix separately in another bowl). Both creams should be beaten to stiff peaks. The test to make sure it's done is by tilting the bowl upside down and find that the cream doesn't move at all and stays stiff. Immediately transfer the cream to the refrigerator till use by covering with a lid or cling wrap.

How to make sugar syrup?
  • Make a sugar syrup using 1/2 cup sugar and 1 cup water. Put this on a stove and heat till the sugar is dissolved. Put off stove and leave to cool completely.

How to assemble the cake?
  • Once the cake is cooled, the cake can be cut in two or three layers as per the height of the cake. My cake was best for a two layer cake, but my kids wanted to make it a three layer, so I somehow managed to cut it in three. Use a serrated bread knife or twine to cut the layers. I used a serrated knife. Be very careful when you cut the cake in layers, as the cake is very soft and delicate.
  • Then place a dollop of cream on the cake base and place the base on the turn table. Place the first layer of the cake. Add pieces of parchment paper over the sides of the cake all around to get a neat finish at the end. Add sugar syrup on the first layer and then place the chocolate whipped cream on top of this layer and spread using an offset spatula. 


  • Add the second layer and pour sugar syrup on this layer. Add the plain whipped cream and  finally place the third layer, add the sugar syrup and spread the cream on the sides. Spread gently because you may get crumbs on the offset spatula. 
  • Once you have finished a crumb coat, refrigerate the cake for half to an hour before you add more layers of frosting.


  • Add more whipping cream to give the finished look, make designs on the side. Pour the white chocolate ganache on top. Then pipe the dark chocolate ganache on half side of the cake and using a tooth pick make designs. Then added chocolate wafers and chocolate designs(that I made earlier but forgot to click pics, will share sometime later) on top with a cake topper. Refrigerate to two hours to set and enjoy !!


NOTES
*  If making cake flour by substituting, then add 2 TBS of corn flour in a cup and then add the rest all-purpose flour to fill one cup.
* I used whipping cream to make ganache too so didn't add any sugar to the cream but if using fresh cream add powdered sugar or icing sugar.


Friday, December 17, 2021

Light Fruit Cake (VIDEO)

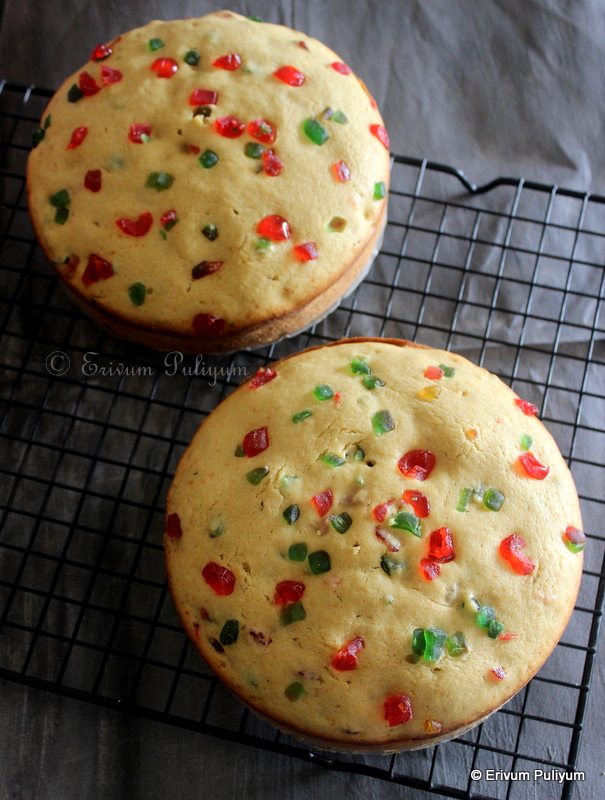
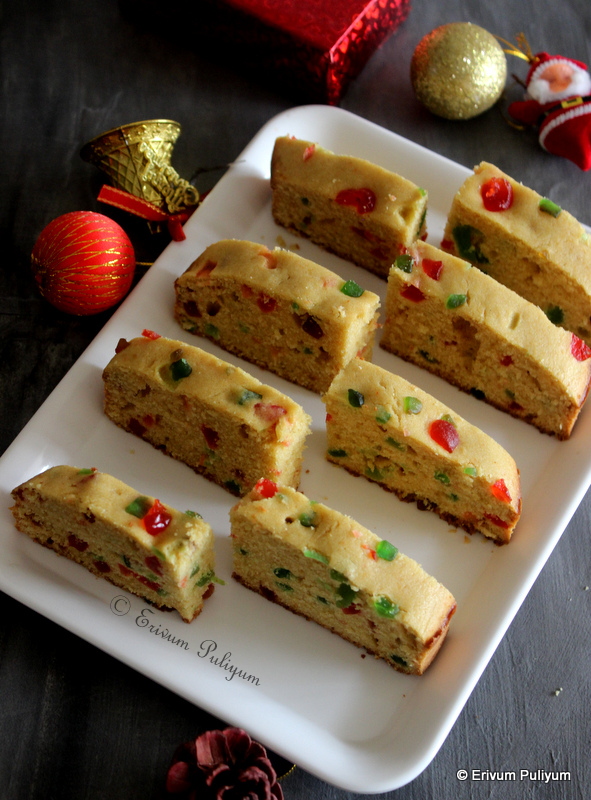
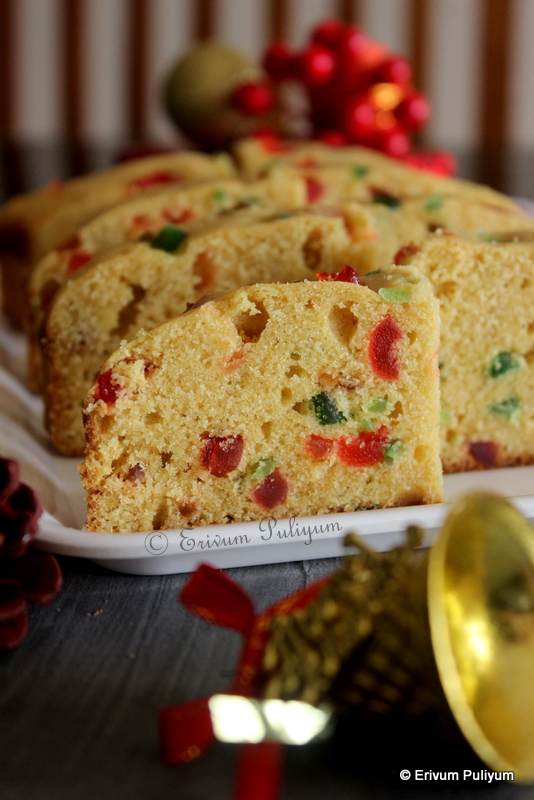
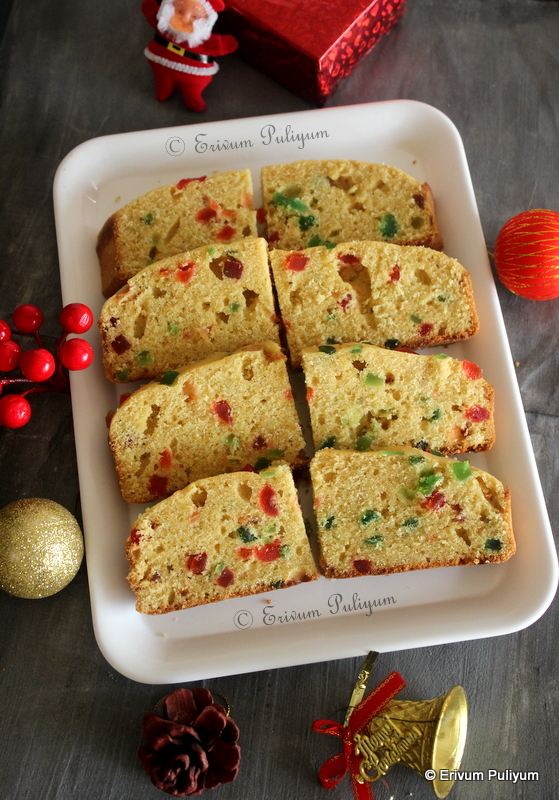
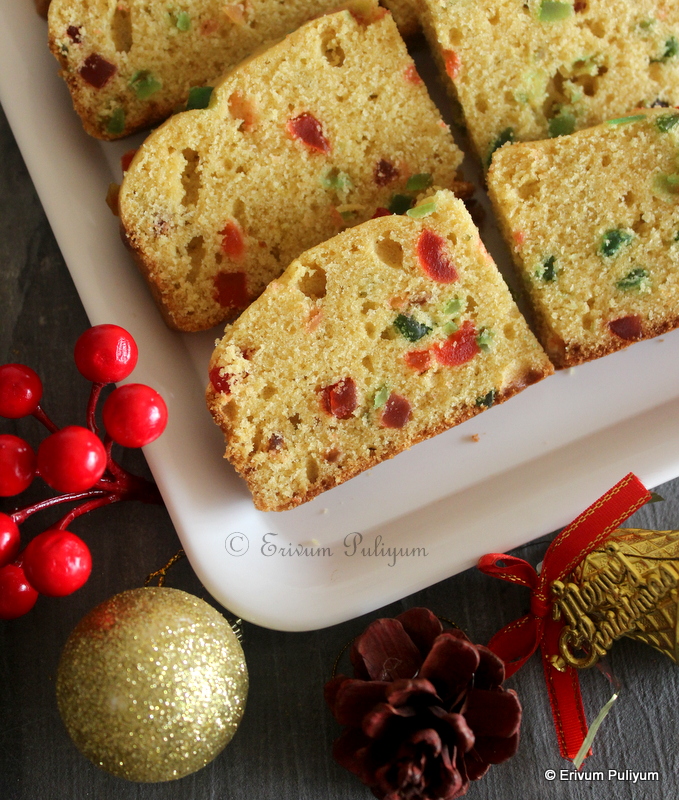
 As the name suggests, this is a light fruit cake made with dry fruits. This cake has no fuss of caramelizing sugars and no wait time to serve the cake. The best part of this cake is that you can enjoy this cake the same day. This light fruit cake can be made not just for Christmas season but all throughout the year. This cake is light, tender, moist and buttery. You can even mix the dry fruits mixed in alcohol if you like that version, but I have skipped adding alcohol. The cake is loaded with dry fruits that you get to bite in every bite.


This cake is  totally dedicated to people who don't like the Traditional Plum Cake. It has candied cherries, candied cranberries and tutti fruity. This cake is a rework of my tutty fruity cake that I posted a long time back. I have made that cake with wheat flour alone and that's a little denser compared to this one, also it has only tutti fruity whereas this cake has candied cherries, has custard powder which gives that yellow hue and lighter texture to the cake. Do give this a try if you don't want to make the elaborate traditional Kerala style Plum Cake with spice mix and caramelized sugar. Enjoy !!


Preparation time ~ 20 minutes
Baking time ~ 30-40 minutes
Author ~ Julie
Serves ~ 2 round cakes of 450 gms each
Ingredients
dry ingredients
wheat flour 2 cups
custard powder 3 tbsp
baking powder 2 tsp
salt a pinch

wet ingredients
milk 3/4 cup 
butter 150 gms (10 tbsp)
powdered sugar 1 cup
pineapple essence 1 tsp
eggs 3
tutty fruity 1/2 cup
candied cranberry 1/4 cup
candied cherries 1/4 cup


Method

  • Sift the dry flours- wheat flour, baking powder, baking soda and salt twice or thrice. Keep aside.
  • Take the dry fruit mix in a bowl, chop any dry fruits as needed. Reserve about 2 tbsp of dry fruits for garnish and add a tbsp of flour to the remaining dry fruit mix (I used candied cherry and tutty fruity). Give a quick mix and keep ready.
  • In another bowl, beat the butter until creamy and pale. To this, add the powdered sugar and mix using a spatula to combine so that the sugar doesn't fly out. Then beat again with a hand beater.
  • Break the egg and add one by one till creamy. The mixture may look creamy and curdled. Now add pineapple essence. Combine well.


  • Pre-heat oven to 325 degrees F or 170 degrees C and line two trays of 6' or 5' rounds with parchment paper and apply butter on the sides. Dust with flour and shake off excess. Keep ready.
  • Finally, start adding the flour mix little by little and mix using a spatula. Add milk by little and flour, mix alternatively till you finish mixing the batter. The batter looks thick, add milk to adjust consistency. Add the dry fruit mix coated with flour. Mix everything to combine.
  • Garnish with the reserved dry fruit mix. Place in oven and bake for 30-40 mins(Mine was baked at 35 minutes).
  • Remove from oven and cool on a wire rack. Cool completely, cut in slices and enjoy !!


NOTES
* The cake is moderately sweet, but if you like it very sweet, then go upto 1 1/4 cup.
* I have used wheat flour, but if you like it lighter texture then go with all-purpose flour(maida). The measures remain the same except that you may need a little less milk than with wheat flour. So add mik little by little and check consistency.
* I have used vanilla custard powder, but you can use any flavour custard powder. Also, can use corn starch alone too, but you may not get that yellow hue of vanilla custard powder.
* You can even add chopped almonds and cashews or any nuts chopped. Also add candied pineapple, black raisins.

RELATED POSTS


Tuesday, November 16, 2021

Bombay Mixture (Kerala Style Mutta Mixture) | Dal Moth Namkeen(Mixture)

Do you love sweet or savoury snacks ?? 
I love savoury snacks the most however H has a sweet tooth and this goes to my kids as well, both have different tastes. In a way it's good to have mixed taste buds so that I try and showcase both sweet and savoury snacks. But both our taste buds enjoy sweets / payasam or love munching mixture/ samosas too in moderation. 


I have already posted a few of the popular mixtures/ namkeen which are my favourites. But I love mutta mixture or dal moth namkeen too/ Bombay mixture. These are recipes that I love munching anytime, and I loved admiring the glass bottles in bakeries with different kind of mixtures as a child too. The dal moth mixture is prepared using whole masoor dal and green gram and sev is added to this mixture along with fried peanuts, cashews and almonds. The whole masoor dal and green gram has to be soaked nicely and dried under a fan to remove any moisture before frying in hot oil. Adding chilly powder is optional, you can even add black pepper powder as well. Do give these a try as its simple to make and enjoy at home. 

Please check out more snack recipes that you can prepare and store in airtight containers-
Kerala Spicy Mixture


Soaking time ~ 4–5 hours
Dal drying time ~ 30 minutes- 2 hours
Cooking time ~ 20 minutes
Serves ~ a big bottle
Author ~ Julie
Ingredients 
to make mixture
whole masoor dal 1 cup
green gram dal/ cherupayar 1/2 cup
*sev(recipe below) 2–3 cups
peanuts 1/3 cup
almonds 1/3 cup
cashews 1/3 cup
salt 1 tsp
hot chilly powder 1 tsp
hing/ asafoetida/ kayam podi 1/4 tsp
amchur powder 1/2 tsp

to make sev
besan / kadalmavu 1.5 cups (150gms)
oil 1 tbsp 
salt 3/4 tsp 
water 1/2 cup
turmeric powders, a good pinch
hing/ asafoetida/ kayam podi 1/4 tsp


Watch on YouTube -


Method
  • Wash and soak the whole masoor dal, green gram dal in enough water for 3-4 hours.
  • Drain the water completely in a strainer and spread on a clean cloth.
  • The dal should dry completely before frying, else may burst in oil. So, dry under a fan or air dry for 30 minutes- 2 hours. There shouldn't be any traces of water on dal or dry using layers of papr towel.


  • In the meantime, prepare the sev. Take the besan, hing, turmeric powder and salt. Combine well. To this add oil, rub the oil into the flour very well(important step). Add water little by little(needs 1/2 cup for this measure) and make a dough using a spoon. Beat the dough using a spoon for 45 seconds (It's better to use a spoon rather than hands, as it sticks to the hands very badly).
  • Take the idiyappam press or mould, apply a thin layer of oil in the inside of the mould (use the mould with the smallest holes to make the sev). Then dip your hands in water, scoop out the dough into the mould. Then close the mould.
  • Heat oil in a kadai up to 2' deep and then when the oil is hot, lower the flame and hold the mould over the oil to press the dough in concentric circles(don't overcrowd but just enough to cover the diameter of the kadai).


  • Increase the heat to medium once you finish pressing the mould over oil. Wait for the bubbles to settle and then flip the other side. When the bubbles reduce, then it's fried and can be removed using a slotted spoon(as in pic).
  • Next, fry the dried masoor dal and green gram. The dal takes almost 3–4 minutes to fry on high flame, the bubbles subsides is a indicator to drain the dal from oil. Use a strainer with smaller holes to remove the dal from oil easily. Drain on a paper towel and then fry the peanuts, cashews, almonds one by one. Drain on paper towel and keep aside.


  • Now add the sev in a bowl and crush gently to break the long strands. Then add the fried dals, peanuts, almonds, cashews, chilly powder, hing, amchur powder and salt.
 

NOTES
* Adding chilly powder at the end is optional, You can add black pepper powder to instead of red chilly powder or just leave without adding any of the two to yield a yellow colour Bombay mixture. The south Indian variety is yellow and doesn't have the red chilly powder added at the end.
* Adding amchur powder adds a nice tangy flavour to the mixture.
* You can add more fried nuts to the mixture, but these measures yield a good mix of nuts.
* It's better to prepare the dough with spoon, as the besan tens to stick to the hands very badly.
* Don't overcrowd the wok when pressing the sev for frying, else the sev may not fry properly and may remain soggy in places.

FOR MORE KERALA SNACKS RECIPES, CLICK HERE.


Friday, December 18, 2020

Whole Wheat Plum Cake ( Eggless, Butterless, No Refined Sugar, No Caramelize)~ Step by Step Pics

Cake and healthy ? Sounds strange especially during Christmas time when bakeries are flooded with cakes. But believe me this cake is for all those who requested for a healthy plum cake this Christmas. This cake has only good things to deliver, no refined sugar used, no maida, no butter yet is a spongy soft delicious cake. I already have two plum cakes in my space- one the traditional Kerala Plum cake and the eggless plum cake of the cake.However, this is a perfect plum cake for weight watchers, calorie conscious and new bie as there is no hassle of caramelizing sugar as well. The best thing I loved about this cake is that we can happily have an extra piece of this cake without feeling the guilt of maida, butter  and refined sugar. Also this is a alcohol free, eggless cake and requires no soaking of dry fruits in advance. You may be wondering then how is this cake baked ? Lets see..


This cake is made with whole wheat flour, oil, jaggery syrup and is soft spongy and the cake is not as dense as regular wheat flour cakes (regular plum cakes made with maida are no lighter as well). There is no prominent flavors of using jaggery and is simply superb. The best thing I loved about this cake is that there is no elaborate procedures of soaking, beating butter and sugar, no caramelizing. All that you need is a spatula to mix up the ingredients and voila ! the cake can be baked with ease.This cake tastes best the next day as with any plum cakes so try cutting the cake the next day. I have already baked this cake thrice now and all loved this cake. The top of the cake is smooth, firm and not sticky. The baking powder, butter milk and baking soda does the magic. The orange zest along with whole spice powders wafts a nice flavor along with vanilla essence. The sweetness part is taken care by the jaggery syrup and the dark color is supplemented by cocoa powder(optional to add color) and jaggery syrup. Depending on the type of jaggery used, the color of the cake will be dark. Am sure all my reader friends may want to try this cake soon so posting it early before Christmas. Try this out and it would be nice if you can send me a pic too, will be more than happy to share the pic on my fb page too!!


Preparation time ~ 20 minutes
Baking time ~ 35-45 minutes
Serves ~ 1 cake
Author ~ Julie
Ingredients 
whole wheat flour 1 1/4 cup
corn flour 2 tsp
cocoa powder 2 tsp
baking powder 1 tsp
salt 1/4 tsp
whole spices (cinnamon, nutmeg, cloves,cardamom powder)  1/4 tsp each

butter milk 1/2 cup + 2 tbsp ( mix 2 tbsp curd with 1/2 cup milk)
baking soda 1/3 tsp
oil 1/4 cup
vanilla essence 1 tsp
jaggery grated, tightly packed 1/2 cup  
hot water 1/2 cup
black raisins 2 tbsp 
golden raisins 2 tbsp
tutty-fruity 4 tbsp
cherry chopped 1 tbsp
cranberry chopped 1 tbsp
chopped cashews 1.5 tbsp 
chopped almonds 1.5 tbsp
candied orange zest 1 tsp
whole milk 2 tbsp (optional)
cashew slices 5-6 (garnish)


Method
  •  Add the grated jaggery in a pan and add the water(1/2 cup). Bring this to a boil and switch off flame when the jaggery is melted. Strain this mix and put back on flame. To this add both golden and black raisins chopped. Boil for three minutes and switch off flame. Leave for 15-30 minutes.


  • In the meantime, sift the wheat flour, corn flour, cocoa powder(optional though), baking powder, whole spices powder and salt twice or thrice. Also, mix the curd (the curd need not be sour, just a regular yogurt is good) with milk and make butter milk. Keep aside.


  • Pre heat oven to 325 degrees F or 165 degrees C. Line a tray with parchment paper, I used a 8' tray here but a 6' tray with height is also good. I have made in both pans. The 8' cake does not have much height when cooked so better to use a 6' or 7' pan.
  • Then, add the tutty fruity, chopped nuts, chopped cherries, chopped cranberries, orange zest(forgot to click pic of zest) to the jaggery mix. Mix well. Add in the oil and vanilla essence to the jaggery- dry fruits mix.
  • Start to add the flour in batches to the wet ingredients or add the wet to the dry ingredients and mix in batches. Mix the baking soda to the butter milk at this point and mix well. Immediately combine with the batter. If needed add 2 tbsp of milk to get the right consistency.
                                                            

  • Transfer this to the prepared pan and level the top. garnish the top with reserved cashew slices. Tap the tray several times to remove air and place in pre heated oven. Bake in pre heated oven with both rods on for 45 minutes in a 6' tray, 35 minutes in a 8' tray. I have tried both and so mentioned time of both. Insert a tooth pick in the center of the cake and if it comes out clean the cake is done. Remove on wire rack and cool before removing from pan. Cool completely before cutting in slices. This cake tastes best the second day so if you have patience, cut the next day and enjoy. 


 NOTES
* Use the whole spice powders 1/4 tsp each.
* You can add candied orange peels for a nice flavor or use 1/4 cup orange juice too. in that case use half of butter milk and replace the remaining half with orange juice.
* You can use dry fruits and nuts of your choice. Black raisins adds a nice look in the cake.
* Don't add the tutty fruity, cherries and cranberries in the hot jaggery syrup as it loses color.
* Adding cocoa powder is optional as I have baked this cake without that too but the one with jaggery gives a light color to the cake and adding cocoa enhances the deep color.

RELATED POSTS
* Kerala Plum Cake