- Wash the blueberries under running water and mash them nicely using a masher. Add sugar to this and mix until dissolved.
- Whisk the thick yogurt until smooth in consistency. To this add the mashed blueberry mix. Combine well and refrigerate for two hours until the colour and flavours of the blueberries seep in.
- Remove from refrigerator and enjoy the tasty blueberry yogurt.
Friday, December 15, 2023
Blueberry Yogurt | Fruit Yogurt
Friday, December 01, 2023
Fish Kanthari | Bird's Eye Chilli Fish Fry
We have seen many types of fish fries with varied tastes and flavours. Which one do you like the most?
I keep trying different fish fry and this is a recent try, liked by all at home. A bird's eye chilli (kanthari mulaku) fish fry ? These chillies are small but are very strongly spicy, a common variety found in Kerala. They are known to have beneficial effects to reduce cholesterol. You may be imagining the heat of these small chillies but don't worry the sour flavours and the coconut milk neutralizes the heat to a great extent. Also, this is a very less oil fish fry version. But the green masala coating really adds to the fresh fish, tastes delicious. Give this a try if you get fresh bird's eye chilli, or even green chillies work fine.
Here is a YouTube#shorts on this Fish Kanthari and here is another one with avoli fish.
- Wash and clean the fish pieces, keep aside.
- In a blender jar, add the bird's eye chilly. Add the ginger, garlic, shallots, coriander leaves, lemon juice, turmeric powder, pepper powder and salt. Make a smooth paste.
- Add the paste to the fish pieces and marinate the fish pieces for half an hour.
- Heat a pan and add the oil (2tsp). Slide in the fish pieces. Cook on medium flame, flip the fish pieces. Add the remaining marinade and cook till crisp.
- Pour the thick coconut milk half way and flip to cook both sides evenly till lightly browned.
- Serve warm for lunch with a salad, enjoy.
Saturday, November 25, 2023
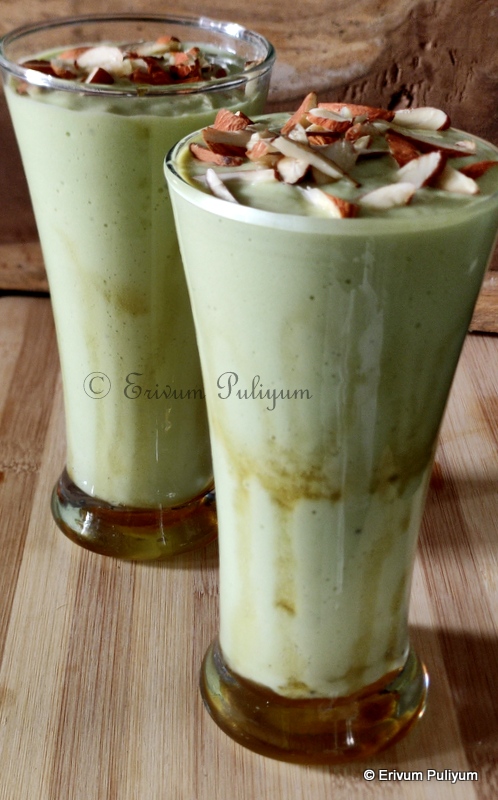
Avocado Banana Breakfast Smoothie
Do you love the sea foam green colour of this creamy, buttery smoothie?
I go mad over this natural colour, it's so pleasant to watch the soothing colour, isn't it? I
I already have posted an avocado milkshake without bananas. Likewise, I love trying out variations with avocado. But this one with bananas is a filling one, perfect for all breakfast skippers. Takes hardly any time to whip it up and makes a filling drink. Try this out and enjoy !!
Watch the YouTube #shorts on Avocado Banana Smoothie.
- Wash, cut and scoop out the flesh of avocado and add to the blender jar.
- Add the cold milk, honey and whip once. Then add the sliced bananas and whip again till smooth.
- Pour in glasses and garnish with few almond slices, enjoy.
Friday, November 03, 2023
Suji Burfi | Rava Barfi
Diwali is around, and how are your preparations going on? Hope all are busy tidying & lighting up homes, buying dresses, diyas and a lot more to welcome Laxmi Devi. Festival season is full of happiness and joy, and a great get-together for families and friends. Sweets are an inevitable entity, especially during Diwali, and this is the perfect time when there is a lot of adulteration in the store brought sweets as the demand is high in the market. It's always wise to rely on good quality sweets or make a few savouries and sweets at home.
- Heat a pan and add ghee. Add the rava and roast on low flame for 3–4 minutes till the raw smell disappears. Don't let the rava change colour, keep flame on low.
- Switch off flame and move away from residual heat. Add the milk powder and mix well, keep aside.
- In a sauce pan, add the water and sugar. Dissolve the sugar and get a sticky consistency. No string consistency is needed. Switch off flame.
- Pour the warm syrup in the rava milk powder mix. Combine well without lumps, put back on flame.
- Cook till the mix is thickened, add the cardamom powder and turmeric powder. Give a quick mix.
- Add a drop on a plate and wait for 30 seconds, try rolling the mix with fingers. If it's non-sticky and forms a ball - then the mix is ready to set in the tray.
- Brush ghee in a tray and keep ready. Pour the mix immediately on the tray, level the top and side edges to get correct shape.
- Garnish with saffron strands, almond and pistachio slices. Gently press with a spatula to set. Leave to cool for 15 minutes.
- Mark the lines to cut the desired shapes. Cool completely and break in pieces. Enjoy!!
Friday, October 27, 2023
Chicken Pasta ~ Fusion Style
Ingredients
Method
- Clean the chicken and rinse the chicken. Drain the water, marinate the chicken using pepper powder, salt and lemon juice. Keep for 1/2 an hour.
- Heat a pan and add oil. Shallow fry the chicken pieces as a single layer. Flip the chicken pieces and fry evenly. Drain from oil when the chicken is just fried and not very crisp, keep aside.
- Heat water in another pan and add oil, salt. Add the pasta to boiling water and boil till done. Drain water and add cold water to the cooked pasta.
- Heat the fried chicken oil, add ginger-garlic paste. Add the chopped onions and sauté until translucent. Add the spice powders on low flame and sauté till raw smell disappears.
- Add the tomato purée, salt and give a quick mix. Cook covered till oil separates. Add the fried chicken pieces. Give a quick mix, cook another 2 minutes. Switch off the flame till pasta is cooked, or cook pasta simultaneously on another flame to get ready by this time.
- Boil water in another pan, add salt and oil as listed. Add the pasta to cook. Boil for 5–6 minutes, or till cooked. Drain from water and add cold water.
- Heat the chicken masala if you put off the flame, add the cooked pasta to the chicken masala. Give a quick mix. Add the cooked pasta water, combine well.
- Finally, dry up any moisture for another minute. Switch off the flame.
- Garnish with grated cheese and serve warm.

Thursday, October 19, 2023
Masala Roasted Cashews (Pepper Roasted Cashews)
- Heat oil in a pan and add the cashews. Roast for 2 minutes, until lightly browned. Drain from oil and place on paper towels. Add salts, pepper powder, amchur powder and chat masala. Give a quick mix and serve.
NOTES
Wednesday, October 11, 2023
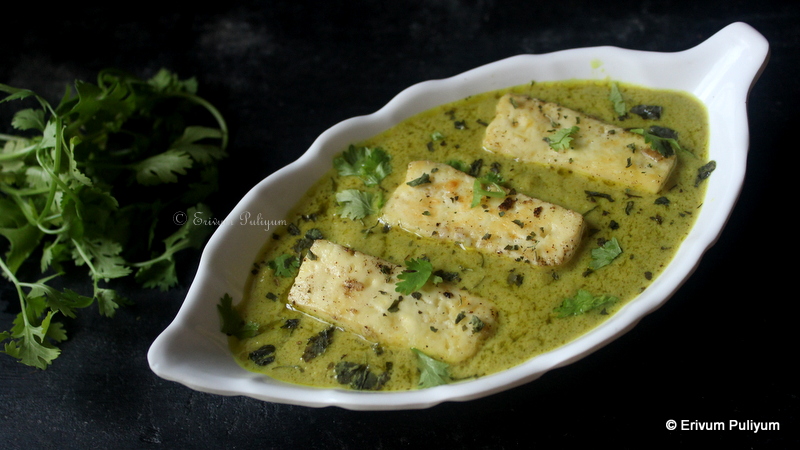
Afghani Paneer | Paneer Afghani
Paneer Afghani is a delightful recipe famous in restaurants and is very simple to prepare unlike other restaurant style paneer recipes, this is quick. How about making this at home with some basic ingredients with the same tastes in no time. The subtle flavours of the gravy elevate your taste buds to a next level and is perfect to serve with naan, kulcha or even phulkas. The lighter shades of green gravy make this paneer recipe stand out with the lightly fried paneer pieces floating on top. A must-try for a kitty party pot lucks or get together for vegetarians, am sure everyone will love this. Check this out.
- Cut the paneer in long slender pieces. Add the ginger garlic paste, pepper powder, salt and hing. Mix this well in the paneer pieces and leave for marination-30 minutes.
- Then heat a pan and add the paneer pieces as a single layer. Shallow fry until lightly brown both sides. Drain from oil and place on a plate, keep aside.
- In the same oil, add the ginger, garlic, green chillies, coriander leaves. Add the cubed onions and sauté on high for a minute, don't wait for the onions to change colour. Cool lightly and add the yogurt. Blend to a smooth paste.
- To this paste, add the coriander powder, cumin powder, turmeric powder and garam masala. Mix well without lumps and keep aside.
- In the same pan, add 2tbsp oil. Add bay leaves and cinnamon. Then add the ground paste, add water (1/4 cup) to the residue in the jar. Add to the pan, bring to a boil and add salt.
- Cook covered for 3–4 minutes till the gravy is nicely cooked reduced and oil floats. Finally, add 1/2 cup water and simmer covered for 2–3 minutes until the desired consistency is achieved.
- Switch off the flame, serve the gravy warm with the fried paneer pieces and garnish the crushed kasoori methi and coriander leaves. Enjoy !!
* Paneer lababdar
Sunday, October 08, 2023
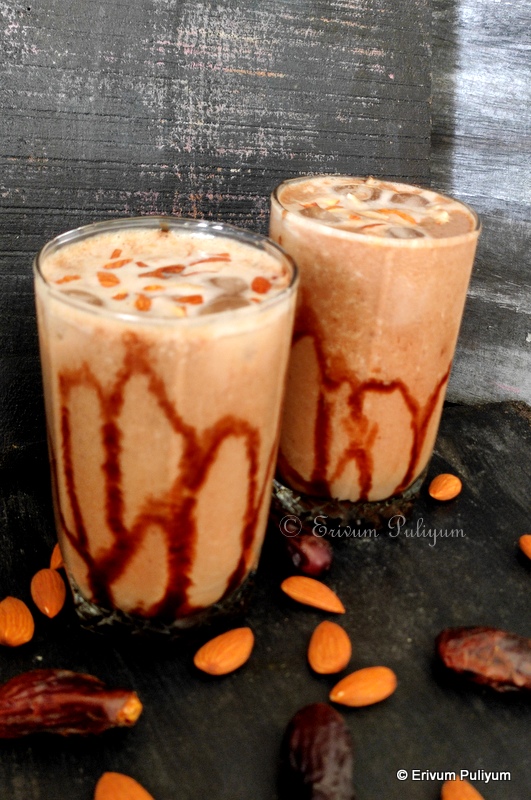
Dates Bournvita Milk Shake
- Add the dates to a blender jar along with cashews. Pulse once or twice to grind the mix. Then add bournvita, sugar and chilled milk. Blend again until smooth.
- Pour chocolate syrup in glasses and add ice cubes. Pour the milk shake, garnish with almond slices and enjoy.
Friday, September 29, 2023
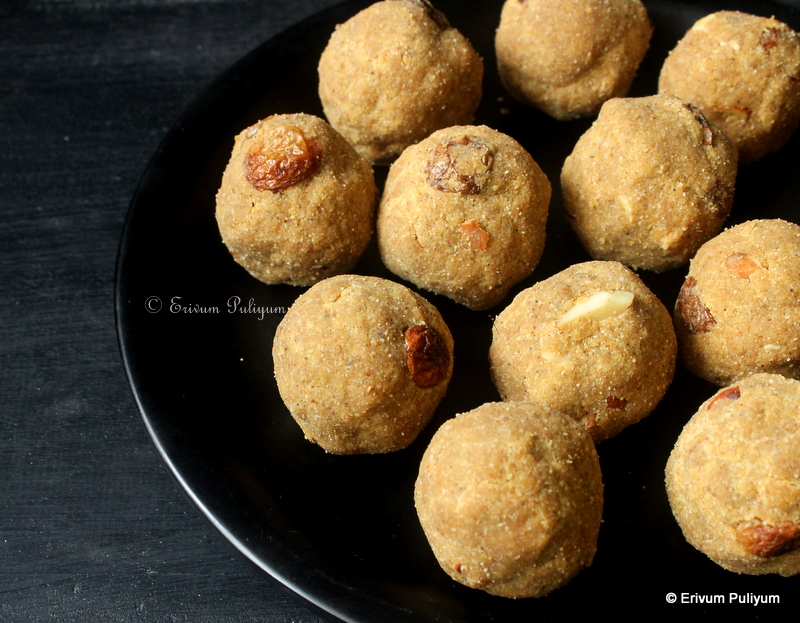
Millet Moong Dal Laddu | Proso Millet Laddu (No Sugar) ~ Healthy Protein Rich Laddus
Millets can be incorporated in many ways in our diet. I have been using millets for the past 5–6 years. I have been using millet flour in making appams, idlis, neer dosa, cookies and muffins. Below is a compiled list of the millet recipe tried so far. This is an easy, tasty sweet that you can enjoy this festive season. This laddu uses no sugar and is made with jaggery and ghee. This is a perfect sweet for all age groups. You can use any millets of your choice. I have used proso millet flour, the recipe of making flour is shared here.
Proso millet has many healthy benefits, like the other millets. This has proved to boost cholesterol metabolism, improving liver and heart health by increasing high density lipo proteins. They also help in bone strengthening and improving digestion. All millets have one or the other benefits. These can be included in our diet in a number of ways. All loved this sweet healthy version of using millets. Do give this simple laddu recipe a try and enjoy.
- Wash the split moong dal, rinse, drain the water. Transfer to a clean towel to dry moisture for 30 minutes. After 30 minutes, add to a non-stick pan and dry roast the moong dal until golden brown (may take 6–7 minutes). Cool completely and powder smooth in a blender jar.
- In another pan, melt the jaggery with 1/4 cup water. Switch off and strain the syrup to discard impurities. Keep aside.
- In a non-stick pan, add ghee(2 tbsp). Fry the sliced almonds and raisins till golden brown. Drain from ghee and keep aside. To the same pan, add 2 tbsp ghee, and add the millet flour. Roast on low medium flame for 3–4 minutes or until fragrant. Then, add the moong dal flour and roast another 2–3 minutes until the ghee is well coated in the flour. Add the fried almonds and raisins. Add a pinch of salt & give a quick mix. Switch off flame. Add the jaggery syrup in the residual heat and mix in the residual heat. Add jaggery syrup as per taste buds, I added 3/4th of the 2/3 cup syrup.
- Start making balls or laddus when the mix is warm and the heat is bearable to shape. Else, it may not hold shape when cold. Repeat making all balls till the mix is finished.
- Store in airtight containers for 4–5 days at room temperature.
Monday, September 18, 2023
Hot Milk Cake (No Beater Cake, Simple & Quick)
- Beat the eggs with granulated sugar until sugar is completely dissolved.
- Sift the all-purpose flour, baking powder and salt in a bowl.
- In a bowl, add the egg-sugar mixture. Add vanilla essence and give a quick mix. Add the dry ingredients in batches, add oil.
- Pre-heat oven to 350 degrees F or 180 degrees C. Line a bread tray with parchment paper at the bottom. Brush oil on the sides of the pan and dust flour.
- Heat a pan and add the butter. When melted, add the milk to warm it up. Switch off the flame and pour this in the batter. Give a quick mix, the batter will be looser than ribbon consistency.
- Pour the batter in the prepared tin and bake in pre-heated oven for 35–40 minutes. Check with a toothpick for done ness.
- Cover with an aluminium foil paper and leave for 10–15 minutes. De mould then and cool on wire rack completely. Cut in slices and enjoy.
- Store in airtight containers and enjoy at room temperature for 4–5 days.
Monday, September 04, 2023
Oats Pancake | Oatmeal Pancakes
What do you generally make with oats? Porridge/ overnight oats or something else. I have tried many of these options, and kids do like porridge once in a while. This is one of the quickest and healthy breakfast option with oats that I feel and kids do enjoy eating as snack or breakfast without much fuss. I love this simple pancakes made with oatmeal or oats flour.
Pancakes are really a great option for my kids as they love most of them no matter what grain or cereal it's made from. And the best part of making pancakes is that they hardly need any sides like chutney or sambar. Adding sugar in the batter is strictly optional, modify as per needs. Drizzle a little honey or chocolate syrup and enjoy.
- Add the oats to a blender jar, and grind to a smooth powder. Add baking powder and salt, mix well.
- To a blender jar, add sugar with cinnamon. Powder along and add eggs. Blend smooth. Add vanilla extract.
- In a pan, melt the butter and warm up the milk, switch off flame. Add to a bowl. To this, add, the egg-sugar mix. Add vanilla extract.
- Add the dry ingredients to the wet ingredients mix. Mix well without lumps. The consistency will be of dosa batter, rest for 10 minutes. Check batter after 10 minutes and add milk if needed.
- Heat a non-stick pan and add a ladleful of batter. Let it spread on its own, cook on low medium flame and wait for all bubbles to break at the surface. Add a little butter, flip and cook both sides till done.
- Similarly, make all pancakes till the batter finishes. Drizzle a little honey or chocolate syrup and enjoy.
Monday, August 28, 2023
Caramel Vermicelli Sago Payasam | Caramel Semiya Payasam ~ Happy Onam !!
Happy Onam all !!
If you are tired of trying the simple vermicelli payasam, then this is a twist to the usual taste and flavour. Vermicelli sago was the simplest payasam, mom would prepare at home for every small functions. And so, I kinda got bored with vermicelli, and so I hardly prepared semiya payasam in home. However, my elder son likes no other payasam other than this vermicelli. So, this was a limited edition at home.
- Heat a pan and add ghee. Fry the cashews lightly followed by raisins, Drain from ghee and keep aside.
- In the same ghee, add the vermicelli and roast on low flame till evenly browned. Keep aside.
- In another pan, add half of the sugar and wait to caramelize. Wait till the caramel is golden brown. Pour the 1/2 cup water and move the caramel to dissolve, but don't worry if there are lumps. Add the milk to boil, when milk starts to boil-caramel will dissolve.
- To the boiling milk, add the remaining sugar. Add the fried vermicelli with ghee. Cook covered for 10 minutes.
- Then, add the fried cashews and raisins.Add cardamom powder and give a quick stir. Simmer for another 2–3 minutes till thickened. The payasam further thickens on cooling, so switch off the flame accordingly.
- Serve in bowls, warm or cold. Enjoy !!
- Semiya Payasam
- Paal Payasam( Pressure Cooker Method)
- Quinoa Sago Kheer
- Pasta Parippu Payasam
- Parippu Pradhaman
- Papaya Pradhaman
- Ada Pradhaman(homemade ada)
- Palada
- Unakalari Payasam
- Suji Gothambu Payasam
- Aval Pradhaman
- Mulayari Payasam
- Carrot Payasam
- Pazham Pradhaman
- Thinai(foxtail millet) Pradhaman
- Chakka Pradhaman
- Aval Carrot Payasam
Monday, August 07, 2023
Lemon Dates Pickle | Naranga Eenthappazham Achar
- Wash the lemons under running water and drain water completely. Boil water in a pan and add the lemons in it. Boil for exactly 3–4 minutes, switch off and drain. Leave to cool completely before cutting.
- Cut the lemons in 6-8 quarter pieces or as you wish (I cut it smaller to help the lemon skin faster). Discard any seeds when cut. Add to a bowl and add 1.5 tbsp salt and give a quick mix, leave for 0 minutes.
- Heat a pan and add gingelly oil. When hot, add mustard seeds and fenugreek seeds. Splutter mustard seeds and fry fenugreek lightly.
- Add the sliced garlic, ginger followed by green chillies and curry leaves. Fry until crisp or sauté 3 minutes.
- Add all spice powders on low flame and sauté without burning. To this, add 1/4 cup vinegar and give a mix.
- Add the 1/2 cup water, bring to a boil. Add the deseeded dates and give a quick mix. Add 1/4 cup water and cook for 2–3 minutes, or until softened. Add salt 1/2 tsp.
- Slide the cut lemon pieces with the juice. Give a quick mix and cook for 2–3 minutes. Switch off flame.
- Cool completely and store in clean, dry airtight containers. Leave on counter top at room temperature for a week for the lemon pieces to get softened. Refrigerate thereafter.
Saturday, August 05, 2023
Passion Fruit Punch
Passion fruit has always been a favourite to me when it comes to selecting citrus fruits. The only fruit that gave me the confidence of trying citrus fruits after a long time. And so, I make maximum use of this fruit whenever I get hold of the seasonal fruit till the stocks last in market. Nowadays, it's again hot in Kerala, the monsoons have vanished, and we are back to hot sunny days. This fruit punch is perfect to quench the thirst of the heat and give you a refreshed feel. A simple fruit punch that has the all the good flavours to keep you energetic throughout the day. You may add soda to make a passion fruit mojito if you wish instead of chilled water. I personally don't like the soda drinks, so don't add. This is my version of the simple fruit punch, which is ready in minutes. Try on and enjoy !!
YouTube #shorts on passion fruit punch, please watch and support.
- In each of the glasses, add the pudina leaves, ginger, green chillies and crush with the back of a spoon /ladle. To each glass, scoop out one passion fruit pulp. Mash with a fork lightly. Add a pinch of salt and sugar syrup. Add chilled water, ice cubes to both glasses. Mix and enjoy.
- To make sugar syrup: Dissolve (1 cup)sugar with (1 cup) water. Boil this mixture over low heat until the sugar is dissolved completely, Switch off flame and leave to cool. Refrigerate to cool or preserve for later.
* Passion fruit Lemonade
.png)


.png)
.png)


