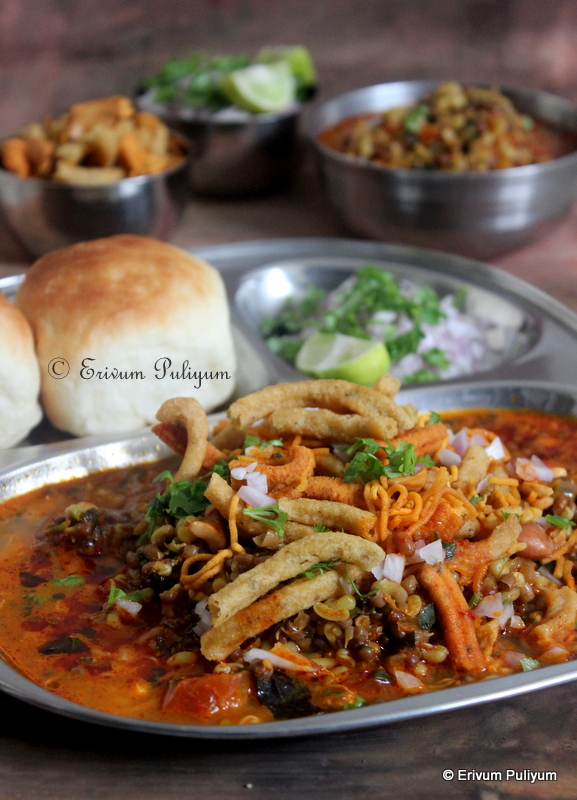
Pav Bhaji, Vada Pav and Misal Pav are the few common Maharashtrian Street foods that I loved having in Pune. One of my best times in life was the hostel days, where we cherished all these memories when we moved out on weekend outings. At times, you feel nostalgic and try to recreate the same magic at home. I did try vada pav, pav bhaji and misal pav a few times before too, but none appeared in the blog as it's a long process. Secondly, people hoard misal pav, and it gets over before I get time to click pictures. People at my home(including me) love all these chatpata flavours, and so I love trying all chat recipes and street food style recipes.
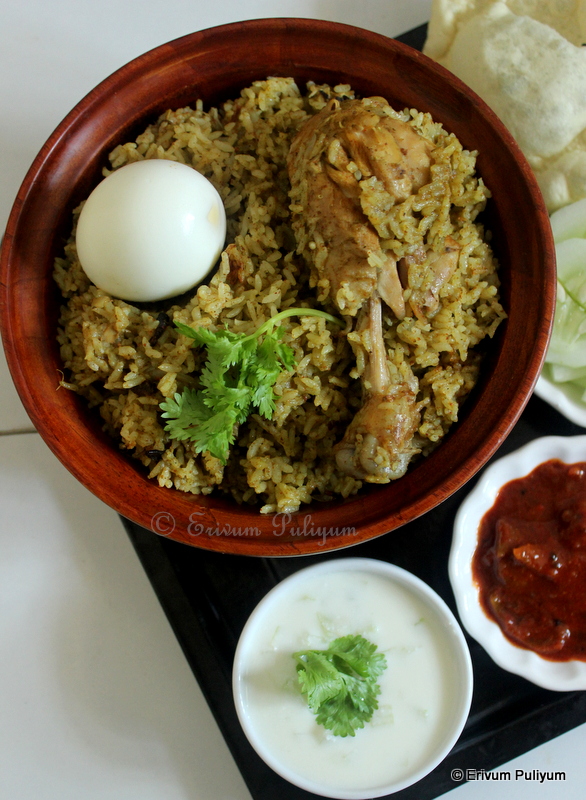
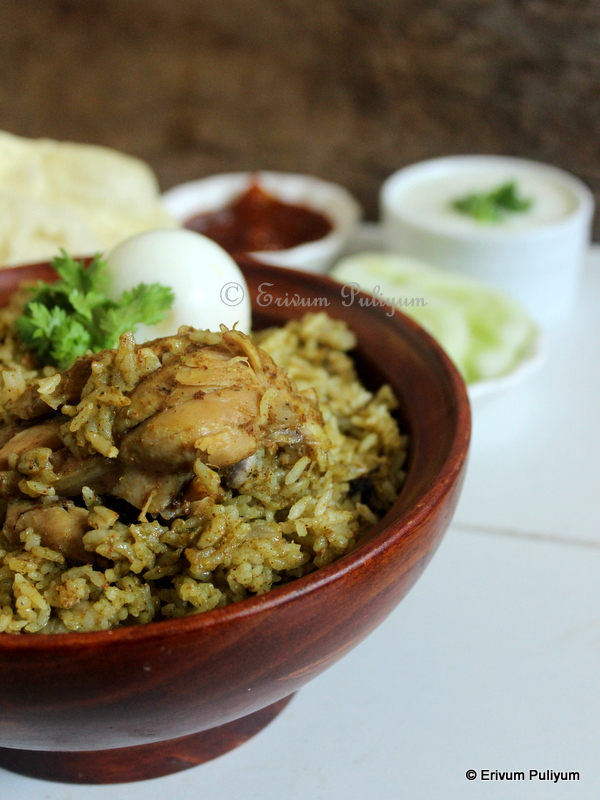
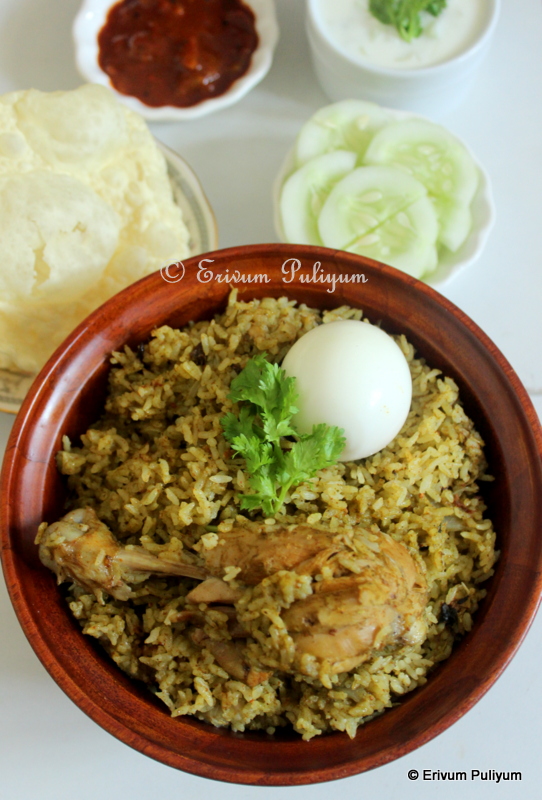
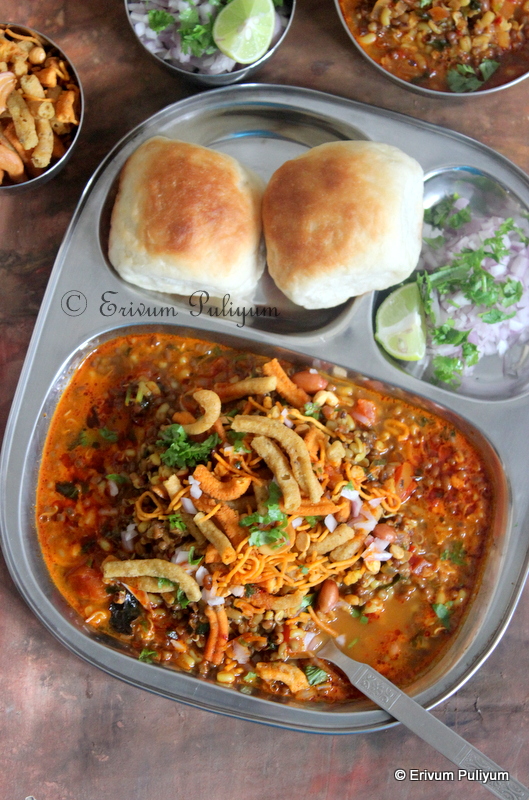
Misal Pav consists of an usal(spicy moth sprouts curry) topped with chopped onions, cilantro and farsan served with pav (poor man's bread). Moth beans are used to make sprouts for Misal Pav and so this is a very healthy pav. There is one special masala that is prepared for making this pav which I have listed below in detail from scratch so that you can prepare the freshly ground flavour and enjoy making any time even if you don't have a store brought pack of the masala. This whole recipe is from scratch, and I was happy with the outcome. I have already shared the Pav Bread recipe in my blog and have followed the same recipe. I referred a few recipes in the past to make misal pav but wasn't getting the authentic style. Then I tried the cooking shooking recipe from YouTube and this delivered almost the street food flavours. Everyone liked this one at home.
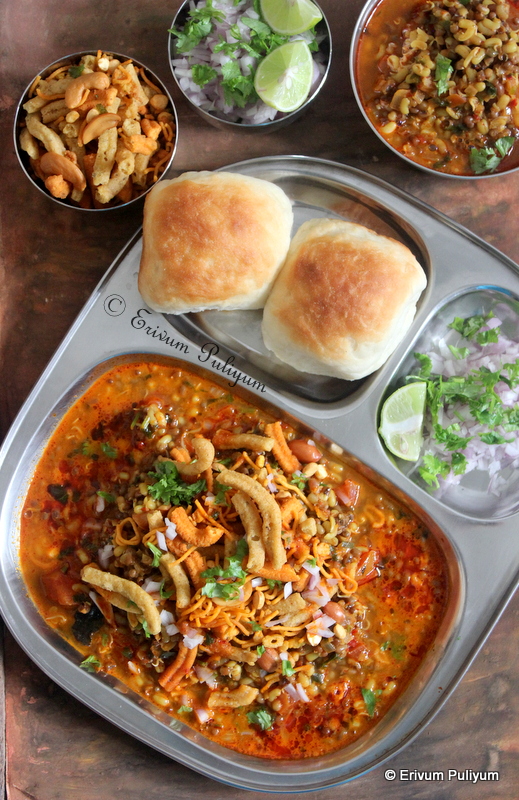
Farsan is the collective term used for the salted snacks used in Maharashtrian and Gujarati cuisine. They can be ragda, dhokla, khandvi, namkeen, aloo sev, besan sev or mixed sev. The mixed farsan is used as topping for misal pav. I even prepared the farsan at home as I wasn't getting the namkeen gatte variety here in my place. I shall share the mixed farsan recipe as a separate post sometime later as this post is already long.
Assembling this misal pav is easy and so you can prepare the sprouted moth beans curry in advance and just assemble the rest and enjoy. However, the freshly prepared tastes best. The special masala can be prepared in advance in powdered form and can be used as needed when preparing usal. The watery gravy (rass and kat) can be made separately, and moth curry (usal) can be made as a dry gravy and mixed only when assembling. But I haven't separated the two and made together. Pav bhaji is one of the top listed among vada pav, misal pav and vada pav but you can always try this for a change as this is healthier than the othe two. Do give this a try in your leisure time, enjoy !!
Soaking & Sprouting time ~ 24-48 hours
Preparation time ~ 20-30 minutesCooking time ~ 30 minutes
Author ~ Julie
Serves ~ 10-12 misal pav
Ingredients
for cooking sprouts
sprouted moth beans 1 cup
turmeric powder 1/2 tsp
water 2 cups
salt to taste
for special masala
dry kashmiri chilli 5-10 (or crushed powder 3 tbsp)
coriander seeds 1 tbsp
cumin seeds 1.5 tsp
sesame seeds 1.5 tsp
cinnamon 1/2'
cloves 5
fennel seeds 1/2 tsp
star anise 1/2
stone flower 1 piece
peppercorn
dessicated dry coconut 2tbsp
garlic 5-6 cloves
oil 1/2 tsp
for making usal
mustard seeds 1/2 tsp
cumin seeds 1/2 tsp
ginger-garlic paste 1/2 tbsp
tomato 1/2 chopped
hot chilli powder, 1 tsp
turmeric powder 1/4 tsp
onions 1.5 medium-sized, chopped fine
coriander leaves 2 tbsp(chopped)
jaggery / sharkara 1 small piece
water 2 cups
oil 3-4 tbsp
to garnish
farsan 1 cup
onion 1 fine chopped
cilantro 3 tbsp chopped
pomegranate kernels 1/2 cup(optional)
Method
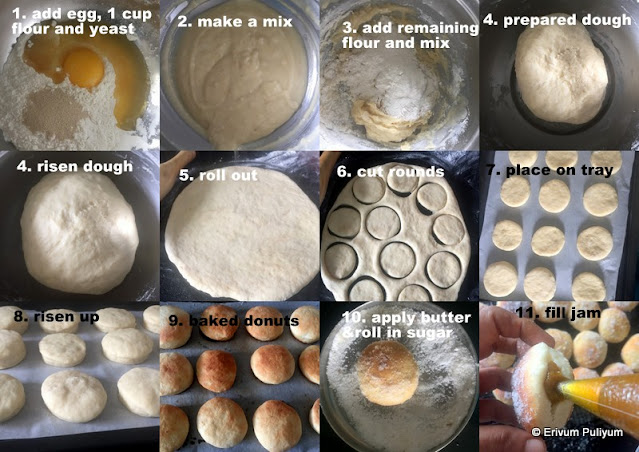
PAV MAKING
I have already shared the
Pav Bread. I followed the same recipe and prepared the pav, below is the glimpse of the prepared pav.
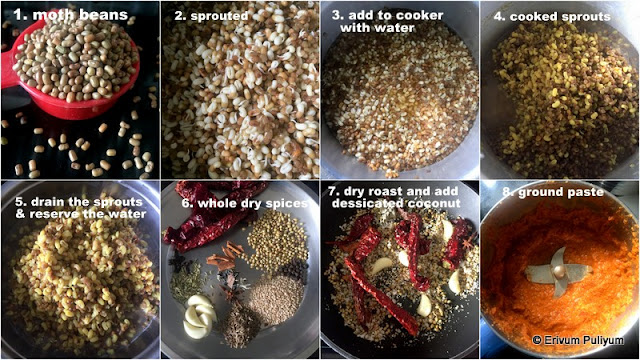
SPROUTING MOTH BEANS
The moth beans(1 cup) are washed and soaked in water for -7 hours. Then removed the moth beans from water and tied in a muslin cloth, kept covered in a casserole to sprout. Sprinkle a little water each time you feel the cloth turns dry say about after 12 hours when you check. The sprouts may take around 36-48 hours to fully sprout. Wash this sprouts under running water and is ready to use.
COOKING SPROUTS-
Add the sprouted moth beans to a cooker. Add 2 cups water, turmeric powder and salt. Close the pressure cooker with weight. Cook for one whistle and leave to release pressure.
FOR SPECIAL MASALA(see pics above)
Keep a heavy bottomed pan and add the oil listed in special masala. To this add the coriander seeds, sesame seeds, star anise, fennel seeds, cumin seeds, stone flower, dry Kashmiri chilli, cinnamon, peppercorns, cloves, garlic cloves and finally add dessicated coconut at the end. If you're using fresh coconut, then add a little earlier so that it gets roasted nicely along with the dry spices. Switch off flame and cool.
Add these spices to a blender jar and add a little water to make a smooth paste. OR If you are making big batches, powder the roasted spices without adding water and store in sir tight containers and place in refrigerator.
FOR MAKING USAL-
- Heat oil in a pan and splutter mustard seeds. To this add cumin seeds and add chopped onions. When the onions are sautéed half way, add the ginger-garlic paste. Sauté till raw smell disappears. Then add turmeric powder and hot chilli powder(if you like the masala bland then add kashmiri chilli powder, but the moth beans need a little spike in spiciness to get the real flavours).
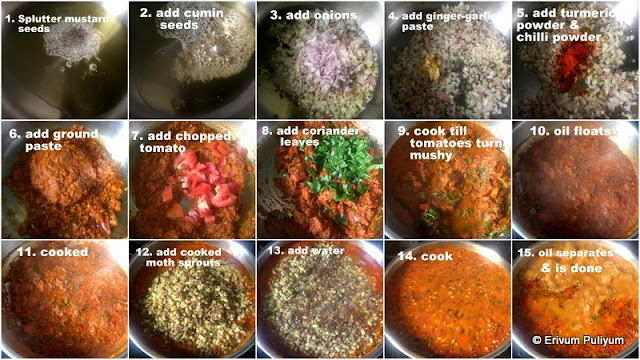
- Add 2tbsp of the ground masala paste and refrigerate the rest of the masala (you can use within 4-5 days).
- Add the half chopped tomato, mix well. To this add chopped coriander leaves. Now cook covered till the tomatoes turn mushy. Add salt lightly. Cook till the oil floats on the surface.
- Finally, add the cooked sprouts with water and add about 1.5 cups more water too. Add the piece of jaggery and cook covered for about 6-7 minutes till the oil with kat starts to float. Switch off flame and leave to cool slightly for 5-6 minutes. Then remove the kat in a bowl so that you have a nice garnish ready when serving misal pav(optional step).
ASSEMBLING MISAL PAV
- In a plate, take the sprouts without much gravy and add to the plate. Then add the gravy, add chopped onions, chopped cilantro, handful of farsan and then add few tbsp of reserved kat on top.
- On the sides, place the pav bread and chopped onions, cut wedges of lemon and chopped cilantro.
- Serve warm and enjoy. We did add a few pomegranate kernels too which is strictly optional, but we liked it.
NOTES* Adding tomato is optional in the masala. Some people do add tamarind pulp too. But the sour flavours are optional.
* Add kashmiri chilli powder to the usal too if you like less spicy. But we like a little spicy in the gravy, so added hot chilli powder.
* I have used homemade farsan, but you can use store brought ones. I shall share the recipe of farsan sometime later.
RELATED POSTS
.png)


.png)
.png)