Print Friendly and PDF

Friday, December 23, 2022

Dates Carrot Cake (Bakery Style)

Wishing all my readers a blessed & happy Christmas !!
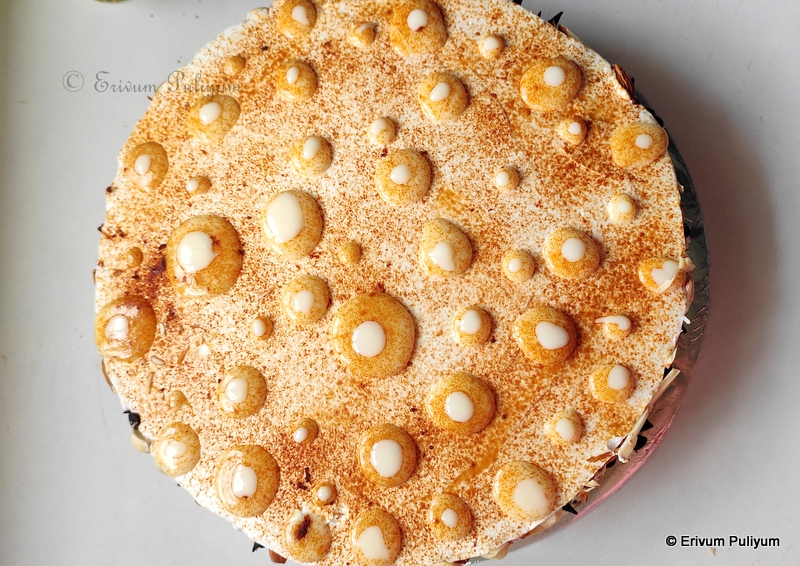
Have you tried a dates cake? Am sure most of you must have baked one if you are a baker. But this cake is something that we loved a lot, carrot and dates. This cake is an eggless, butterless version but is a super moist, delicious cake.This cake tastes best the next day after baking. I have tried baking this cake quite a few times now, and each time I have fallen in love with the texture of the cake. The carrot speckles in the cake are so evident and the beautiful dark colour compliments well with the Christmas theme cakes like plum cake. I would say if you plan to bake something in the last minute, then this is a great choice as all the ingredients are readily available and there is no use of beater. Do share the pics and feedback too if you try this out this Christmas season. Enjoy !!


Preparation time ~ 15 minutes
Baking time ~ 35-40 minutes
Author ~ Julie
Serves ~ a 6' cake 
Ingredients
all-purpose flour (maida) 1 1/4 cups
baking powder1/2 tsp
baking soda 3/4 tsp
dates 13-15
milk 1/2 cup+ 1/4 cup
carrot 3/4 cup grated or two medium-sized
veg oil 1/2 cup
sugar 1/2 cup granulated 
cinnamon 1' piece
nutmeg 1/2 tsp
cloves 4
almond chopped 1/4 cup


Watch on YouTube -


Method
  • Add the deseeded dates in warm milk
  • Sift the flour, baking powder baking soda and salt twice.
  • Add the granulated sugar, cinnamon, cloves and nutmeg. Powder till smooth. Keep aside.
  • Peel and grated the carrots. Add 2 tbsp flour to the grated carrots, mix and keep aside.
  • Pre-heat oven to 350 degrees F or 180 degrees C and line a tray with parchment paper and apply oil, dust with flour. Keep aside.
  • Add the dates soaked in milk and grind smoothly to a fine paste.
  • Add the paste to a bowl, add oil. Mix well. To this, add the flour mix in batches.
  • Slide in the flour mixed grated carrots. Add the remaining 1/4 cup milk in batches.
  • Add the batter to the prepared cake tin. Garnish with chopped almonds.
  • Bake in preheated oven for 35-45 minutes (mine was done in 35 minutes). I gave the top rod in the last 3 minutes.
  • Remove to wire rack when done. Cool completely before cutting in slices. This cake tastes best the next day. Enjoy !!


NOTES
* You can add 1/2 tsp vanilla extract.
* You can add 1/4 cup chopped almonds or cashews too in the cake.


RELATED POSTS


Tuesday, December 20, 2022

Venad Paal Konju (Chef Pillai Special)

Venad Paal konju is a simple recipe that can be made in no time if you have fresh prawns ready at hand. The prawns are cooked in thick coconut milk, which is then converted to virgin coconut oil as the prawns get cooked. So there is no need to add any extra oil. The prawns are soft, juicy and has the nutty flavours of the coconut. This is Chef Suresh Pillai's recipe that he showcased in his page, I always wanted to try this out because of the simplicity. Am glad that I finally tried this out, all loved it at home. As Christmas is around the corner, do try this out if you are looking for some easy appetizer for Christmas lunch.


Preparation time ~ 15 minutes
Cooking time ~ 15 minutes
Author ~ Julie
Serves ~ 3-4
Ingredients
for marination 
prawns / konju 500 gms, cleaned & deveined
turmeric powder 1/2 tsp
pepper powder 1/2 tsp
chilly flakes 2 tsp
salt to taste
coconut oil 1 tsp
garlic crushed 2 tsp or 5-6 cloves

for cooking
coconut milk 1/2 cup
curry leaves 2-3 sprigs, cut 
coconut oil 2 tsp
ginger julienne 1 tsp


Watch on YouTube


Method
  • Wash, clean and de vein the prawns. Drain the water and add the ingredients listed under marination.Crush the garlic and add to the marination, leave marinated for 30 minutes.
  • Mix the coconut milk, coconut oil and curry leaves. Keep aside.
  • Heat a pan and add the marinated prawns (NO NEED TO ADD OIL). Add as a single layer and cook for 2 minutes. Flip the prawns in the other side and cook another 2 minutes.
  • Now add a spoonful of coconut milk mixture. Finally, add the full coconut milk as it gets absorbed.
  • Cook the prawns in the coconut milk, adjust salt if needed. Add in the julienne ginger and green chillies (if using).Finally dry up the coconut milk and switch off flame.
  • Serve warm as a starter or appetizer. Enjoy !!


NOTES
* You can add 3-4 vertical slit, green chillies along with ginger.

Related Posts


Tuesday, December 13, 2022

Grilled Sprouts Sandwich

Sprouts sandwich is a simple-to-make sandwich but a filling and healthy one that you can prepare in a jiffy. No much cooking and all you need is the spicy green chutney and sweet tamarind chutney which compliments well to the sandwich. The best part of this sandwich is that there is no use of potatoes in this recipe. I have prepared both these chutneys at home, the recipe link is here. You can use store brought chutneys too. The sprout making I have already shared here in the moth sprouts tikki, pls check this link. I have used moth sprouts, but you can use any sprouts of your choice. Enjoy !!

Here is a YouTube #shorts on sprouts sandwich, watch and try on!!


Preparation time ~ 5 minutes
Cooking time ~ 10 minutes
Author ~ Julie
Serves ~ 5 sandwiches
Ingredients 
bread slices 8-10
sprouts 2 cups(I took moth sprouts)
besan 2 tbsp
onion 1 medium size, chopped
ginger 1/2 tsp, chopped
green chillies 1, fine chopped
turmeric powder 1/2 tsp
chilly powder 3/4 tsp
coriander powder, 1/2 tsp
spicy green chutney, 4 tbsp
sweet tamarind chutney, 4 tbsp
butter or ghee 2 tbsp
salt to taste
oil 2 tbsp


Method
  • Roast the besan in a pan for 3 minutes on low flame till the raw smell of besan disappears.
  • Heat a pan and add oil. Add chopped onion, chopped ginger, chopped green chilli. Sauté till the onions are translucent.
  • Add the spice powders on low flame, add in the sprouts and cook for 3-4 minutes. Add salt to taste. Add in the roasted besan and mix well. Switch off flame, once everything looks combined.
  • Apply ghee or softened butter on both slices of bread, add spicy green chutney on one slice and sweet tamarind chutney on the other. Add 2 tbsp of the sprout mixture to the slice and close with the spicy chutney slice.
  • Apply ghee or butter on top and place on a heated tava. Grill the sandwich until crisp and then apply ghee on the top slice, flip the other side. Grill for a minute and then remove to a plate. Repeat making other slices.
  • Cut and serve warm with both chutneys, enjoy !!

NOTES
* You can use any type of sprouts for this recipe.
* I used a mix of hot chilli powder and kashmiri chilly powder.
* I have already shared the making of moth sprouts in this video, please check.
* Homemade spicy green chutney and sweet tamarind chutney is here.

Please check out a few more sandwiches-


Wednesday, November 30, 2022

Ragi Dates Malt

Ragi Dates Malt is a super healthy, delicious drink that can be made by grinding whole ragi or ragi flour. I prefer using whole ragi for this process. Ragi is soaked and then ground to a fine paste, strained and the milk is then extracted. Lately I have learnt that millets should be soaked, and the soaked water should be discarded and used, which enhances the absorption of nutrients. I have not used milk in this process as milk hinders the absorption of iron in ragi and dates. You may or may not add milk, replacing the water. I have already shared a panjipullu kurukku or ragi porridge using milk, you can check the link here. If you love the combo of dates and ragi, then give this a try.


Preparation time ~ 10 minutes
Cooking time ~ 15 minutes
Author ~ Julie
Serves ~ 4 Ingredients whole ragi 1/2 cup water 3 - 4 cups dates deseeded 10 cardamom powder 1/2 tsp granulated sugar 1 tbsp almond slices 1 tbsp


You can view the recipe as YouTube #shorts here.
Method
  • Soak the ragi for 4-5 hours, drain the water and add to a blender jar. Grind to a smooth paste and extract the milk by adding water. Grind again till you have only the dark portions of ragi alone left in the strainer, discard that.
  • Add the dates to a blender jar and grind smooth. If using thick dates, then soak and grind. I used soft dates, so didn't soak. Mix this paste to the ragi milk.
  • Heat the mix on low flame, else the bottom mix may thicken faster and get burnt. As it gets cooked, the ragi milk thickens. Add cardamom powder, and granulated sugar towards the end, give a quick stir Serve in glasses and garnish with almond slices.
  • Add the dates to a blender jar and grind smooth. If using thick dates, then soak and grind. I used soft dates, so didn't soak. Mix this paste to the ragi milk.
  • Heat the mix on low flame, else the bottom mix may thicken faster and get burnt. As it gets cooked, the ragi milk thickens. Add cardamom powder, and granulated sugar towards the end, give a quick stir
  • Serve in glasses and garnish with almond slices.


NOTES * I personally don't like adding whole milk to ragi these days because I learnt that the iron absorption from ragi may be hindered if you add more calcium rich milk. Depending on your personal choice, add or delete. * Adding dates enhances again the iron absorption, as dates are a good source of iron. * Add powdered jaggery or sugar, adding a little of these enhances the flavour but it's your wish to omit as there is mild sweetness from dates.
FOR MORE RAGI RECIPES, CHECK THIS LINK HERE.


Friday, November 25, 2022

Chocolate Crinkle Cookies

What are your bake plans for this holiday season?  I, have a never ending list of bakes to try each holiday season and I ended up trying one or two from that, rest is all bookmarked forever :D

Chocolate crinkle cookies is one such bake from the list that I tried recently. These cookies are so good to watch them bake as they press down to flatten and take the shape of a crinkle cookie from a ball. The white icing sugar on top adds beauty to the cookie. Kids totally loved these and have already demanded for another batch soon. Do give this a try and enjoy with a cup of warm milk this season.


Preparation time ~ 10 minutes
Baking time ~ 10-12 minutes
Serves ~ 12 large cookies
Author ~ Julie
Ingredients
all-purpose flour (maida) 1 cup (125 g)
cocoa powder 1/2 cup (50 g)
granulated sugar 1 cup
baking powder 1 tsp
salt 1/8 tsp
eggs 2
vanilla extract 1.5 tsp
oil 1/4 cup
icing sugar 1/2 cup (refer notes)

to make icing sugar (1/2 cup)
granulated sugar 1/4 cup
corn flour 1.5 tsp


Watch on YouTube -


 Method
  • Powder the granulated sugar in a blender jar and grind smooth.
  • Add cocoa powder to a bowl, add the powdered sugar. Mix this well. 
  • ICING SUGAR DIY- If you have store brought icing sugar, then forget this step. Otherwise, go ahead and prepare this up to roll the cookies. Add 1/4 cup granulated sugar to the same blender jar and add 1.5 tsp corn flour. Blend until sugar is smoothly powdered. Keep aside till you roll the cookies.
  • In the same blender jar, add the eggs. Blend until smooth. To this, add the vegetable oil and blend again. Add the liquid to the cocoa sugar mix and combine. Add the vanilla extract too. Mix smoothly without lumps.
  • Finally, sift the flour, baking powder and salt over the mix, and you will get a sticky dough. Cover with a cling wrap and refrigerate for 2-3 hours or overnight.
  • Remove, after chilling, roll out small portions of the dough in balls. I got 12 large balls or make 24 small balls. Roll the made balls in the prepared icing sugar and keep on a tray lined with parchment paper.
  • Preheat oven to 350 degrees F/ 180 degrees C for 10 minutes. Place the tray and bake in preheated oven for 10-12 minutes. The cookies are soft just after bake, so cool in the pan for 10 minutes and then transfer to a wire rack to cool completely. 
  • Enjoy with a cup of warm milk, or store in airtight containers till use.
                                                     

NOTES
* Depending on the oven temperatures, keep a close watch on the oven temperatures to prevent burning.
* I added 3/4 granulated sugar to make these cookies, but you can go up to 1 cup of granulated sugar.


Tuesday, November 15, 2022

Nutty Bubble Cake

Nutty Bubble Cake is a simple-to-make icing cake using sponge cake, whipping cream, nuts, white chocolate ganache and boost powder. The white chocolate ganache is dropped like bubbles on top and dusted with boost powder that gives the cake the bubble look. 

I prepared the cake from scratch by making a basic vanilla sponge cake. I soaked the cake in boost mixed condensed milk syrup. To this I added whipped cream in the layers and covered the sides of the cake with cashews, almonds and dark chocolate chips. Finally, topped the cake with bubbles made from white chocolate ganache ad dusted with boost powder. The cake is very soft, delicious and melt in mouth. Do give this a try and enjoy !!


Preparation time ~ 30 minutes
Baking time ~ 35 minutes
Author ~ Julie
Serves ~ >1 kg (1200g) cake
Ingredients 
to make sponge
all-purpose flour 1 cup (250 ml)
baking powder 1 tsp
baking soda 1/4 tsp
salt a pinch
powdered sugar 3/4 cup 
vanilla essence 1 tsp
oil 1/4 cup 
eggs 4
milk 1 tbsp

for whipped cream
whipping cream 1.5 cup

to soak
water 1 cup
condensed milk 3tbsp
boost powder 2 tsp

to chocolate ganache
white compound 50 gms
half cream 3 tbsp

for garnish 
cashews 3tbsp
almonds 3 tbsp
dark chocolate chips 3 tbsp


Watch on YouTube -


Method
To make sponge cake
  • Powder the granulated sugar (1/2 cup) to get 3/4th cup. Prepare an 8' tray with parchment paper at the bottom and brush oil on the sides, dust the sides with flour. 
  • In a bowl, sift the maida, baking powder, baking soda and salt twice. Keep aside.
  • In another bowl, beat the eggs until frothy. Add powdered sugar in batches and beat well until pale and creamy.
  • To this add the vanilla extract and oil, give a quick mix. Add the dry ingredients in batches and mix well (don't over mix the batter).
  • Pre-heat oven to 350 degrees F or 180 degrees C for 10 minutes.
  • Pour the batter in prepared tray and place in pre-heated oven. Bake in oven for 30-35 minutes, mine was done in 35 minutes.
  • Remove from oven and cool on a wire rack for 10 minutes and then remove from tray. Cool completely.

To make whipping cream
  • Chill the bowl and blades. Then add the whipping cream to the bowl and beat for 4-5 minutes with a beater. The cream should get stiff peaks and when the bowl is tilted upside down, the cream shouldn't slide down. Cover and refrigerate until use.
To make soaking syrup
  • Boil a cup of water in a pan and add the boost powder. Mix well. To this add the condensed milk. Mix well and keep aside.
To prepare white chocolate ganache
  • Add the chopped white chocolate in a bowl and double boil the chocolate to melt.
  • To this, add the whipping cream and mix well until smooth. Keep aside.


Assembling
  • Cut the cooled sponge cake using a serrated knife in three equal parts.
  • Add a dollop of cream on the board and place the first layer. 
  • Brush the soaking syrup all over the layer. Then pipe the whipping cream using a piping bag or just like that.
  • Add the second layer of cake and brush soaking syrup, add the cream. 
  • Place the final layer and then brush soaking syrup. Add the whipped cream on top and sides to complete the crumb coat. Refrigerate this cake for minimum 30 minutes to 2 hours to set.
  • Finally, add the remaining layer of whipped cream to coat the cake nice and good.
  • Add the cashews, almonds and dark chocolate chips on sides. 
  • In a piping bag, add the white chocolate ganache and cut a small hole. Pipe in small rounds on the top of the cake in different sizes. Finally, dust the cake with boost powder.
  • Pipe in a few smaller bubbles on top of the existing ones to highlight the bubbles a bit.
  • Chill the cake in refrigerator for 1 or 2 hours and enjoy !!!!
NOTES
* I have used a mix of boost powder and condensed milk to make soaking syrup, but you can add whole milk and boost with sugar. I have not added any extra sugar, as condensed milk had sugar.    
* You can use any basic vanilla sponge cake to make this cake if you don't want to try this cake from scratch.


Thursday, November 03, 2022

Bread Pizza Sandwich

Looking for some quick after school snacks??
Pizza flavours are liked by all kids, but making pizza from scratch takes a lot of time. Moreover, pizza base may not be readily available at all times at home.Then, this sandwich becomes a great choice that can be prepared quickly if you have some bread slices. Kids would love to have a snack with pizza flavours and this can be served warm. Do give this a try and enjoy !!


Preparation time ~ 10 minutes
Cooking time ~ 10 minutes
Author ~ Julie
Serves ~ 5 sandwiches
Ingredients 
bread slices 8-10
chopped capsicum 3 tbsp
corn kernels 3 tbsp
black olives 3 tbsp
chopped onion 3tbsp
pizza sauce 3-4 tbsp
pizza seasoning 2 tsp
cheese slices 5
unsalted butter 2 tbsp


Watch on YouTube -


Method
  • Take two bread slices. Apply softened butter on one, then spread pizza sauce.
  • Add a cheese slice and place the toppings one by one-chopped capsicum, chopped onion, black olives and corn kernels. Sprinkle the pizza seasoning on top. 
  • Apply the softened butter on other slice and apply pizza sauce. Cover this slice on top of the toppings.
  • Finally, apply softened butter on the top slice.
  • Heat a non-stick tava and place the prepare sandwich with buttered side down, touching the tava. Press with a spatula to melt the cheese slice and to keep the toppings intact. Apply butter on the top side and flip. Cook this side another 45 seconds. Remove from tava and cut in desired shapes and enjoy.
  • Repeat the same steps of making the sandwich and cook on tava until toasted. 

NOTES
* Buttering the underside of bread before applying pizza sauce is to prevent seepage of pizza sauce in the bread slices and prevents bread soggy.


FEW PIZZA FLAVOURS THAT YOU MAY BE INTERESTED-


Friday, October 21, 2022

Besan Burfi | No Milk Powder, No Mawa Barfi ~ Diwali 2022

Wishing all my friends a Happy and Prosperous Deepavali :)

How are your last minute preparations going on?
Though we don't celebrate Diwali, I love this festival very much because of the positive vibes. The lighting, decluttering and paintings done at home, everything everywhere looks neat and tidy, a lot of variety sweets at Halwai shops and the fire crackers all create a great mood. 

I personally don't like the fire crackers, thinking of the impact this causes on our air. It would have been nice, if the crackers are lit at one place for a community or for a housing society which will lessen the quantity of crackers burnt compared to what each individual homes burn every year. This is just an opinion of how we can help the environment and no hard feelings against Diwali. Anyway, that's each person's decision to help the air for the upcoming generations.

Let's get back to today's recipe - another simple one, but a little tricky. I have been struggling to get a perfect besan barfi for the past 4-5 trials. But am happy that I learnt finally and this is so simple to make as it hardly takes any time. Roasting the besan and getting the sugar syrup to one string consistency is IMPORTANT, no shortcuts. I really loved the beautiful colour of the barfi because of the pinch of yellow colour added, which was lacking in my previous trials. This really gives the exact colour like halwai shops. Do read below and start off making the recipe. Enjoy !!


There are many lesson learnt during this experimentation which are shared below-
1. Use a non-stick pan and a spatula for easy mixing.
2. Use melted ghee for correct measurements. The bowl in which you measure the besan can be used to measure the other ingredients, that means the besan: sugar : ghee ratio will be 1:1:1/2. 
3. Roast the besan excellent for the correct texture and taste. Roast on low flame without changing colour for about 6-7 minutes for 1 cup besan with ghee. This is important else the besan will have raw taste. The besan may not cook properly. Sprinkle few drops of water on the surface to check, if it sizzles then besan is well roasted.
4. Get the sugar syrup to one string consistency and mix this well with besan mixture.
5. Check if the besan, sugar mixture together is leaving the sides of the pan like a mass. Cook till you achieve this stage because the barfi may turn chewy otherwise.


Preparation time ~ 20 minutes
Cooking time ~ 20 minutes
Author ~ Julie
Serves ~ 9-10 pieces barfi
Ingredients
besan/ kadalamavu 1 cup (120 gms)
melted ghee / neyyu 1/2 cup
granulated white sugar 1 cup (200 gms)
water 1/2 cup
cardamom powder 1/2 tsp
yellow food colour, a pinch


Watch on YouTube -


 Method
  • Sift the besan without any lumps. Keep aside, this helps to yield a smooth burfi.
  • Heat a pan on low heat and add the sifted besan.To this, add the melted ghee. 
  • Then, mix the besan with ghee. Initially the ghee and besan mixture will tun lumpy but as besan gets roasted, the ghee will float on top. It may take 6-7 minutes on low flame to reach that stage. (Sprinkle few drops of water on the surface of besan, if it sizzles then the besan is well roasted) Switch off flame and move from heat or keep mixing few more minutes, else the besan may change colour due to residual heat. Add the pinch of food colour and give a quick stir. The colour may not show up now in the besan, but as you add the sugar syrup, the colour becomes prominent.
  • Heat another pan and add the sugar. To this, add 1/2 cup water and bring this to a boil. Let the syrup get to a one string consistency. Add cardamom powder, mix well. Check the sugar syrup by pressing the syrup between your thumb and index finger, this should form one string. Switch off flame and add the sugar syrup to the warm besan mix little by little and combine well.
  • If the besan mix becomes a little watery, then place on low heat and continue to cook till the mix starts to leave the sides of the pan.
  • Line a tray with parchment paper and apply oil/ ghee on the sides. Transfer the burfi mix to the pan and tap the tray a few times to release any trapped air bubbles.
  • Garnish with sliced pistachios. Leave to cool in tray for 15- 30 minutes at room temperature.
  • Then pull out the barfi mix with the parchment paper. Cut in desired shapes and enjoy !!

NOTES
* Roast on low flame only else the besan gets burnt.
* Once sugar syrup reaches on string consistency, switch off flame and add little by little in the besan mix. Give a quick stir.

MORE BESAN SWEETS AND SNACKS DIWALI RECIPES


Thursday, October 20, 2022

Baked Cheesy Beet Triangles

Looking for a healthy after school snack??Then try this out healthy and simple snack with wheat flour, beets, cheese and some spices. They can be prepared much in advance and the final can be done just before serving so that you can enjoy crunchy triangles with some guacamole dip. 

I have shared an Insta reel and YouTube shorts on the recipe, please check that out.

Baked Cheesy Spinach Triangles was posted by me sometime back, and so this beet triangles was quite similar and tried almost the same proportions. The acceptance of the cheesy spinach triangles was the much-needed boost to try out the beets version. Luckily, the beets triangles also finished in no time and I prepare these as an after school snack for kids, and they were totally mad over these. I served the cheesy triangles with guacamole dip, but you can always make mayonnaise dip or ranch.Spinach triangles give a green colour, and it's easy to include greens, esp for kids (which they otherwise wouldn't have eaten spinach) and beet triangles are pink which is very appealing to kids with all health benefits of beets.They taste similar to the tortilla chips and are very crisp.Try making these at home and enjoy with a spicy dip or a salsa !!


Preparation time ~ 10 minutes
Cooking time ~ 15 minutes
Serves ~ 4-5
Author ~ Julie
Ingredients
wheat flour 1 cup
fine semolina 1/2 cup
chilly powder/chilly flakes 1/2 tsp
grated mozzarella cheese 1/2 cup
beets purée 1/3 cup or 1 small beet + 1/3 cup water
baking soda 1/4 tsp
salt 1/3 tsp
oil 2 tbsp


Method
  • In a bowl, add flour, semolina, chilly powder/flakes, salt and baking soda.Combine well.
  • Add the grated mozzarella cheese, mix well to get a crumbly mixture.
  • In a blender, add the peeled, washed beets and water 1/3 cup.Blend till smooth.
  • Add the purée little by little to the mixture until you get a stiff, firm dough.Semolina absorbs water and so wait till rest time is over.Leave to rest for 10-15 minutes.If the dough is very stiff, add a little more left over purée if any or water to get a pliable but firm dough. Add the oil and mix well.
  • Make 6-7 large balls of the dough and lightly dust each ball with flour and start rolling the dough in a very thin circle like chapthis. Be gentle when rolling out as beets dough will be thinner than usual chapathi dough.So, may be stickier too.
  • Heat a non-stick pan or tava.When hot, transfer the rolled chapathis/discs on to the tava.Fry both sides like you do for chapathis until you see brown spots here and there.
  • Brush little oil on the surface of beets chapathi and remove on a plate.Repeat the same step for all other balls/rolled chapathis.
  • Pre-heat oven to 400 degrees F and cut the discs in halves and then quarters, cut in triangles.
  • Place the cut triangles in a tray and bake in the oven for 5-6 minutes.Remove from oven and flip the other side, place again in oven for 3-4 minutes.Look for slightly brown edges, the chips are crisp and ready.
  • Serve with some guacamole or ranch dip !!


NOTES
* If you wish to deep-fry them, then cut it in triangles soon after you make chapathis shapes.Deep-fry in hot oil on medium heat until crisp.
* You can use all-purpose flour too.
* You can add 1/2 tsp cumin seeds or 1/2 tsp roasted cumin powder to the dough preparation.
* You can use butter for added flavour instead of oil.
* You can even cut out left over chapathis and bake them up for a quick snack the same way.


Friday, October 14, 2022

Mushroom Pepper Roast | Koon Kurumulakittathu

Did you know mushrooms are the only source of vitamin D in the produce aisle? These are the only exceptional one to the rule that plants don't naturally contain vitamin D (read it here).They also are a rich source of many antioxidants, minerals and has beta glucans (an important factor for immunity stimulating there by reducing chances of allergies). What more are you looking for in such healthy mushrooms, go ahead and try out your favorite recipes. Also, please scroll down the page for more mushroom recipes as well.

Mushroom Pepper Roast is one of the quickest stir-fry that you can try using button mushrooms. This can be served with chapathis or hot steamed rice. Mushrooms shouldn't be left in water when washing, as they tend to absorb water. Mushrooms leave out water and shrink on cooking, they cook faster than other veggies. This is a yummy stir-fry with shallots, ginger-garlic paste, green chillies and spices. Whole peppercorns are crushed and added for that crunchy bites in the mushroom roast. Give this a try and enjoy !!


Preparation time ~ 15 minutes
Cooking time ~ 15 minutes
Author ~ Julie
Serves ~ 4
Ingredients
button mushrooms 200 g
onion 1 medium-sized, diced
shallots, 1 handful crushed
ginger-garlic paste 1 tsp
green chillies 2 vertical slit
fennel powder (perumjeerakam) 1/2 tsp
whole peppercorns crushed 1.5 tsp
coriander powder 1.5 tsp
hot chilli powder 1/2 tsp
turmeric powder 1/4 tsp
salt to taste
oil 2tbsp + 1 tsp(garnish)
curry leaves, a sprig
coriander leaves chopped 2 tbsp


Watch on YouTube -


Method
  • Wash under running water and drain immediately. Clean the mushrooms by peeling the outer skin of the mushrooms if soiled. Cut in halves and quarters if very big.
  • Add oil to a pan and add the ginger garlic paste. Sauté until raw smell disappears.Add the crushed shallots and sauté until translucent. Slide in the diced onions and green chillies. Sauté till light brown.
  • Add the spice powders on low flame and sauté. To this, add curry leaves. Add 1/2 cup water and cook covered for 2 minutes until onions become soft.
  • To this, add the cut mushrooms. Mix well and add salt. Cook covered for 5 minutes on medium flame. Then, add crushed pepper corns and fennel powder. Mix and simmer covered again for 2 minutes.
  • Adjust salt if needed. Finally, add in chopped coriander leaves. Dry up all moisture left on high flame and add a tsp of coconut oil to finish. Leave covered for 5 minutes and mix. Serve warm.


NOTES
* Mushrooms will leave out water, so don't add too much water.
* Adding coconut oil at the end is optional, just enhances the nutty flavour of coconut oil.


Wednesday, October 12, 2022

Avil Milk (Poha Milk Shake) ~ Malabar Delicacy

Avil Milk shake is a refreshing, healthy milk shake from Malabar or North Kerala. This is available at various street stalls, especially during summer. But these days, many milk shake shops in Kerala serve avil milk and so it's not just confined to Malabar any more. Avil milk is nothing but adding roasted poha, mashed bananas, roasted peanuts to chilled milk. Poha or beaten rice is known as 'Avil' in Malayalam, and so is the name of this milk shake.

Avil milk shakes are available in many different variations and flavours. I prefer using the thin version matta aval or Kerala type red aval. But you can always use thick or thin white poha as well. Local shops used bournvita or boost for an added flavour, but you can always skip that part. You can use coconut milk, almond milk or soy milk for a vegan version. Use roasted cashews or almonds for a peanut free version. Use any ripe bananas for this recipe, but usually mysuru or palayamkodan pazham is used. I used njallipoovan(elakki banana). Also, you can add a scoop of vanilla ice cream topping for added richness. This is quite simple to prepare at home, and you can enjoy anytime. The best part of this drink unlike other milk shakes is that you can eat as well as drink this, the soaked poha puffs up and the roasted peanuts along with tutty fruity adds a nice crunch. Enjoy !!

Please check out my insta handle  for an avil milk reel 😍 Also, on YouTube #shorts.


Preparation time ~ 10 minutes
Cooking time ~ nil
Author ~ Julie
Serves ~ 2 glasses
Ingredients
beaten rice / avil roasted 1/2 cup
roasted peanuts 2-3 tbsp
small banana (njallipoovan / mysuru) 3-4
chilled milk 1.5 cups
granulated sugar 2tbsp
tutty fruity 2tbsp
boost/ bournvita, 1 small sachet


Method
  • Chill the milk before use. You can use pasteurized or boiled whole milk.
  • Dry roast the avil(poha) in a pan until it's nice and crisp without adding any oil or ghee. May take 2-3 minutes on low flame, keep aside.
  • Peel and mash the ripe bananas in a bowl with a fork. Add granulated sugar and mix well.
  • Dry roast the peanuts and peel the skin off once cooled. 
  • To a tall glass, add 2-3 tbsp of mashed banana mix, add roasted avil and roasted peanuts. To this add tutty fruity. Finally, pour in chilled milk. Add again the roasted avil and peanuts. Add tutty fruity for garnish and sprinkle half of a sachet of boost powder.
  • Serve immediately. Mix with a spoon and enjoy.

NOTES
* You can use coconut milk, almond milk or soy milk for a vegan version.
* Use roasted cashews or almonds for a peanut free version.
* Use any ripe bananas for this recipe, but usually mysuru or palayamkodan pazham is used. I used njallipoovan(elakki banana).
* You can add a scoop of vanilla ice cream topping for added richness.
* Use bournvita or boost or horlicks or any other energy powders, or just omit that too.
* You can use chopped cherries or add condensed milk instead of granulated sugar.
* I prefer using the thin version matta aval or Kerala type red aval. But you can always use thick or thin white poha as well.