Print Friendly and PDF
Showing posts with label PUDDING/DESSERTS. Show all posts

Monday, March 30, 2026

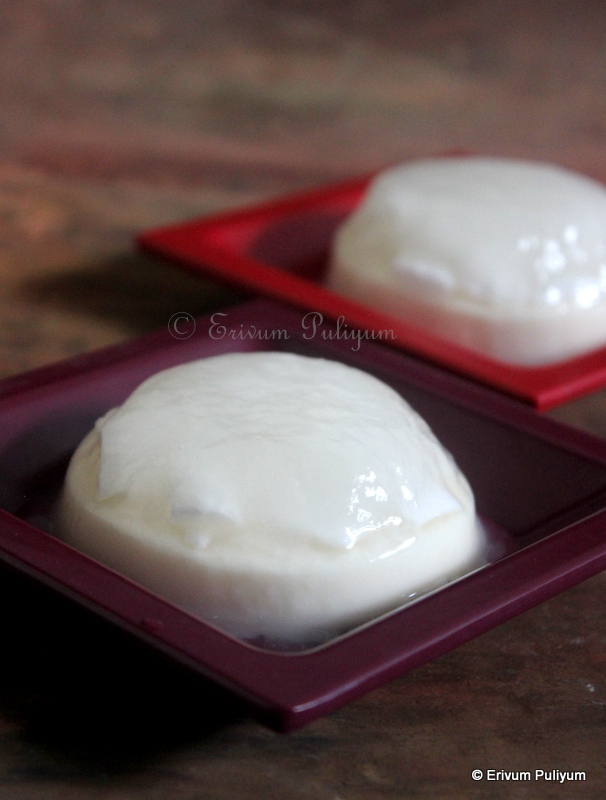
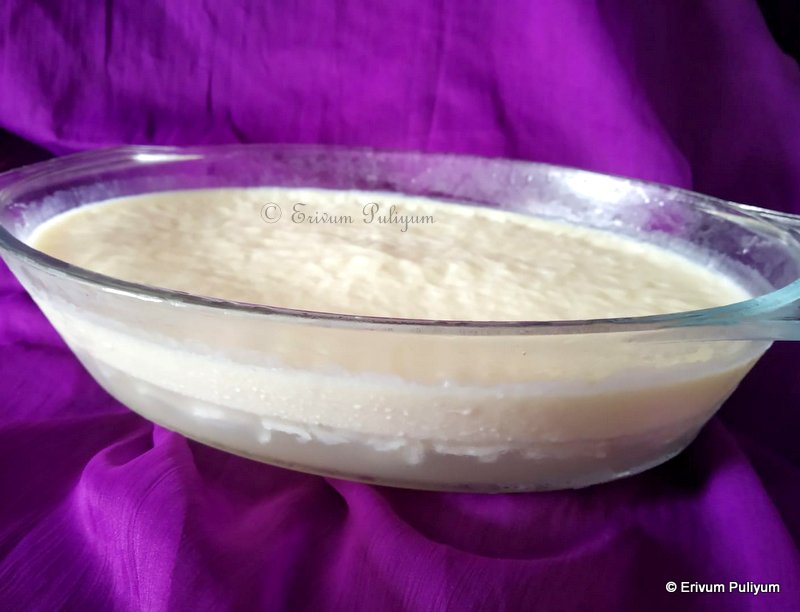
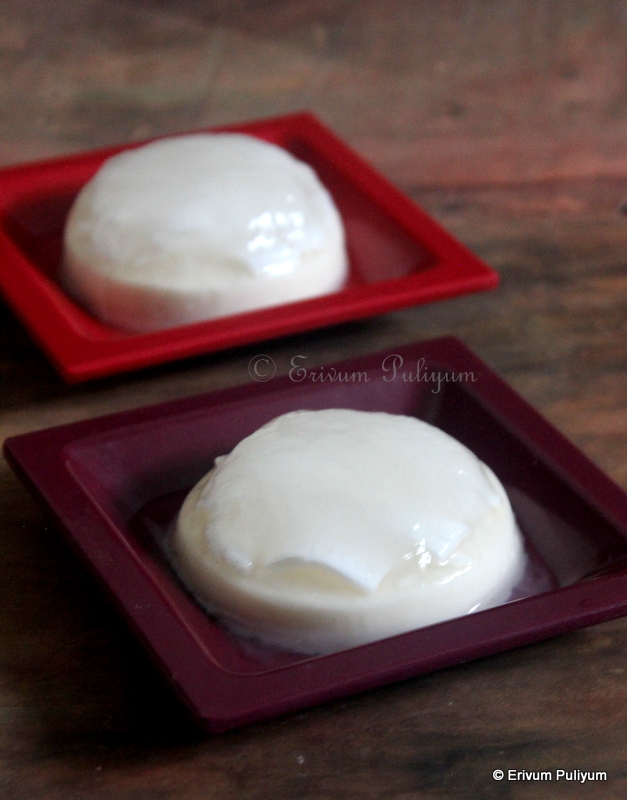
Coffee Pudding (Easy)

If you're looking for some quick pudding for family get togethers or Easter celebrations then here is a simple quick and melt in mouth pudding for all the coffee lovers. No elaborate tasks, no fancy ingredients, simple steps and can be made in advance. Check this out !!


Preparation time ~ 2 minutes

Cooking time ~ 5-7 minutes

Author ~ Julie

Serves ~4 

Ingredients 

Milk 500 ml

Instant Coffee powder 2 tsp

Corn flour 1/4 cup

granulated Sugar 1/2 cup 

Grated chocolate 2-3 tsp


Watch the YouTube #shorts for the making here. 


Method

  • Heat 2 tsp of water and mix the coffee powder in it. Keep aside. Heat the milk is hot, remove 2-3 tbsp of milk and mix with the corn flour without lumps. 
  • When the milk is boiling add the cornflour slurry and mix without lumps. When it starts to thicken, pour the coffee mix. Give a quick mix, cook till the spatula is nicely coated and the mix looks thickened.
  • Switch off the flame & leave to cool lightly. Pour in moulds or pans to set. Wait till the pudding comes to room temperature, then refrigerate 6 hours. 
  • De mould and serve with a garnish of shaved or grated chocolate. The melt in mouth pudding is so good, enjoy !!


Tuesday, October 15, 2024

Chocolate Pudding | Quick Chocolate Dessert

Chocolate pudding is a simple, tasty pudding that you can make in no time. Am always hunting for simple pudding recipes that can be put together with fewer efforts and gets set. The reason for a search for easy pudding is quite simple because after the elaborate meal preparation, the pudding is an extravaganza as everyone prefers something sweet but not a heavy one though. The best part of this pudding can be prepared beforehand and can be refrigerated till use. Enjoy !!


Preparation time ~ 10 minutes
Cooking time ~ 10 minutes
Serves ~ 5-6
Author ~ Julie
Ingredients
milk 2 cups
dark chocolate compound 150 gms
granulated sugar 1/2 cup
agar-agar powder 5-7 g (I used 5 g or 1/2 of the packet)


Watch on YouTube -


Method
  • Chop the dark chocolate in small chunks.
  • In a bowl, add the milk, sugar and agar-agar powder. Give a quick mix and let the agar-agar absorb well for 15 minutes.
  • Add the chopped chocolate, give a quick mix. Place on flame and keep stirring until chocolate is melted.
  • Continue to cook for 3–5 minutes until it's thickly coating the spatula and is thickened.Switch off the flame.
  • Cool and then pour in trays. Cool completely.Refrigerate until set for 2–3 hours.
  • De mould on a plate and then enjoy.


NOTES
* Check the sugar and add as per tastes.
* Don't increase the amount of agar-agar as the pudding becomes hard.


Saturday, June 15, 2024

Quick Mango Dessert | Mango Bread Pudding

Mango bread pudding is a tasty melt in mouth dessert that can be whipped and set in no time. Quite easy to prepare and tastes delicious. I am always fascinated towards less complicated desserts which hardly takes much time to put together as this is the last item to prepare at home and after an elaborate meal, I hardly find time to prepare lengthy desserts. So, for people who love simple to go desserts, then this is a great choice to try before the mango season ends. Check it out !!


Preparation time ~ 10 minutes
Cooking time ~ 10 minutes
Serves ~ 7-8
Author ~ Julie
Ingredients
ripe mango 2
bread slices 7-8
whipping cream 1 cup
granulated sugar 1/2 cup
custard powder 2-3 tbsp
milk 2 cups 
pistachio slices 2 tbsp

Watch on YouTube -


Method
  • Remove 1/4 cup milk and bring the remaining to a boil in a pan. When the milk is heated, add the sugar to dissolve. Keep stirring to prevent the milk from getting burnt at the base of the pan.
  • To the remaining milk, add the custard powder and mix without lumps. Add this mix to the boiling milk and cook till thickened. Continue to stir till you finish and switch off the flame. Leave to cool.
  • In another bowl, add the whipping cream and whip until soft peaks. Keep aside.
  • Trim the edges of the bread slices and keep aside.
  • Wash and cut the mangoes in small cubes. Add one chopped mango to the blender jar and purée without adding water. Leave the remaining chopped mangoes just like that for garnish.
  • Add the puréed mango to the cooled custard and mix. Reserve 1/4 cup mango purée for garnish.
  • ASSEMBLING : In a glass bowl, arrange the bread slices as one single layer. Then add the mango custard mix to cover the bread slices. Divide the chopped mangoes in three and add one part of the mangoes in this layer.Then divide the whipped cream in two and add one part of whipped cream. Smoothen the whipped cream evenly and then arrange another layer of bread slices, custard mix and chopped mangoes. Finally, add the remaining whipped cream and level it up. Add specks of the reserved mango purée and draw designs with a skewer. At the end, add the remaining mango cubes, and pistachio slices.
  • Cover with a cling wrap and refrigerate for 2–3 hours.
  • After 3 hours, remove from fridge and cut in slices and enjoy. 


NOTES
* I have used non diary whipping cream so it has sweetness. But if you use the diary one, please add sugar and whip.
* You can use corn starch instead of custard powder.
* You can add 2tbsp of milk powder along with custard powder to make it richer.
* You can use condensed milk instead of granulated sugar when making custard.


Tuesday, March 12, 2024

Bread Chocolate Rolls (No Cooking)

Bread chocolate rolls, as the name suggests, these are the simplest quick desserts that you can prepare in no time at home with very few ingredients. The only cooking needed is to boil the cream to make the chocolate ganache. I had some chocolate ganache left out after frosting a chocolate cake and so used that. You can use left over whipped cream as filling too instead of the ganache with your desired flavour too.
This dessert gets ready in no time and how simple to surprise your guests. Give this quick dessert no cooking a try and enjoy !!


Preparation time ~ 15 minutes
Cooking time ~ 5 minutes
Author ~ Julie
Serves ~ 6 rolls
Ingredients
bread 6 slices
chocolate ganache 1/3 cup
condensed milk 2 tbsp
milk 1/2 cup
sugar 2-3 tbsp
melted chocolate 2 tbsp
preserved cherries 6


Watch on YouTube -

Method
  • Make the ganache using whipping cream and chocolate compound. I used dark chocolate compound. I made the ganache for frosting a chocolate cake and used only 1/3 cup for making this dessert. Likewise, I have showed the preparation of ganache for the cake frosting, so if you are making only for the dessert, 50 g dark chocolate compound and 2tbsp of heavy cream should be good enough. Prepare the ganache silky smooth and keep aside.
  • Mix the condensed milk with the chocolate ganache and keep aside.
  • Mix the sugar in the milk until dissolved, leave aside.
  • Trim the edges of the bread and flatten the bread slices using a rolling pin. Drizzle the milk mixture to soak the bread lightly on the corners alone, else the bread slice may be soaked too much with the ganache and milk mixture. Add a tbsp of the condensed milk, ganache mix in the center of the slice. Now roll each of the slice very gently so that the ganache don't seep out, and the bread slice shouldn't break. Fix the open ends by adding more ganache mix.  
  • Drizzle the milk mix on the finished rolls. Then, roll them in dessicated coconut, place a cherry and repeat doing the same step for making all chocolate rolls till you finish. Arrange them in a plate and add a little more dessicated coconut to the finished rolls. Though you can start using immediately but refrigerate an hour for best tastes. Drizzle chocolate sauce on top for an added flavour and look.
  • Enjoy chilled !!


NOTES
* You can use left over whipped cream instead of chocolate ganache. In that case, you can add colours & flavours of your choice.
* Add the sweetened milk very less before rolling the slice because the bread slice may break due to soaking. Be gentle while rolling.
* I have used homemade dessicated coconut to roll the bread rolls.


Sunday, July 23, 2023

Mango Kesari | Mango Sheera | Mango Suji Halwa

Mango kesari is a tasty halwa recipe that requires no added colour or flavour. Tastes delicious with puffed up pooris or just like that. I have already posted a pineapple kesari on the similar styles, love these fruit flavoured kesari than the classic kesari or sheera with added colour. This is a seasonal choice that you can try making when you get ripe mangoes in abundance. Now, the season is almost coming to a halt, but still give it a try if you love to make something sweet quickly.


Preparation time ~ 10 minutes
Cooking time ~ 15 minutes
Serves ~ 5-6 
Author ~ Julie
Ingredients 
suji/ rava 1 cup
sugar 1/2 cup
water 2 cups
mango pulp 1/2 cup or 1 medium-sized mango
cardamom powder 1/2 tsp
saffron strands 12-15 strands
ghee 3 tbsp (divided)
almonds 2 tbsp
cashews 2 tbsp
raisins 1 tbsp


Method
  • Wash, peel and cut mangoes in pieces, add to a blender jar and blend smooth without adding any water. The pulp should be 1/2 cup, keep aside.
  • Add ghee(2tbsp) to a non-stick pan and fry the almonds, cashews and raisins. Then remove this to a plate and chop the almonds and cashews when cooled. Keep aside.
  • Add the suji/ rava to the same ghee, continue to roast the suji on medium flame for -4 minutes until fragrant and lightly browned (IMPORTANT STEP).
  • Remove the suji to a plate and then add the water (2 cups). Add sugar to dissolve. When the water starts to boil, add the roasted suji and keep mixing to prevent lumps. 
  • Then add the saffron strands, cardamom powder. Finally, add the mango pulp and give a quick mix. 
  • Add the chopped nuts and raisins. Combine well. Add remaining ghee little by little and give a quick mix. Switch off flame and serve with puris or just like that.


NOTES
* Add the saffron strands when water is boiling for best results. I missed that time.
* You can add 2 more tbsp of ghee for tastier version.
* Mango kesari can be served warm or cold as per personal preference.
* I used neelam mango for this recipe.


Tuesday, January 24, 2023

Strawberry Pudding (No Gelatin, No Whipped Cream, No Agar Agar)

Strawberries are in season and this is the time to make the best of fresh strawberries. I tried making this simple pudding with the basic ingredients available at home. The pudding can be whipped up in no time and is a crowd pleaser for small kitty parties or birthday parties.The pudding tastes yummy with the tangy sweet topping with little bits of cooked strawberry and soft custard. This pudding is very light pink in colour, if you wish brighter colour add a drop of pink, which I haven't added (this is the natural colour of strawberry purée in pic). Do give this a try and enjoy !!

Please scroll down to the end of this page for more strawberry recipes.

Preparation time ~ 10 minutes
Cooking time ~ 15 minutes
Author ~ Julie
Serves ~6-8 small pudding cups
Ingredients
milk 2 cups
sugar 1/2 cup (2 tbsp+ 1/4 cup+ 2 tbsp)
corn starch/ flour 1/3 cup
strawberry 1 pack (250 gms)
lemon juice 2 tsp

Method
  • Wash and clean the strawberries. Remove the stem and cut the strawberries. Divide the strawberries in half. Add half of the strawberries to a blender jar, add 2 tbsp sugar. Blend until smooth. Keep aside the cut strawberries, blended purée.
  • Mix 1/4 cup milk to corn flour without lumps and keep aside.
  • Heat a pan and add remaining milk. Boil the milk, add sugar (1/4 cup). Mix well, add the corn flour mixed milk to the boiling mix and cook till this thickens considerably. Switch off flame and leave to cool.
  • When the mix is warm, add the puréed strawberry mix. Give a quick stir (no need to cook again).
  • Strain this mix to get a smooth pudding consistency. You may have to move with a spatula in the mix to strain.
  • Finally, add to pudding bowls and refrigerate until set or two hours.
  • In another pan, add the cut strawberries and 2 tbsp sugar. Add a tbsp of water and keep stirring continuously until the strawberries are cooked and sugar is dissolved. The sauce thickens, add a tbsp of lemon juice and switch off flame. Cool slightly and scoop on top of the pudding. Refrigerate again for half an hour. Enjoy !!

NOTES
* The main pudding is mildly sweet which we liked, but if you are a sweet tooth add another 2tbsp of sugar.
* Adding lemon adds a tangy flavoured topping and prevents sugar crystallization.
* This pudding is very light pink in colour, if you wish brighter colour add a drop of pink. I left in the natural colour.
* If you love to demold the pudding, then spray cooking oil or brush oil in the cup. Add the topping first and then add the custard, demold after refrigeration and enjoy !!

Friday, June 17, 2022

Vermicelli Barfi | Semiya Barfi (VIDEO)

Semiya or vermicelli is popularly used in making kheer or payasam. What else do you try out frequently with semiya or vermicelli? The other popular item made at home is Vermicelli(semiya) Upma that I have already posted. I had bought thin vermicelli or nylon vermicelli for making the kunafa. Then, I prepared sheer khurma too, but then there was still some leftover. So thought to make this barfi which was a good thought as everyone loved it at home. The best part of making this barfi is that this sweet doesn't have many calories and sugar compared to the amount usually added in Indian sweets in general. And so, this sweet may not taste very rich but believe me, this barfi is good in its own way.

The thick kind of vermicelli may not taste very good for making this barfi as the strands may be crunchy. However, if you like biting the crunch, then try with the thick type vermicelli. The thin variety when cooked is  soft, yet the strands are identifiable in looks alone, which gives a unique look. If you are hunting down on trying some simple sweet recipes that you would like to prepare in a jiffy, then this is the right choice. Do give these a try and enjoy !!


VIDEO LINK-


Preparation time ~ 10 minutes
Cooking time  15 minutes
Author ~ Julie
Serves ~ 6-8 pieces
Ingredients
nylon vermicelli(thin) 3/4 cup
pottukadala (roasted bengal gram) 1/4 cup
ghee 1.5 tbsp
milkmaid / condensed milk 1/3 cup
milk 1/2 cup
cardamom powder 1 tsp
sliced pistachios 1 tbsp (garnish)


Method
  • Dry roast the pottukadala(roasted bengal gram) and grind to a smooth powder. Keep aside. 
  • Heat a pan and add ghee. To this add vermicelli and dry roast for 2 minutes till lightly brown. Then add pottukadala powder and roast with it till the raw smell disappears. Add milk to the mix and the mixture absorbs the milk. Then, add condensed milk, cardamom powder and mix well. The mixture starts to leave the pan and becomes a ball. Switch off the flame. 
  • In the meantime, line a bread tray with parchment paper, add little sliced pistachios and transfer the mixture. 
  • Level the mixture with a spoon and add sliced pistachios on top to garnish. Leave to cool for 20 minutes and cut in squares. Enjoy.


NOTES
* You can add 1/4 cup milk powder too instead of roasted bengal gram(pottukadala).
* I haven't added colour to the barfi, but you can add a pinch of  yellow food colour or saffron strands for colour.
* If you like biting through the thin strands of vermicelli, then omit adding the amount of milk, only add condensed milk.


RELATED POSTS (Vermicelli Recipes)


Friday, May 20, 2022

Chocolate Mousse (Eggless & Quick Recipe)

No eggs ? No tempering? 
Such a quick and silky smooth mousse that you can whip up in less than 20 minutes. You may not get an enormous volume of chocolate mousse with this recipe, as the whipping cream is the only one that adds volume to this. 

Usually, the typical chocolate mousse is prepared with egg yolks, whipping cream and dark chocolate. The egg yolks are beaten to light and fluffy. Then, tempered into the half of the heated whipping cream. Finally, the grated chocolate is added. The other half of the whipping cream is beaten to stiff peaks and then folded in the egg chocolate mixture. The mousse is then chilled and served.


But here, in an eggless mousse, there are no eggs and the grated chocolate is melted with fresh cream. This is then left at room temperature. In the meantime, the whipping cream is beaten to stiff peaks, and the melted chocolate ganache is folded to attain a light and fluffy chocolate mousse. I have not added any extra sugar, as the whipping cream had sugar in it. I have used dark chocolate in the recipe, but you can always use semi sweet or milk chocolate to make the same. Give this a try and enjoy with your loved ones!!


Preparation time ~ 10 minutes
Cooking time~ 3 minutes
Author ~ Julie
Serves ~ 4-5 serving bowls
Ingredients
dark chocolate  200 gms
whipping cream 1 cup
fresh cream 1/2 cup
vanilla extract 1/2 tsp
salt a pinch
grated chocolate 2 tbsp (garnish)


Method
  • Melt the dark chocolate using double boiler method (add water in a bowl and add the grated chocolate with fresh cream in another bowl. Place on top of the boiling water and keep stirring to avoid chocolate freeze. Melt the chocolate until smooth and use). Mix well until smooth, add the pinch of salt and vanilla extract.
  • Whip the cream in a glass bowl until light, fluffy and soft peaks. To this, add the prepared ganache at room temperature and beat until stiff peaks.
  • Refrigerate the prepared mousse for 2-3 hours, or pour in smaller servings and refrigerate.
  • Grate the dark chocolate on top and garnish with a cherry and serve chilled.


NOTES
* 1 cup whipping cream, yields 2 cups whipped cream.
* You can use whipping cream instead of fresh cream, too.
* Use chilled bowls and beater blades for whipping cream.

RELATED POSTS
* Tiramisu(eggless)


Friday, January 21, 2022

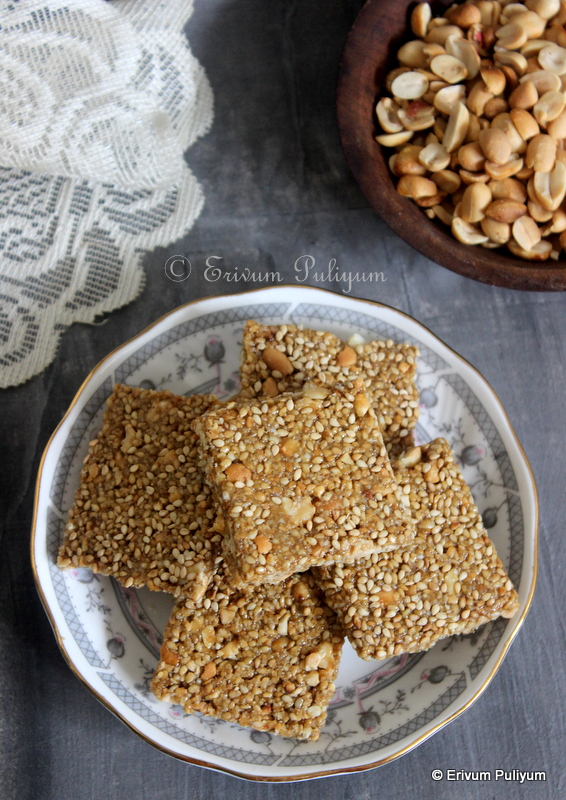
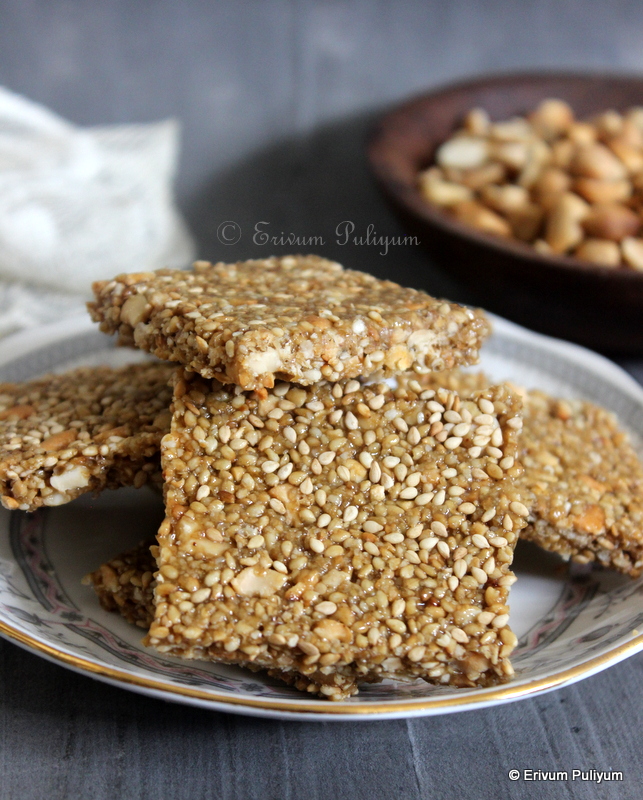
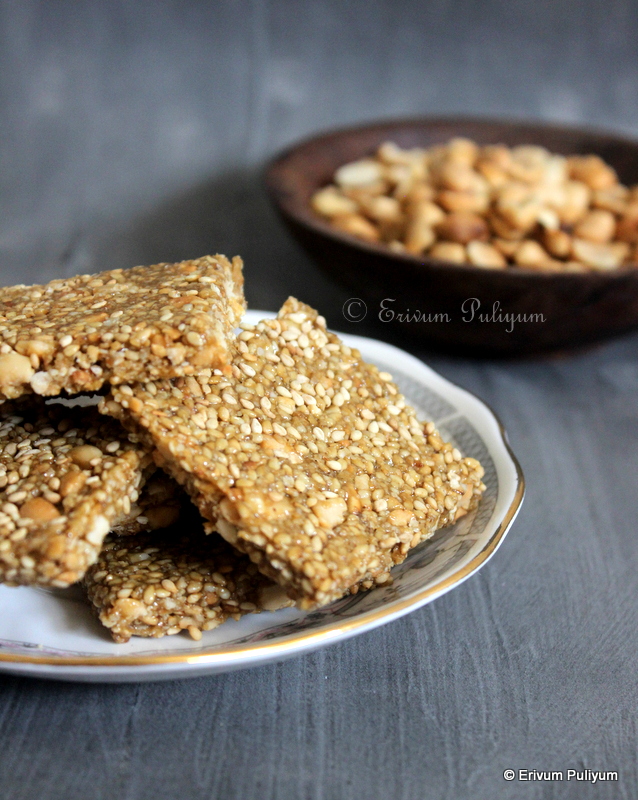
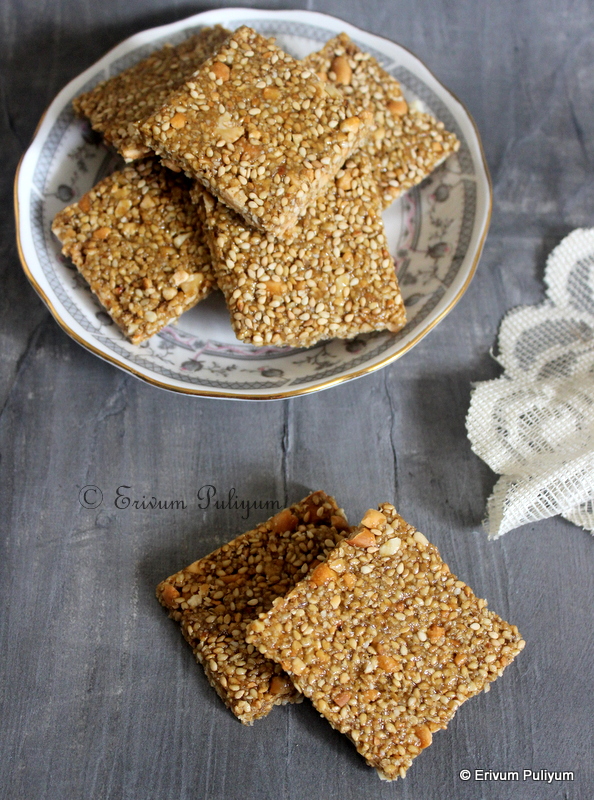
Gajak | Mungfalli- Til Gajak | Peanut- Sesame Brittle(Step by Step Pics)

Gajak is a confection originally from the North-Central India and is made with sesame seeds, jaggery/ sugar and peanuts. Winter times demand some of these warm gajaks to warm up our body. Peanuts, sesame seeds, jaggery  are the basic ones to be precise, but there are much more sophisticated versions with dry fruits and nuts. The basic ingredients of this gajak are popular Indian seasonal available ingredients that are easily available in this weather too.  There are different varieties of gajak available in markets, namely revadi gajak, dry fruits gajak, khas khas gajak, mawa gajak.


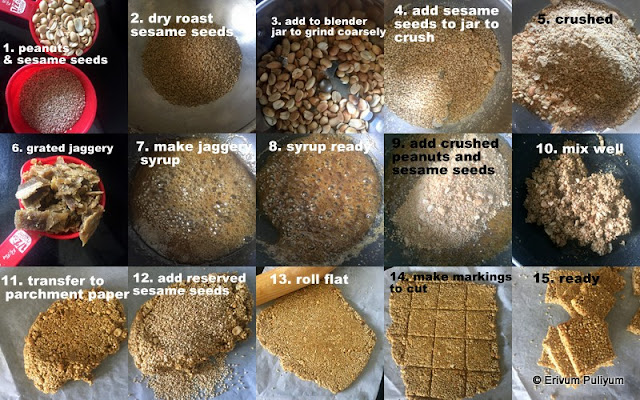
These are almost similar to the almond-sesame brittle or peanut brittle, but those are made with melted sugar. Chikki or kappalandi mittai is a close family member of this confection, but there are slight differences too. The peanut chikki is made by adding roasted split peanuts without crushing them, and the jaggery syrup is more liquid and is set in denser squares than gajak. Gajak is simple to make and hardly requirs any time. Do give this a try with the help of the step by step pics listed below and enjoy during this season.


Preparation time ~ 10 minutes
Cooking time ~ 15 minutes
Serves ~ 10-12 gajak pieces
Author ~ Julie
sesame seeds / til/ ellu 1/2 cup
jaggery / sharkara 1/2 cup
peanuts / ground nuts 1/2 cup
cardamom powder / elakka podi 1/2 tsp
ghee 2 tsp


Method
  • Heat a pan and dry roast the peanuts till lightly browned. Cool and peel the skin off. Crush the peanuts coarsely in a blender jar till use.
  • In the same pan on medium flame, add the sesame seeds and dry roast for about 2-3 minutes until it starts to splutter and is nicely roasted. Switch off flame. Reserve about 2tbsp of sesame seeds and crush the rest of the sesame seeds coarsely in a blender jar.
  • Heat a heavy bottomed pan and add the jaggery, add few tbsp of water. Melt the jaggery, strain the impurities in a strainer. Now add ghee in a pan and then add the jaggery syrup back to flame. Continue to boil the syrup to get the correct consistency.


  • Check the consistency of the jaggery syrup by adding a drop of the syrup in water. Wait 30 seconds and try rolling the drop. If the drop of jaggery is soft, then the syrup needs more cooking. Check again by adding in a bowl of water, if the syrup turns solid after 30 seconds then the syrup is ready.
  • At this point, switch off the flame and add the crushed peanuts, crushed sesame seeds, cardamom powder  and mix well. Mix it well to get a round mass. Now, apply ghee over a chapathi board and add the reserved sesame seeds half. Transfer the mixture over this and then add the remaining sesame seeds on top. Then flatten using a rolling pin to 1/2 or 1/3' thick. All this process has to be done when the mixture is warm and don't wait for the mixture to cool completely, else rolling is impossible.
  • Finally, make markings with a knife and cut squares. Leave to cool completely before you break the pieces. Store in airtight containers and enjoy !!


NOTES
* The consistency of jaggery syrup should be closely watched, If the syrup is under done then the confection will be soft. If the syrup is overdone, then the confection may be bitter.
* Store this confection in airtight containers, can be stored over a month.
* You can double the ingredients and make larger batches by keeping the ratio of peanuts, sesame seeds and jaggery in mind.
* You can make the same with sugar syrup too, but jaggery ones are healthier.
* You can add dry fruits too.

WINTER SPECIALS


Monday, December 13, 2021

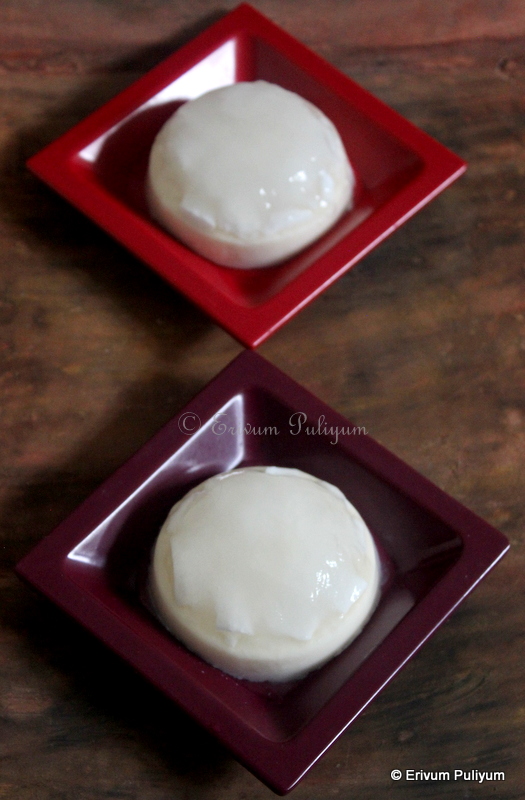
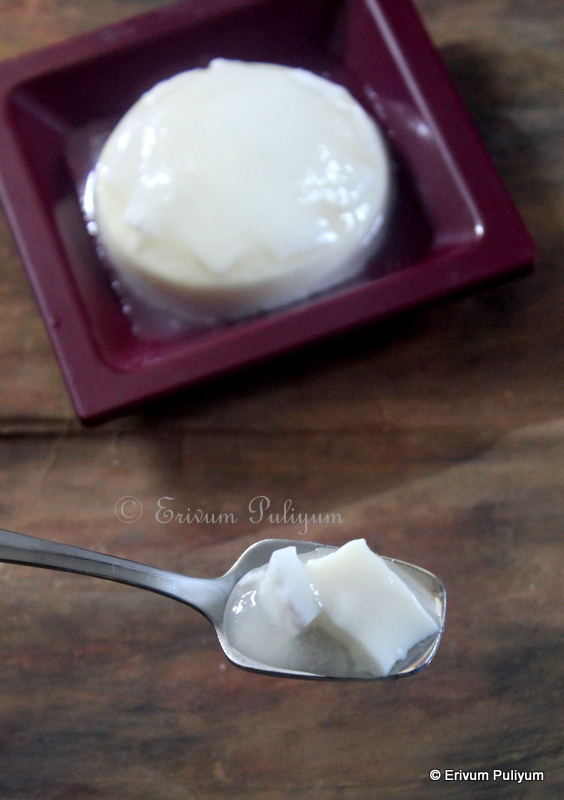
Tender Coconut Pudding | Double Layered Coconut Glass Pudding


Did you know that tender coconut water has more amino acids than cow's milk? Interesting right?
How many of you love sipping this fresh tender tropical drink than any sports drink, especially after a heavy workout ?? 

Tender coconuts are a powerful source of nutrients, rich in potassium, have anti oxidants, anti-ageing and cancer fighting properties. They are low in calories as well and prevents kidney stones as it flushes out excess toxins. Having said that, we can use tender coconut in puddings, smoothies, ice creams and so on. This has been in my try to-do list since long and was waiting to get fresh tender coconut. This time I got some fresh tender coconut from our courtyard and so decided give this a try. 


Tender coconut pudding can be made in many ways. This is a double-decker or double layered pudding where the first layer sets as a glass layer which has fresh coconut water and tender coconut flesh. The second layer has fresh coconut milk and condensed milk. I have used gelatin to set this pudding, but you can use agar-agar(china grass) too. I have adapted Lakshmi Nair's recipe, but I have made the same pudding before as a single layer too by mixing both coconut milk, coconut water and cut tender pieces. The pudding that I made earlier lacked the glass layer but taste wise both are the same.  You can just use canned coconut milk and make this pudding by adding tender coconut flesh in it. Or you can just prepare the coconut water and coconut flesh cut layer alone for the pudding without the coconut milk layer. There is hardly any cooking time; the only time needed is to melt the gelatin for both layers separately. We had surprise guests whom I served this pudding, they really liked the pudding and enjoyed. Both the layers together makes a rich and decadent pudding that you can try for Christmas. The silky smooth layer of coconut milk along with jelly like coconut water layer where you get bits of the coconut flesh in-between. Tastes delicious!! Try this out this festive season and lemme know too.


Preparation time 15 minutes
Cooking time ~ 5 minutes
Serves ~ one bowl (6-8 servings)
Author ~ Julie
Ingredients
tender coconut 2
coconut flesh 3/4-1 cup
coconut water 2 -2.5 cups
gelatin 2 tbsp + 1tbsp
ice water 3/4 cup
sugar 3-4 tbsp
condensed milk 3/4 tin (300 g)
coconut milk (first or thick) 1.5  cups


Method
  • Soak the gelatin 2 tsp in 1/2 cup ice water and 1tbsp in another bowl in 1/4 cup ice-cold water. Leave undisturbed for 20 minutes.
  • In the meantime, extract the first coconut milk(1.5 cups) from a cup of grated coconut or use thick canned coconut milk. To this, add the condensed milk and give a quick stir.
  • In another bowl, add the sugar and coconut water. Give a good stir to dissolve sugar. Scoop out the coconut flesh from tender coconut(avoid scooping the brown portion to the shell) and cut the coconut flesh in small pieces. Add the pieces to the coconut water mix (REFER TO THE VIDEO FOR STEP BY STEP PICS)


  • Now double boil the bloomed gelatin(1/4 cup water plus 1tbsp gelatin) and melt the gelatin mix. Add the melted gelatin to the coconut water mix. Give a nice stir and pour in a glass bowl.
  • Leave to set in freezer for 1-2 hours.
  • Similarly, melt the other gelatin mix using double boiling method. Add this mix to the coconut milk and condensed milk mixture. Mix well, now pour this mix over the first set layer and leave to set again in fridge for 3-4 hours. Remove and cut in pieces and enjoy !!


NOTES
* Use china grass 10 g instead of gelatin for this recipe.
* You can even mix both layers and serve as one single pudding, just in case if are running out of time. That tastes good, too.


Tuesday, November 23, 2021

Chocolate Cheese Crackers Pudding

Chocolate Cheese Crackers  pudding was an instant hit that I whipped up quickly, but the taste was awesome. I had some whipped cream and cheese crackers ready at hand after frosting a cake. So I just mashed up the duo to get a dessert for kids, but we all loved the flavour of cheese mixed crackers with whipped cream along with chocolate chips, and it's not the kids who had, but we enjoyed too. The best part of this pudding is that there is hardly any cooking involved. How sweet, right? 😉 The only time to cook is to heat the whipping cream. The first layer is more of a biscuit layer in pudding but has a cheese and chocolaty flavour. The second layer is whipping cream mixed with cheese crackers and chocolate chips. Finally, the third layer is a simple dark chocolate ganache. 

There can be many variations to this recipe, as you can make a chocolate mousse instead of a whipped cream layer. You can add grated chocolate on top of the whipped cream layer to garnish instead of dark chocolate ganache. Do give this a try if you have some whipped cream to finish or if you love the cheese chocolate combo.


Preparation time ~ 10 minutes
Cooking time ~ 2 minutes
Author ~ Julie
Serves ~ 3-4 
Ingredients
first base layer
cheese crackers 1 pkt or 10 no.s
milk compound 70 g
heavy whipping cream 1 tbsp

second layer
whipped cream 1 cup
crackers 1/4 cup crushed
dark chocolate chips 2 tbsp

third layer
dark compound 100g
heavy whipping cream 2 tbsp


Method
  • Take the crackers, reserve one(for garnish) and crush the rest of the crackers in a mixer and measure the amount of crushed crackers. Add 1/2 cup crushed for the first layer, and reserve 1/4 cup for the second layer.
  • Heat the whipping cream(3-4 tbsp) and add one tbsp to a bowl with milk compound and  remaining 2-3 tbsp to a bowl with dark compound for last layer. Leave undisturbed for a minute or two and mix well to a smooth ganache. (I have heated both whipped cream together and divided, you can dividely heat took).


  • Add 1/2 cup crushed cheese crackers in a bowl, add the milk chocolate ganache, give a mix and spread as a layer. Refrigerate for half an hour to set.
  • Then, mix the 1/4 cup crushed crackers with whipped cream, add the chocolate chips. Transfer this to a piping bag and add as a second layer. Refrigerate for half an hour.
  • Finally, take the already prepared dark ganache(if it solidifies, double boil and melt) and spread thin over the second layer, cut the reserved cracker diagonally and garnish on top. Refrigerate for 20 minutes to set and can be served.


NOTES
* I have used Gery brand cheese crackers. You can use any brand cheese crackers.
* You can add chopped nuts to the second layer too.
* I had some whipped cream reserved after making a cake and so used that. You can always whip fresh cream to make this pudding too. Use 1/3-1/2 cup cream to get 1 cup whipped cream.
* You can even use half of the cheese cracker filling for the first layer and then layer as a third layer and whipped cream as a fourth layer, alternating to finish.
* You can make a chocolate mousse instead of a whipped cream layer. 
* You can add grated chocolate on top of the whipped cream layer to garnish instead of dark chocolate ganache. 

PLEASE CHECK OUT THE BELOW IF INTERESTED-


Friday, August 20, 2021

Chakka Pradhaman(Payasam) | Chakka Varetti Payasam | Chakka Mani Payasam ~ Happy Onam !!

Onam is a festival of all Keralites irrespective of caste or religion or status, and it's the beginning of a Malayalam calendar year too. This year Onam is quite early and so kids are on vacations early as well. Though the situation in Kerala is not that favourable of celebrating Onam as a gathering but still family members are getting together to celebrate. Last year's Onam also vanished in covid lockdown and so this year people are trying to celebrate how much ever possible. We also are celebrating Onam at home and there are no elaborate celebrations, just the regular sadya preparations this time.


I have posted most of the regular payasams that we make for sadya - ada pradhaman, palada, ari payasam, parippu pradhaman, paal payasam and many other varieties which you can view below. But this time I thought to make pradhaman using chakka varetti. Chakka varetti is the easiest available ingredient now at home as I prepared and preserved chakka (jackfruit) in the season to enjoy the fruit throughout the year till next season. Though every season, I do prepare this payasam but I wasn't fully satisfied with the making as this payasam was just plain with full of jackfruit flavors.

 You can try making it without adding anything. But I needed something to chew other than the fried cashews, coconut bits and raisins, and so I tried adding small rice balls or made mani payasam with chakka varetti, sounds interesting ?? These looked super cute and lovely in the payasam to bite here and there, and everyone loved this idea. The only extra time needed in making this payasam is the making of small balls with the rice flour. I have used idiyappam flour(roasted smooth rice flour) and made very small balls (see pic) and these balls do swell up when cooked. Do give this a try and enjoy if you have chakka varetti ready at hand !!

Check out the below listed payasam / pradhaman that you can prepare this Onam-


Preparation time ~ 20 minutes
Cooking time ~ 40 minutes
Serves ~ 5-6 bowls of payasam
Author ~ Julie
Ingredients
jaggery 150-200 gms
water 1/2 cup
sliced coconut bits(thenga kothu) 1/2 cup
raisins 2 tbsp
cashews 2tbsp
cardamom powder 1 tsp
*dry ginger powder 1 tsp(optional)
ghee 4 tbsp  

to make mani(balls)
roasted rice flour / idiyappam podi 1/2 cup
water 1/4 cup
salt to taste
ghee 1 tsp


Method

  • Extract the coconut milk from grated coconuts s given in this link here. If using canned coconut milk, dilute and keep accordingly.
  • Take the rice flour in a bowl, add salt(a pinch). Mix well and add boiling water to this, make a dough like for idiyappam or kozhukatta dough and add the ghee (a tsp) to this. Then make very small smooth balls out of it, place on a plate till use.

  • Add the jaggery cubes in a bowl and add the water. Melt on heat and strain to remove impurities. In another bowl, mix the chakka varetti (thaw to room temp before use) with third coconut milk till use.
  • Heat a heavy bottomed pan and add the strained jaggery syrup and add the rice flour balls and mix well. Let the balls come to a boil and cook well(second method listed in notes). 

  • As the balls cook and the jaggery mixture thickens, add the third milk mixed with chakka varetti. Cook again to reduce considerably and then add the second coconut milk. Combine and cook till the desired thickness of the payasam is achieved (takes about 15-20 minutes). 
  • Add in the cardamom powder, dry ginger powder and mix well without lumps.

  • In another pan, add ghee and fry the coconut bits, followed by cashews and raisins. Pour over the payasam and mix well.   Finally, add the first coconut milk, when you see bubbles in the corner or sides, switch off flame. Serve warm or chilled.


NOTES
* Second method-You can cook the rice flour balls in a bowl of water. Bring to a boil and once cooked, strain and remove the balls. Add these balls to a bowl with cold water so that it doesn't stick together till use. This way the starch in the rice balls reduces, and then you can add these balls to the jaggery syrup, proceed further as listed above.
* You can even make this payasam without adding these rice balls, in that case just proceed with the chakka varetti mixed with third coconut milk to be mixed with jaggery syrup and the next steps remain the same as above with the making.
* Extract all the three milk of the coconut. I used 3.5 cups of grated coconut to extract the three. Refer this link to know how to extract the coconut milk in this post here. OR Dilute and use canned coconut milk.
* I have used about half a cup of small balls prepared which cooks to get swelled up, and they were not much crowded in the payasam. If you like more of them, take a little more rice flour and prepare the balls and use.
* It's always better to melt a little more jaggery than required just in case if the sweetness is not your desired level you can always add that extra strained jaggery syrup.
* If you are using fresh jackfruit bulbs, then use around 30–40 bulbs for this measure. Grind the bulbs to a smooth paste and make payasam or chop the bulbs and then directly sauté in ghee and use if you like small pieces to eat.
* As chakka varetti has jaggery and ghee in it, I have reduced the measure of ghee and jaggery but if you are using fresh jackfruit bulbs then, increase jaggery and ghee accordingly.
* Add the sabudana (1/2 cup) to uruli or heavy bottomed pan instead of making the mini balls, pour in the third coconut milk(2 cups). Add 1 cup more water and cook the sabudana till translucent (takes about 7–8 minutes). OR You can cook the sabudana separately in a bowl with enough water, strain once cooked and drain off the cooked water. This way reduces starch from sabudana if you don't like the payasam thick. We love the payasam thick, so cooked the sabudana with the water. (I used sabudana in the video).
* Dry ginger powder is added in the chakka varetti recipe so can omit adding in the payasam.