Print Friendly and PDF
Showing posts with label COMFORT MEAL. Show all posts

Friday, March 11, 2022

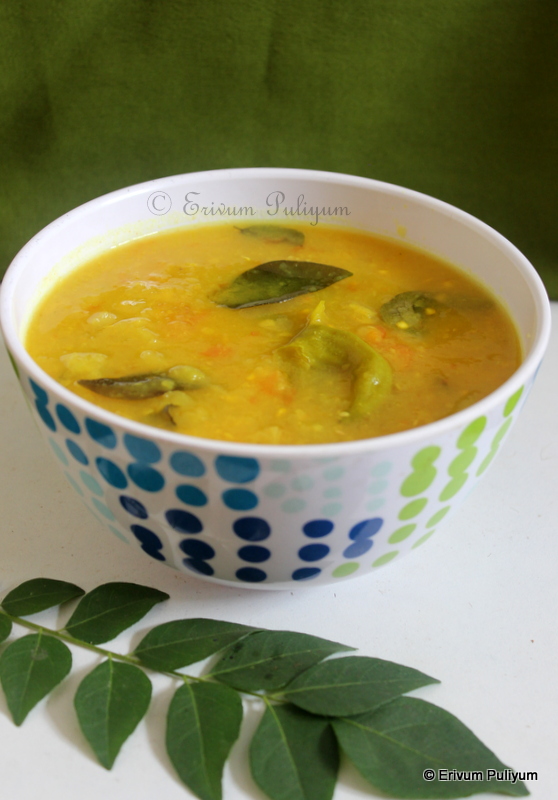
Muloshyam(Kaplanga / Omakka) | Raw Papaya Mulakushyam (VIDEO)

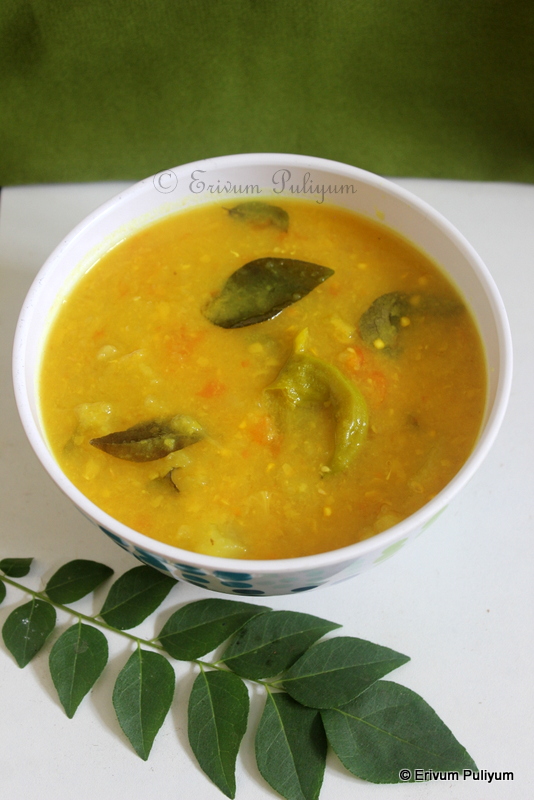
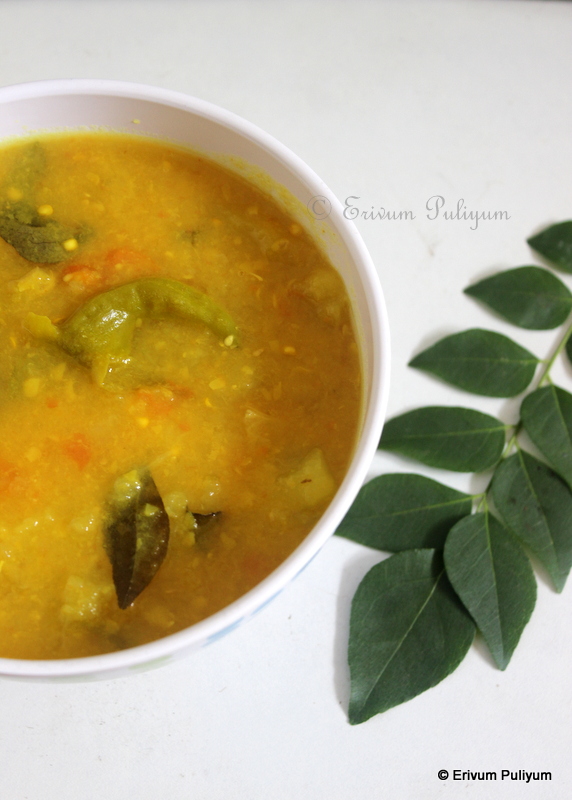
Muloshyam or Mulakushyam is a simple curry of Palakkad, you may call this as mildy spiced vegetable soup like curry. This can be added in the comfort curries as it's easily digested. This is a traditional recipe of muloshayam and there are n number of variations of this basic mulakushyam now available on internet. Ideally, pepper powder or green chilly is added. There are people who add chilly powder instead of green chillies, some don't add tomato, some do add coconut paste too. But let me tell you that these are the modified versions of muloshayam. While having a chit-chat with one of my palakkadan friend, she told the basic recipe goes as below (minus tomato). Muloshayam or mulakushyam means 'mulaku dooshyam' that chillies are bad for health.  If you are fed up with making coconut based curries for lunch, then this is a choice for your digestive system once in a while.
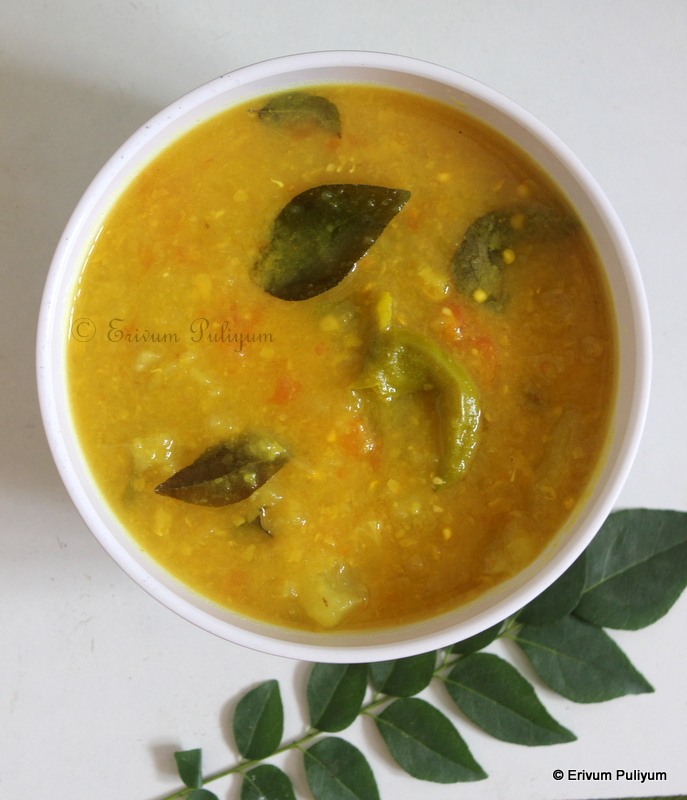
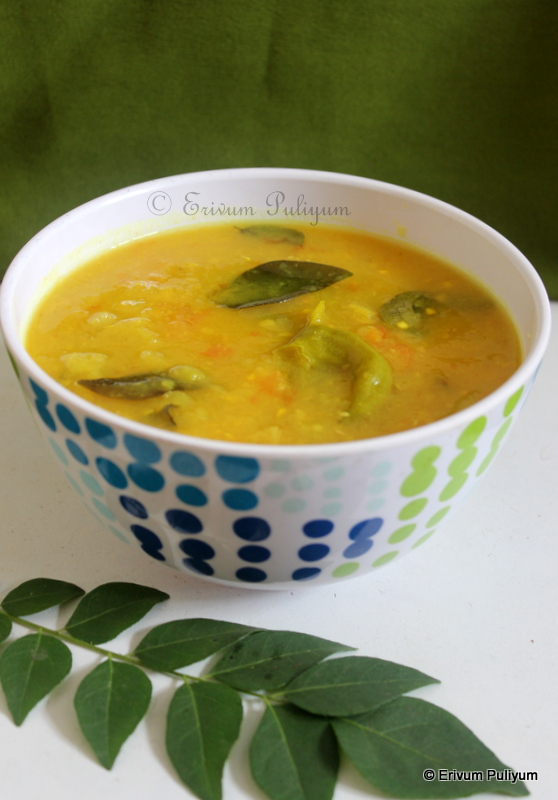
Usually ash gourd, vellarika(cucumber), pumpkin, chena(elephant yam) are used to make this curry and so vellarikka has a mild sour flavour on its own, so adding tomato is not needed. I was using raw papaya, so I added the tomato to  add a little tangy flavour to the curry, as I was apprehensive about my family's acceptance of this simple curry. But to my surprise, they all liked it, and my concept was that the curry would be watery without coconut paste. However, the curry is medium thick gravy and if you require thicker gravy, mash all the raw papaya pieces, and you will get the desired consistency. I preferred keeping little pieces to bite in the curry, but you can always choose as per tastes. If you have no veggies in your pantry and all that you get is a raw papaya from the backyard, then go ahead and give this curry a try. Split moong dal can also be used in place of sambar parippu(toor dal).  Give this curry a try !!


Preparation time ~ 10 minutes
Cooking time ~ 20 minutes
Author ~ Julie
Serves ~ 5
Ingredients
raw papaya 1 small size or 2 cups cubed
green chillies 2-3 big or 3-4 small
tomato 1 small (optional)
toor dal(sambar parippu) 1/4 cup
turmeric powder 1/2 tsp
salt to taste
curry leaves, 2 sprigs
coconut oil 1- 2 tbsp


Method
  • Wash and peel the skin of raw papaya. Cut in halves and scoop out the seeds with a spoon. Wash again to remove any sap, which may irritate some people. Cut in cubes, slit green chillies and cut tomatoes.
  • Wash the dal and add to pressure cooker. Add enough water, turmeric powder and salt. Pressure-cook for 3 whistles and wait for the pressure to release.
  • Add the cut veggies to the pressure cooker and pressure-cook again for 3 whistles.
  • After the pressure is released, mash the papaya pieces here and there using a potato masher(mashing helps to thicken the gravy consistency).
  • Put the curry back on flame and boil again, add water and salt as needed. Boil for 4-5 minutes and add curry leaves, pour coconut oil on top and switch off flame.
  • Leave covered for 10 minutes for the flavours to seep in. Enjoy with steamed rice.


NOTES
* You can use split moong dal too instead of sambar parippu.
* You can use pepper powder(1/2tsp-3/4 tsp) instead of green chillies. This curry is generally spiced, so alter as per your tastes.

RECIPES USING RAW PAPAYA-


Monday, October 11, 2021

Mixed Veg Dal Khichadi (Step by Step Pics)

When all are free sitting idle at home, especially weekends, I try making something simple yet nutritious for the family and so end up making a one pot meal. Mixed veg khichadi is one such type of comfort meal that you can prepare with any type of veggies and dal. There are multiple variations that you can try out for this recipe, and I too keep experimenting a lot of them. Mixed veg khichadi when served with a dollop of butter and hot rasam poured over it -awww !! Tastes heavenly. I love that combo so much, and all you need is a pappad(pappadam) by the side at the most. Do give this healthy one pot meal and try serving it hot for best tastes.


Preparation time ~ 20 minutes
Cooking time ~ 30 minutes
Serves ~ 6
Author ~ Julie
Ingredients 
sona masoori 2 cups
tuvar dal or toor dal or sambar parippu 3/4 cup
water 5 1/2 cups
green peas 1/4cup
capsicum 1 small or 1/4 cup diced 
carrots 2 or 1/4 cup cubed
beans 1/4 cup
onion 1 medium-sized
ginger-garlic paste 1 tbsp
tomato 1chopped
coriander leaves 2 tbsp
curry leaves a sprig
chilly powder 1 tsp
kayam or asafoetida or hing 1/2 tsp
turmeric powder 1/2 tsp
whole spices (cumin seeds 1 tsp, cinnamon 2 pieces, cloves 3-4, peppercorns 4, cardamom 3)
salt to taste 
ghee or butter 1 tbsp 
oil 2 tbsp


Method
  • Wash and cut all veggies, keep aside. Wash the rice and dal separately, keep soaked till use.


  • Heat oil and ghee/ butter in a pan, add the whole spices, hing and sauté. To this add onion, sauté till translucent and then add ginger-garlic paste, sauté till raw smell disappears. Add the spice powders on low flame and then add chopped tomato. Cook till mashed.


  • Then add cut veggies and washed dal along with rice. Add salt and mix well. 
  • Finally, add the coriander leaves and water(5 1/2 cups). Cook for 3-4 whistles. Wait till pressure is released and then fluff with a fork to check if done. Serve on a plate with pappad and raitha as side.
NOTES
* If you want the khichadi watery, then add a cup more of water when cooking.
* You can use tuvar dal too instead of moong dal.
* Add whichever vegetables are available in your kitchen.

MORE COMFORT MEAL IDEAS-


Tuesday, June 22, 2021

Chakka Upperi (Thoran) | Raw Jackfruit Stir Fry

Almost all parts of the humble jackfruit is used in  Kerala and the last lock down period and this lock down people have made good use of this fruit. Right from the tender jackfruit, the fruit is plucked and cooked raw to make idichakka thoran. Then the mature ones are cooked like the recipe below or many other variations. The raw ones are also fried during this season. The ripe ones are eaten fresh or made in different edibles listed below or are preserved as chakka varetti(jackfruit preserve). At last is the seeds which can be made as a delicious chakkakuru milk shake(Jackfruit seeds Milk shake) or chakkkuru mezhukuparetti and added to many other stir fries listed below.

The word 'upperi' may sound strange to people down the south of Kerala  because they refer to upperi as chips. Towards Thrissur, upperi refers to any stir fry vegetable cooked, tempered with spices and without much coconut is referred as upperi, almost like 'thoran' towards south. In Thrissur chips is referred to as chakka varuthathu and not chips commonly. I make my own variations and cook so I generally add grated coconut to this simple upperi. Originally in Thrissur, the grated coconut is not added to the tempering. This is a simple way to have raw jackfruit and there by reduce the intake of carbs in the form of cooked rice, especially perfect for diabetics. Do give this a try if you love this preparation before the jackfruit season ends and enjoy !!


Soaking time(if using dry) ~ 3-4 hours
Cleaning the jackfruit ~ 30 minutes
Preparation time~ 10 minutes
Cooking time ~ 20 minutes
Author~ Julie
Serves ~ 2-3
Ingredients
raw jackfruit bulbs 20-25 or dry jackfruit pieces 1 cup
turmeric powder 1/2 tsp
hot chilli powder 3/4 tsp
shallots sliced 5-6
garlic cloves 6-8
coconut grated 1/3 cup(optional)
curry leaves 2 sprigs
coconut oil 1 tbsp
salt to taste 


Method
  • If you are using fresh raw jackfruit, cut the jackfruit and remove the bulbs. De seed them and chop in small pieces as in pic. 

OR
If you are using dry jackfruit pieces like I did here. The recipe to dry jackfruit pieces is here. In that case soak the dry jackfruit pieces for 3-4 hours with enough water. Drain the water and is ready to use.


  • Either the soaked dry jackfruit pieces or using the fresh raw chopped jackfruit, add half a cup of water, add  the turmeric powder and salt.
  • Then cook the jackfruit covered for about 5-7 mins, we can check the pieces in between to check if cooked. The pieces gets softer and wilted. Switch off flame at this stage.
  • Heat oil in a pan and add the sliced shallots, sliced garlic and curry leaves. Saute until the shallots turn translucent. To this add red chilli powder on low flame.(Read an alternative method to give kids in the 'notes' section).
  • Transfer the cooked jackfruit an mix well. Add grated coconut at this stage if using and combine. Wait for another minute to get the masala combined. Switch off flame and serve warm.


NOTES
 *Adding coconut is strictly optional, adds a sweet nutty flavor. Coconut is not added to this recipe in Thrissur when my MIL cooks.
* A better alternative- I loved this as a kid and my kids love it too. Add freshly grated coconut to the cooked jackfruit pieces with little salt, drizzle a little(about 1 tbsp) fresh coconut oil and give a quick toss. Serve warm and tastes yumm. In this the tempering with shallots, garlic and spices is not done.


Monday, February 01, 2021

Pothichoru (Nostalgic Food Parcels wrapped in Banana Leaf) with Kerala Style Omelette

The other day I was yearning for pothichoru and when I told H, he also was like its long time since we had pothichoru. I don't have much fond memories of pothichoru except for the pothichoru that we carried on our train journey when returning from Kerala after vacations. This happened only once in a year but believe me the taste of the hot piping Kerala cooked matta rice and the yummy sides, the aroma of the wilted leaves stayed fresh in our minds for another one year till we visited Kerala again. However H used to carry pothichoru during school times and even during college times which was a regular affair with all school going kids of that generation in Kerala I believe. After marriage, pothichoru was a rare entity except for a short train travel sometimes. Now its a long time since we had pothichoru and no wonder I wished to have one. Sooner did we get some fresh banana leaves and I just decided pothichoru for all at home for a change for lunch. Sounds funny?? But I did prepare it and we were so excited to have pothichoru which can't be expressed in words, you should definitely make and enjoy. 


The traditional pothichoru includes cooked matta rice, coconut based chammanthi(chutney), thoran, mezhukuparetti, a fish fry or omelette and a pickle. The fresh banana leaves is washed and then wilted over a burning flame so that it becomes easy to fold and pliable. The food is then served on this leaf and folded, wrapped and packed. When opened, the wrapped up food looks squeezed up with all sides and you get a warm aroma of the wilted leaf. The below listed list includes all the variations that you can prepare with each of the sides. I have already shared most of the items as individual post so just sharing the Kerala style omelette recipe in this post that I haven't shared yet. If you are a avid fan of pothichoru,am sure you will give this a try soon !!

POTHICHORU ITEMS-

  1. Cooked Matta Rice 
  2. Chammanthi or chutney- Thenga Chammanthi /Pacha Manga Chammathi / Nellika Chammanthi
  3. Stir fry (Mezhukuparetti) -Kovakka Mezhukuparetti/ Kaya Mezhukuparetti/ Payaru Mezhukuparetti / Pavakka Mezhukuparetti 
  4. Thoran (stir fry)- Cheera Thoran/ Beans Thoran / Kothamara- carrot thoran
  5. Pickle / achar- Naranga Achar/ Kadumanga Achar / Nellika Achar / Pavakka Achar
  6. Omelette(recipe below) / Fish fry or both


Preparation time ~ 10 minutes
Cooking time ~ 10 minutes
Serves ~ one omelette
Ingredients 
for making kerala style omelette
eggs 2
shallots 10 sliced
ginger 1/2 ' piece chopped
green chillies 1 chopped
curry leaves a sprig torn
oil 1 tbsp + 1 tbsp
salt to taste
grated coconut 2 tbsp
or milk 2 tsp


Method 
Making Omelette
  • Beat the eggs with a little salt. If you are using grated coconut then omit adding milk. Else add milk and beat the egg mixture well.


  • Heat  1tbsp oil in a non stick pan and add the shallots, chopped ginger, green chillies and curry leaves. Saute a minute and switch off flame when shallots turn translucent.(This is another optional step that is followed at my H's place. My MIL says this way sauteeing prevents the raw taste of ginger and green chillies.) Then add this to the egg mixture when slightly cooled.


  • Heat the remaining 1tbsp oil in the same pan and add the egg mixture. Cook on low medium flame and wait till the sides look browned. Flip the other side and cook for another minute. Transfer to a plate and enjoy.


ASSEMBLING POTHICHORU

  • Cut a fresh  banana leaf or buy banana leaves. Clean off any dirt or dust by washing under running tap water. Wipe dry. From the back of the leaf cut a small portion of the thick midrib of the leaf length wise which can be then used for tying the leaf (optional) and also cutting the midrib slightly thin makes the leaf more pliable to fold.


  • Switch on the stove and hold the leaf on top of the stove to wilt lightly so that it becomes more pliable.


  • Now place cooked matta rice in the center. 
  • Place the stir fry(thoran), mezhukuparetti, chammanthi, achar on the sides of cooked rice and  fish fry or omelette or both on top.I have used cheera thoran, pavakka mezhukuparetti, thenga chammanthi, nellikka achar and omelette. I have shared all of these recipes before and so not posting again except the omelette which I listed above.


  • Now gently fold the leaf lengthwise and then close breadth wise. Tie using the torn midrib string or place on a news paper and roll to fold. place a rubber band.
  • Keep covered for half an hour and open to devour or if you are taking as pack for travel then devour during travel. 


NOTES
*You can directly add the shallots, ginger, green chillies and curry leaves to the egg mixture and beat along with egg. Sauteeing is an optional step.
*Also add grated coconut if using to the egg mixture and beat along with other veggies. Adding grated coconut adds taste and volume to the omelette. My home they do add grated coconut but H's place don't. So I haven't added here.
*Adding milk makes the omelette fluffy.


Monday, October 30, 2017

Kizhangu(Cheru Kizhangu ) Puzhukku | Nana Kizhangu(Lesser Yam) Puzhukku

Lesser Yam is called kizhangu/ cheru kizhangu or nana kizhangu. Kizhangu is the commonly known name in our place. It closely resembles poatoes or sweet potatoes but have hairs all around unlike potatoes. The botanical name of the plant is dioscorea esculenta, you may read more in wiki. They taste similar to any puzhukku and have a mild sweet flavor. We had this at home and kids love it a lot. A spicy dip to go along with puzhukku and a cup of black tea or coffee serves so satisfying and comfort. This method of boiling the tubers in water and salt is called puzhukku. Generally all tubers like kappa(tapioca), chena(yam), kachil(purple yam), chembu(taro root) are mixed up and boiled over to make a filling breakfast in old times in Kerala. The word "puzhukku" refers to boiled and many places like Thrissur 'puzhukku' is used for mashed tubers like kappa vevichathu is called kappa puzhukku. Anyways this is how it is known as in our place. If you get hold of any other tubers can try this !!


Preparation time~ 10 minutes
Cooking time ~ 15-20 minutes
Serves ~2-3
Ingredients
kizhangu (cheru kizhangu or lesser yam) 10 medium sized
water to boil
salt to taste


Method

  • Scrape the skin of the taro root, the skin removes easily. Add it to a bowl of water as it tends to get browned faster. If big and required,cut in two halves. Don't cut too small or else the smaller pieces gets cooked faster  and mashes.
  • Drain the water and rinse two three times till water is clear. Heat the pan or cooker with enough water and transfer to the pan. Boil it over 20 minutes till its cooked through. In the last 5 minutes,add enough salt like 2tsp or so in water so that the kizhangu soaks up water.

  • Drain the water completely after the kizhangu is cooked well. Serve warm with spicy chilly dip.
NOTES
* Don't add salt before hand else the kizhangu hardens and doesn't cook properly.
* Once the skin is scraped it is slippery to touch and so be careful if you are planning to cut in halves, the kizhangu may slip from hands.


You may also be interested in -
* Kappa Puzhukku
* Kappa Vevichathu
* Spicy Chilly Dip
* Spicy Fish Curry
* Mulakku Chammanthi(Red Chillies Chutney)


Monday, June 04, 2012

Kanji | Rice Gruel | Kerala Kanji

Kanji is a sort of rice porridge or gruel rice popular among many Asian countries. In Kerala, Kanji(gruel rice) is served usually with thenga chammanthi(coconut chutney),cherupayaru thoran(green gram stir fry) or chembu astram (colocasia curry) or kadumanga or vella naranga achar(white lemon pickle) or even coconut milk too. This is one of the comfort meal that many Kerala homes still practice. Also, when you are sick with fever or any digestive issues then definitely warm kanji serves as the right meal to make you feel better. The rice cooked with its water and a little salt makes a filling meal. We do make it as a quick dinner after a heavy meal for lunch or after a tiring day or when someone is sick at home. Kanji is considered as a comfort meal and is served at hospitals for easy digestion.

Watch the YouTube # shorts on kanji recipe.


Preparation time~ 5 mins
Cooking time~ 20 mins
Serves ~2-3
Ingredients
boiled rice /matta rice 1 cup
water 3 -4 cups
salt to taste


Method

  • Wash the rice and put it in the rice cooker or pot with the required water and cook till done (I used the pressure cooker and so cooked till 2 whistles). Add the salt after pressure is released and serve hot .
NOTES
* The cooking time of each variety of rice may vary.So always remember to add one cup of water extra to the normal cooking measure of water.
* If you want it more watery then,add more drinking water.
* If you like to serve with coconut milk, add 1/2 cup thick coconut milk to the cooked rice gruel(kanji). Mix well and serve. Coconut milk adds a mild sweetness to kanji.